Desks 2.0
At Collective Idea, we've been hard at work moving into a bigger, new and improved office space. We have big plans for the space, including refinished hardwood floors, Flor carpet, Nest thermostats and more. But before all the bells and whistles, we need to be able to… work.
We don't need much: a solid internet connection, a handful of cinema displays and some good stand-up desks. That's where I come in.
When I was 12 years old, I built a wood shop in the back of my parents' garage. I made and sold Adirondack chairs throughout high school, taking orders from all around the U.S. and even Norway. In fact, building the website for my carpentry business was my first foray into web development.
So when Daniel realized the lack of stand-up desk options out there and started talking about the possibility of building our own desks for the new office, I jumped at the chance.
The Goal
The stand-up desks that are available for purchase are generally pretty expensive. Plus, the options are limited so there's always that nagging feeling of having the same thing as all the other standers out there.
So the goal was simple: build an inexpensive, one-of-a-kind desk that fits our space and style.
The Top
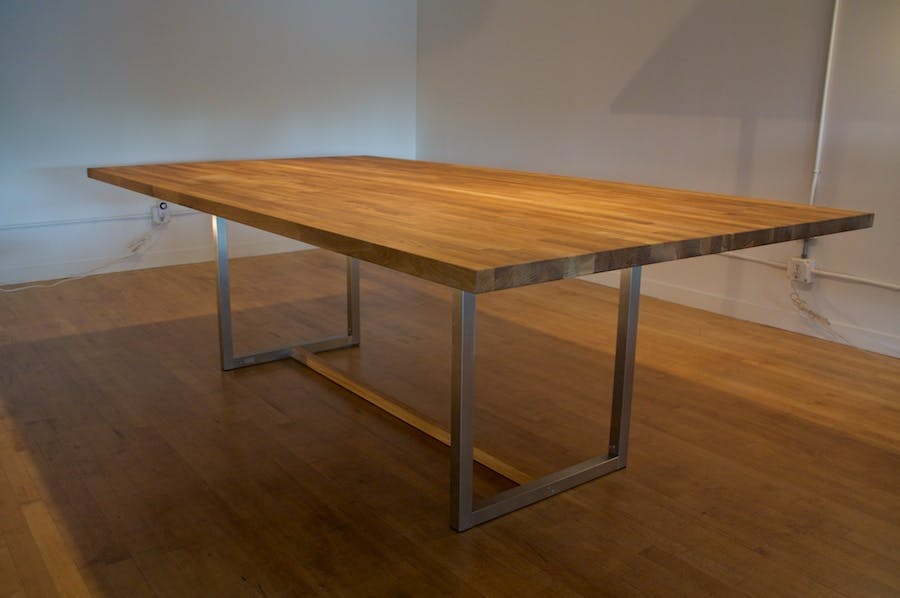
The first picture that came to mind is of the monolithic wooden tables in Apple retail stores.

So I started looking at butcher block tabletops. The problem was that the 4×6' size we wanted was either unavailable or terribly expensive. That's when Brian saved the day with this suggestion to use two inexpensive IKEA countertops:
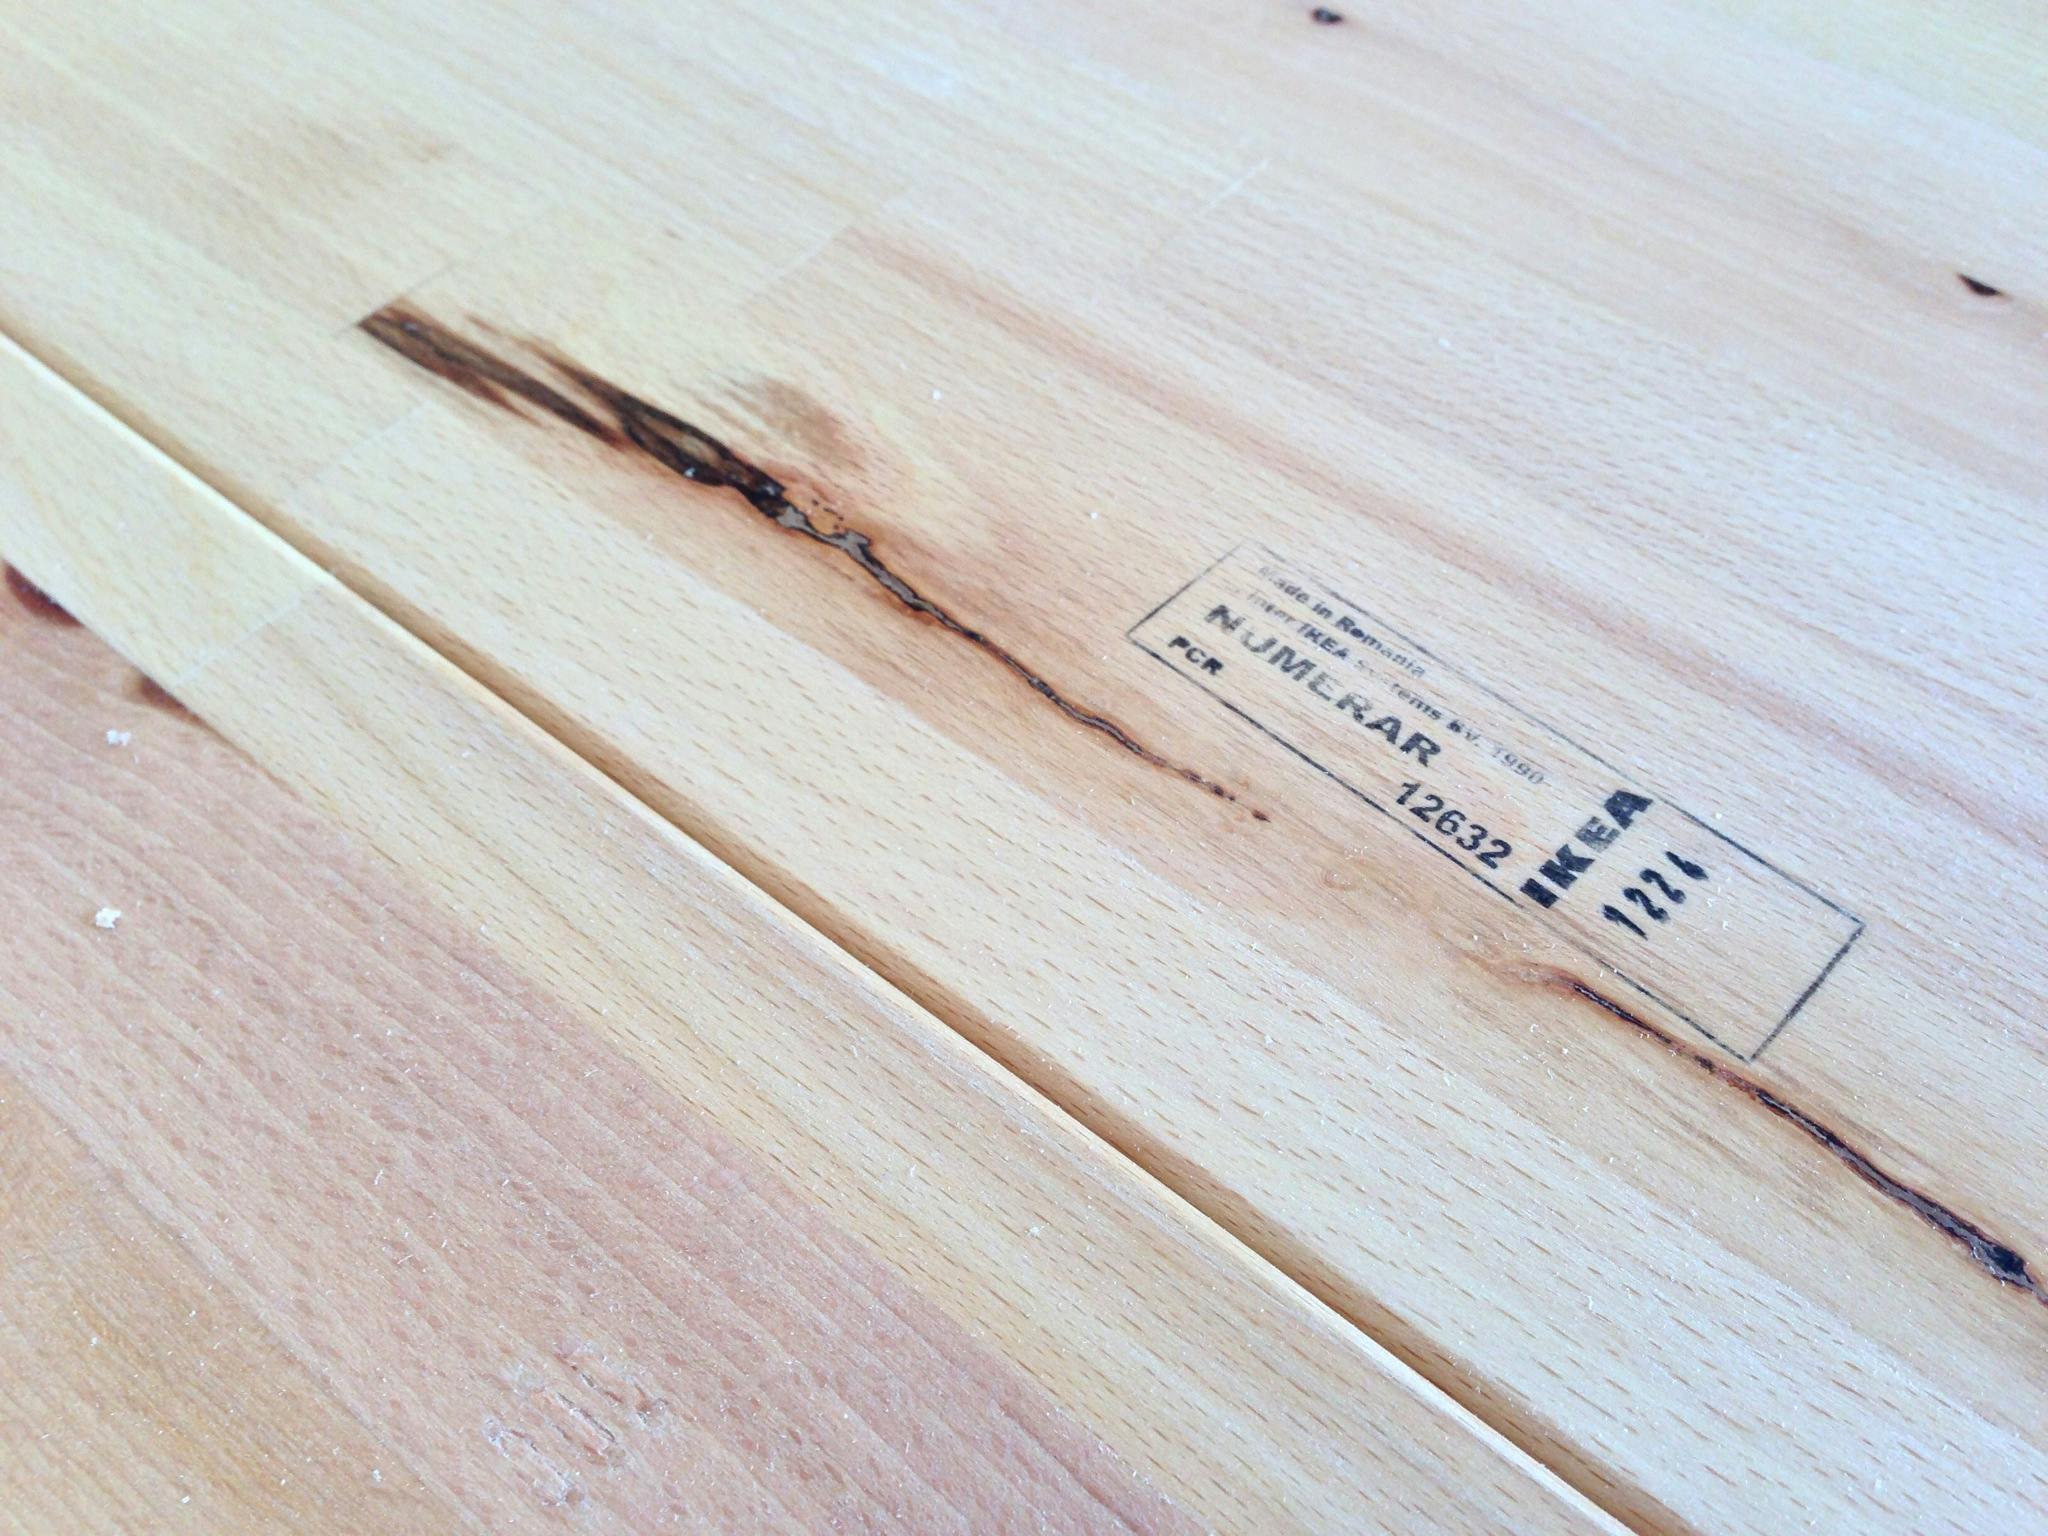
We all loved the idea and decided on the NUMERÄR countertops in beech because they would pretty closely match our maple hardwood floors.
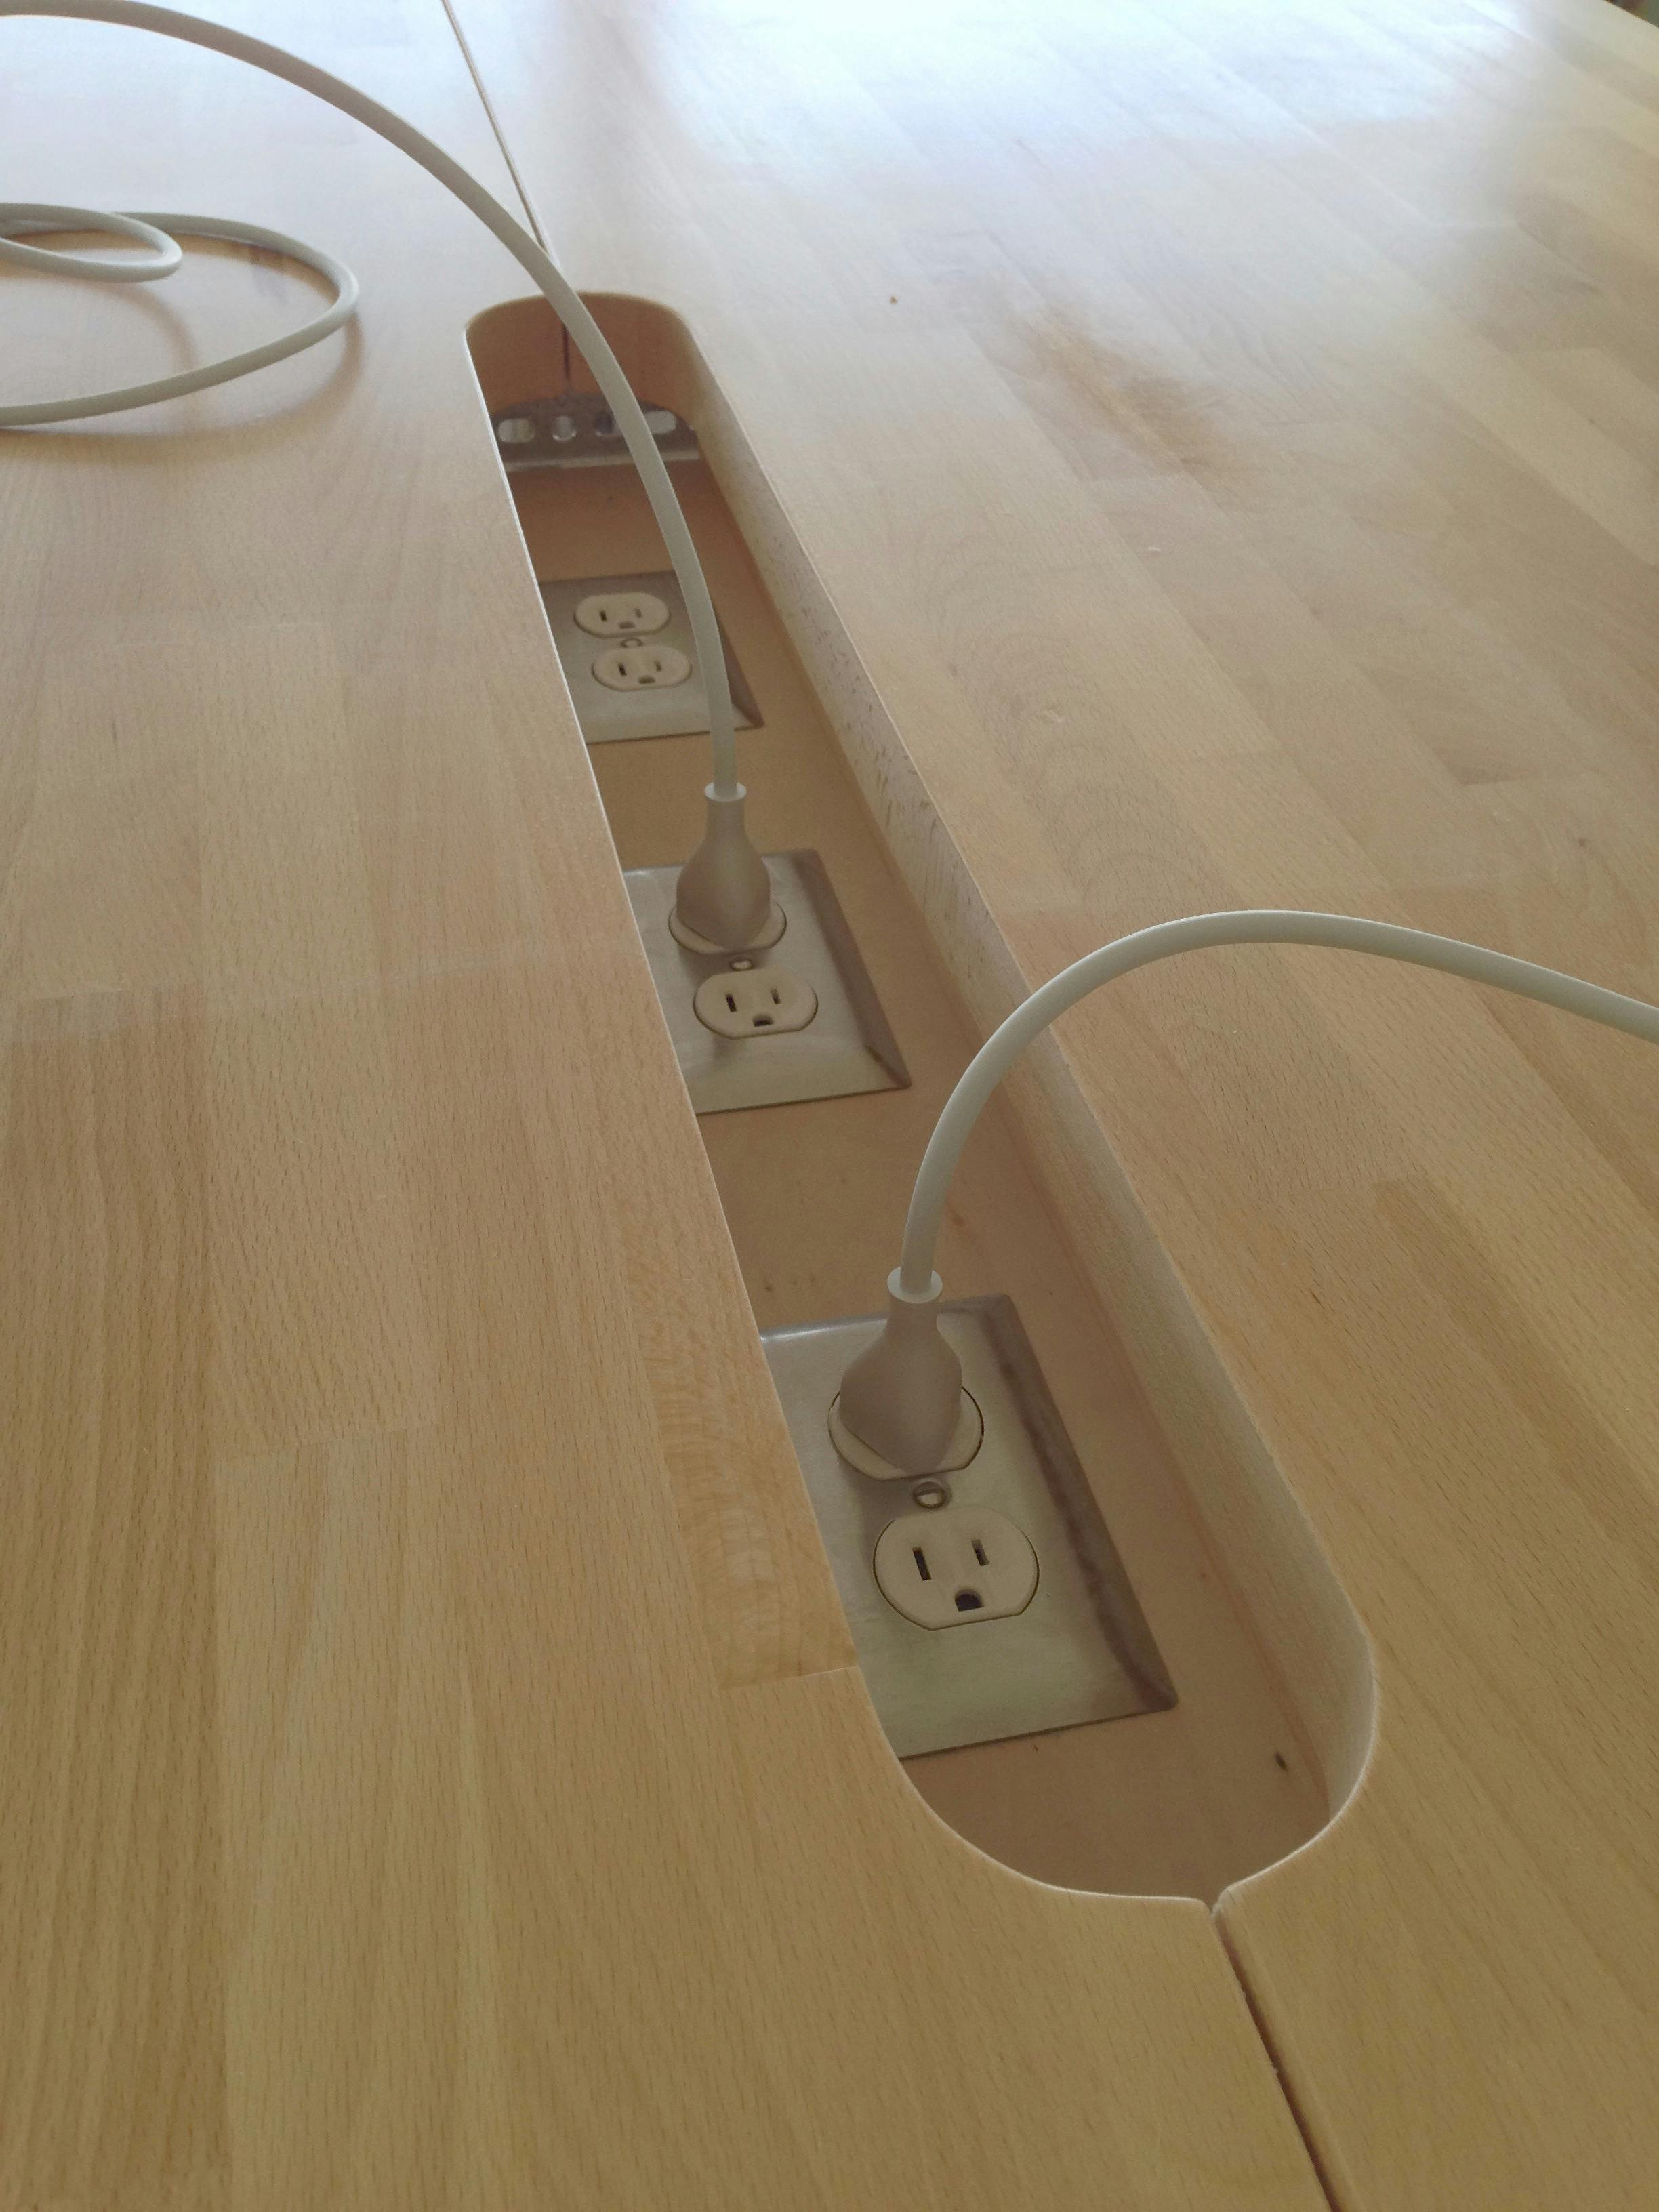
The Power
The difference between the desks we wanted to build and the conference table above is that we need power; to our cinema displays as well as whatever gadgets we'll be charging during the day.
The easiest option was to do nothing at all. We could simply drape the power cords off the back of the desk. But we quickly ruled that out because, well… it's ugly. Plus there's no "back" of the desk since we intend on setting up stations all around the desk's perimeter.
The next idea was a trough. By separating the two countertops a few inches, we could create a channel in which to mount outlets and stow power bricks. The downside is that we lose a little of the monolithic look we were going for by dividing our tabletop in two. Plus, it wouldn't allow us to easily set up stations on either end of the desk.
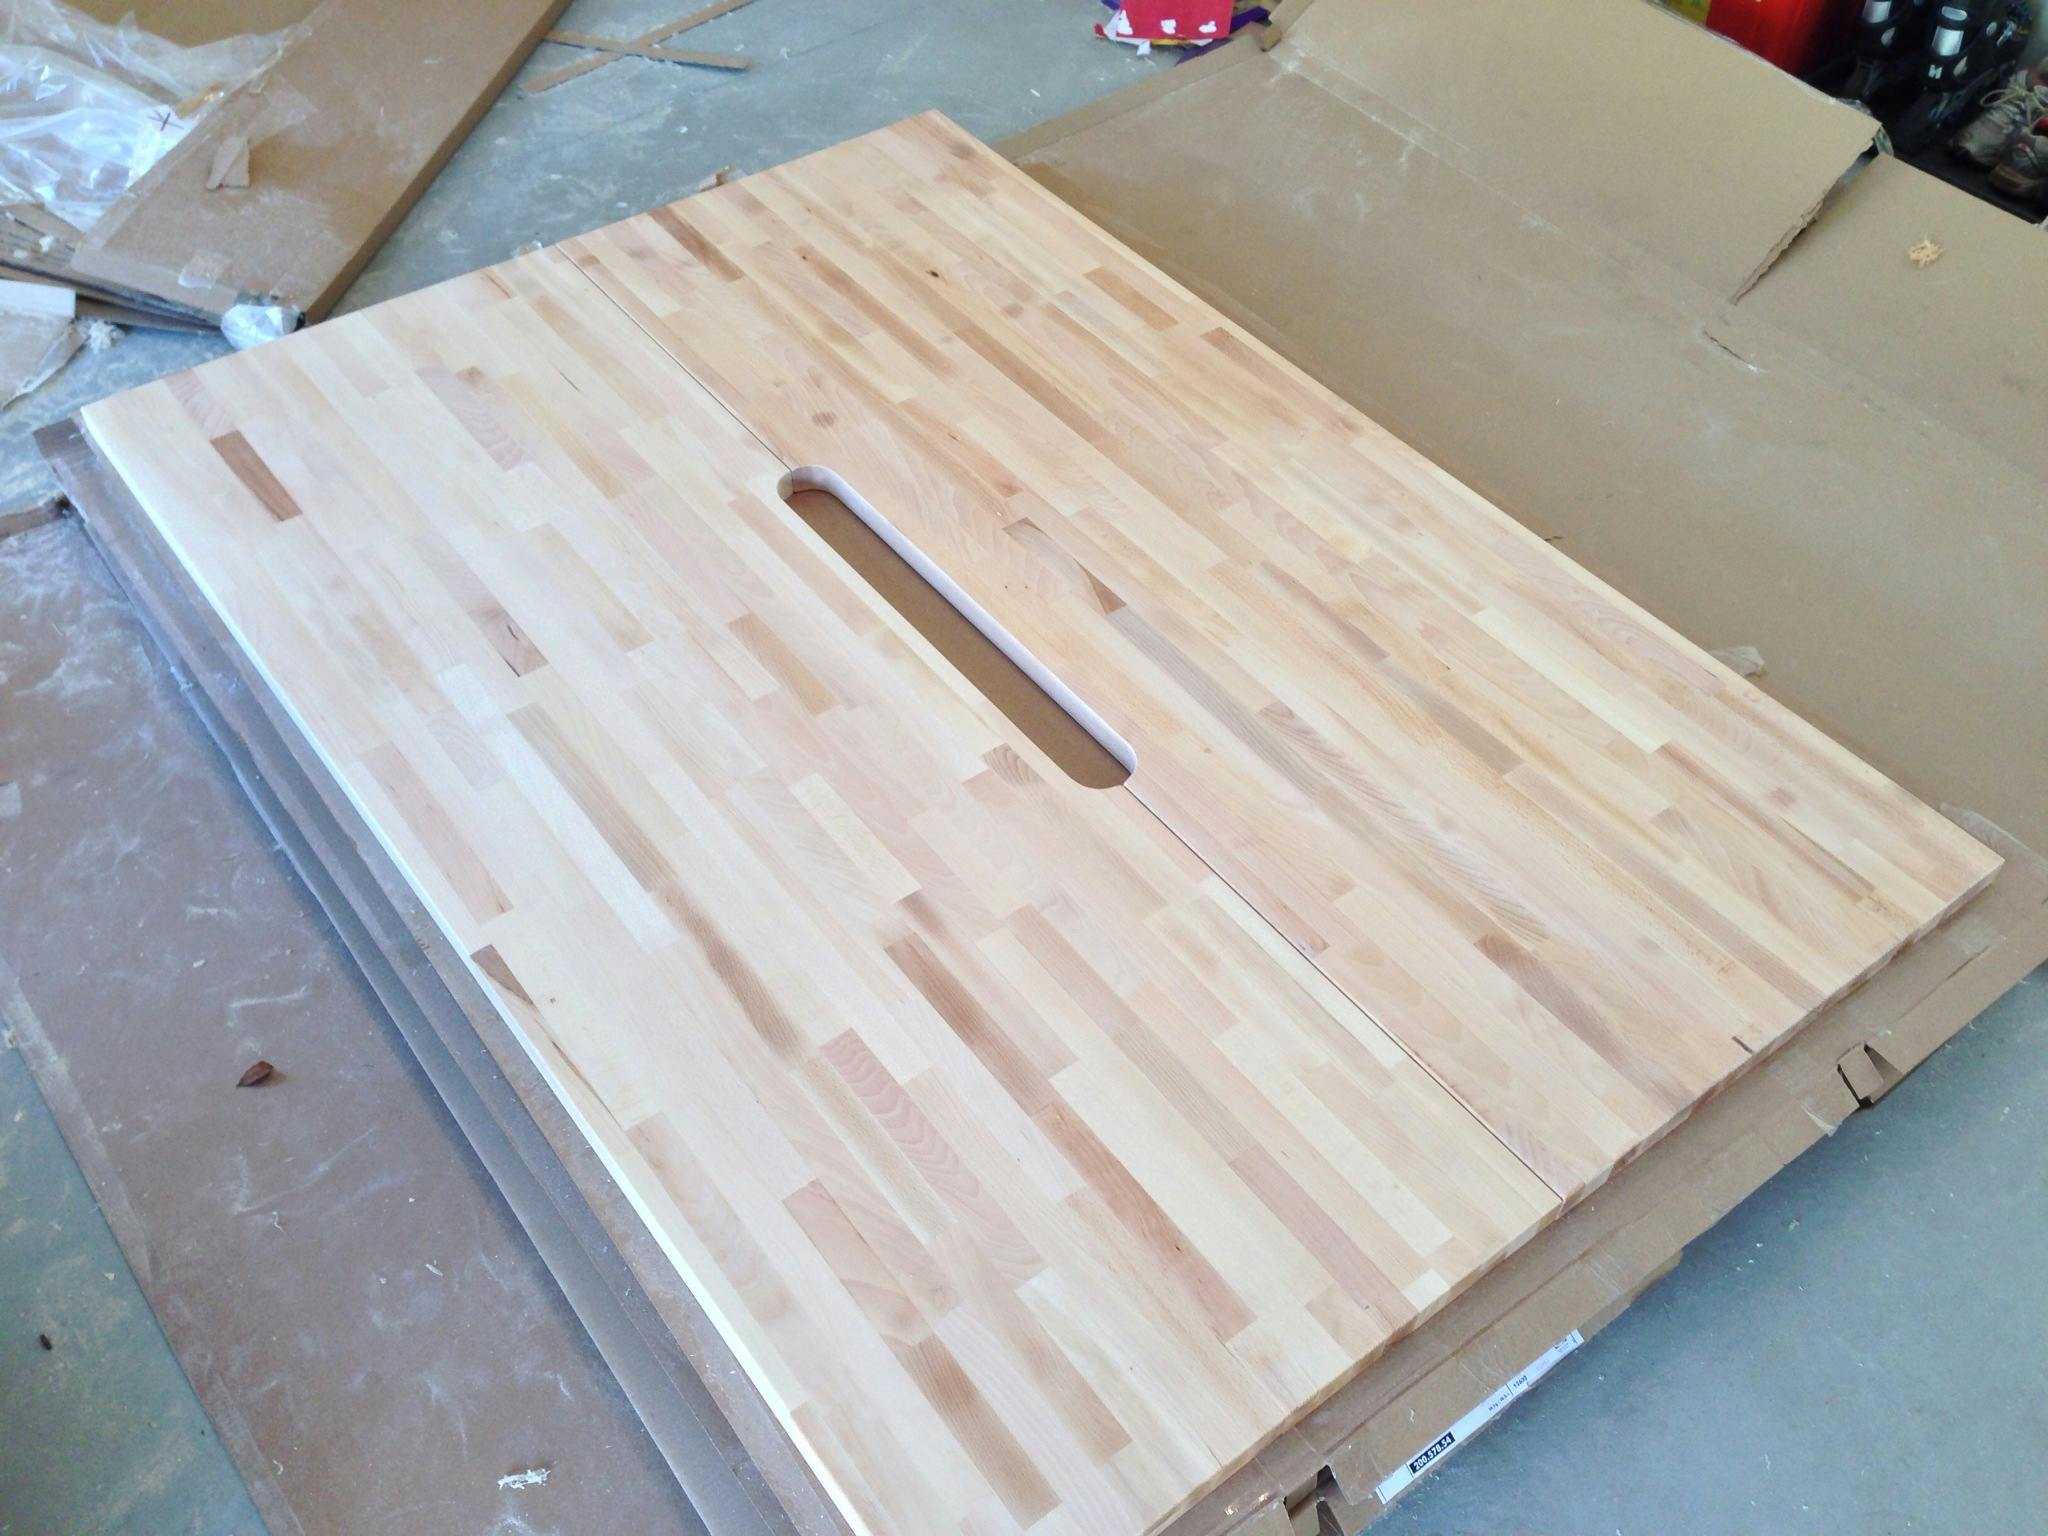
The solution we landed on was a mix of the two; to cut out a slot in the middle of the tabletop. Eventually, we'll install a "floor" to the power management slot where we can install outlets, throw our power bricks, etc. but for the first iteration we'll simply drop our power cords through it.
The Base
We tried to contact the builder of the IKEA conference table above to ask how he built the base of the table, but we got no response. So we had to go it alone.
We briefly considered wooden legs to match the tabletop but it would have required a lot of supporting structure and/or fancy joints that we didn't really have the time (or patience) for.
Our next stop was stainless steel hairpin legs. We found some that looked great and could be made custom, hopefully to accommodate our stand-up height. They also have levelers for uneven floors (which we have).
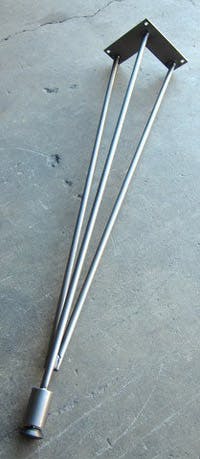
Unfortunately, we couldn't find anyone who would make us legs that were quite as tall as we were looking for, at about 41". Most topped out at around 36".
Next strategy: frantic Googling. And we came up with simple 3" tubular legs.
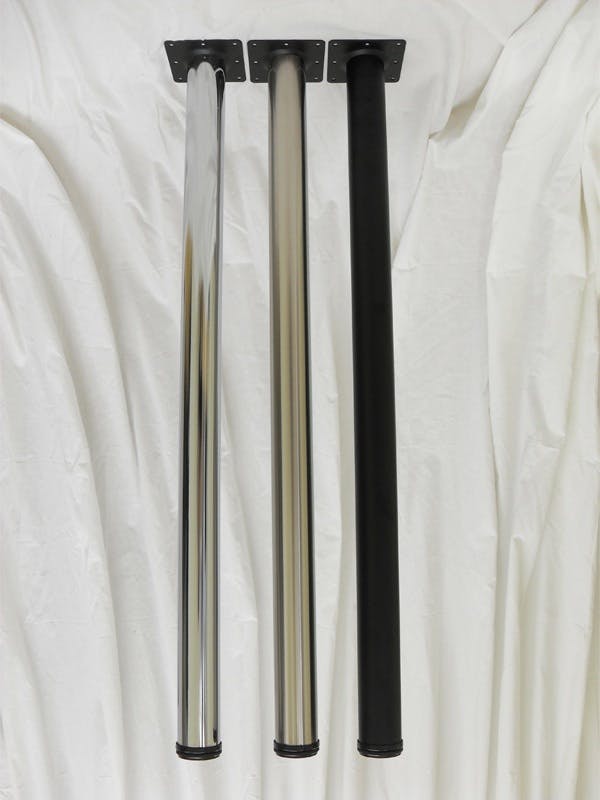
These legs can be custom cut but already come in a 40¾" height, standard. Each leg can support a 300 lb. load which is plenty, even for our heavy 200 lb. tabletop.
If we use a half-inch spacer between the leg and the tabletop, the surface of our desk will be 42¾" high, which is the height we've all become comfortable with.
So now that the legs are chosen, it's time to start building!
The Build
I recently moved into a new house and I don't have a wood shop set up yet so the plan was to build one of the six desks from start to finish and use it as a workbench for the remaining five. It would also give me some practice so that hopefully, the rest would come together more smoothly.
Routing the Tabletop
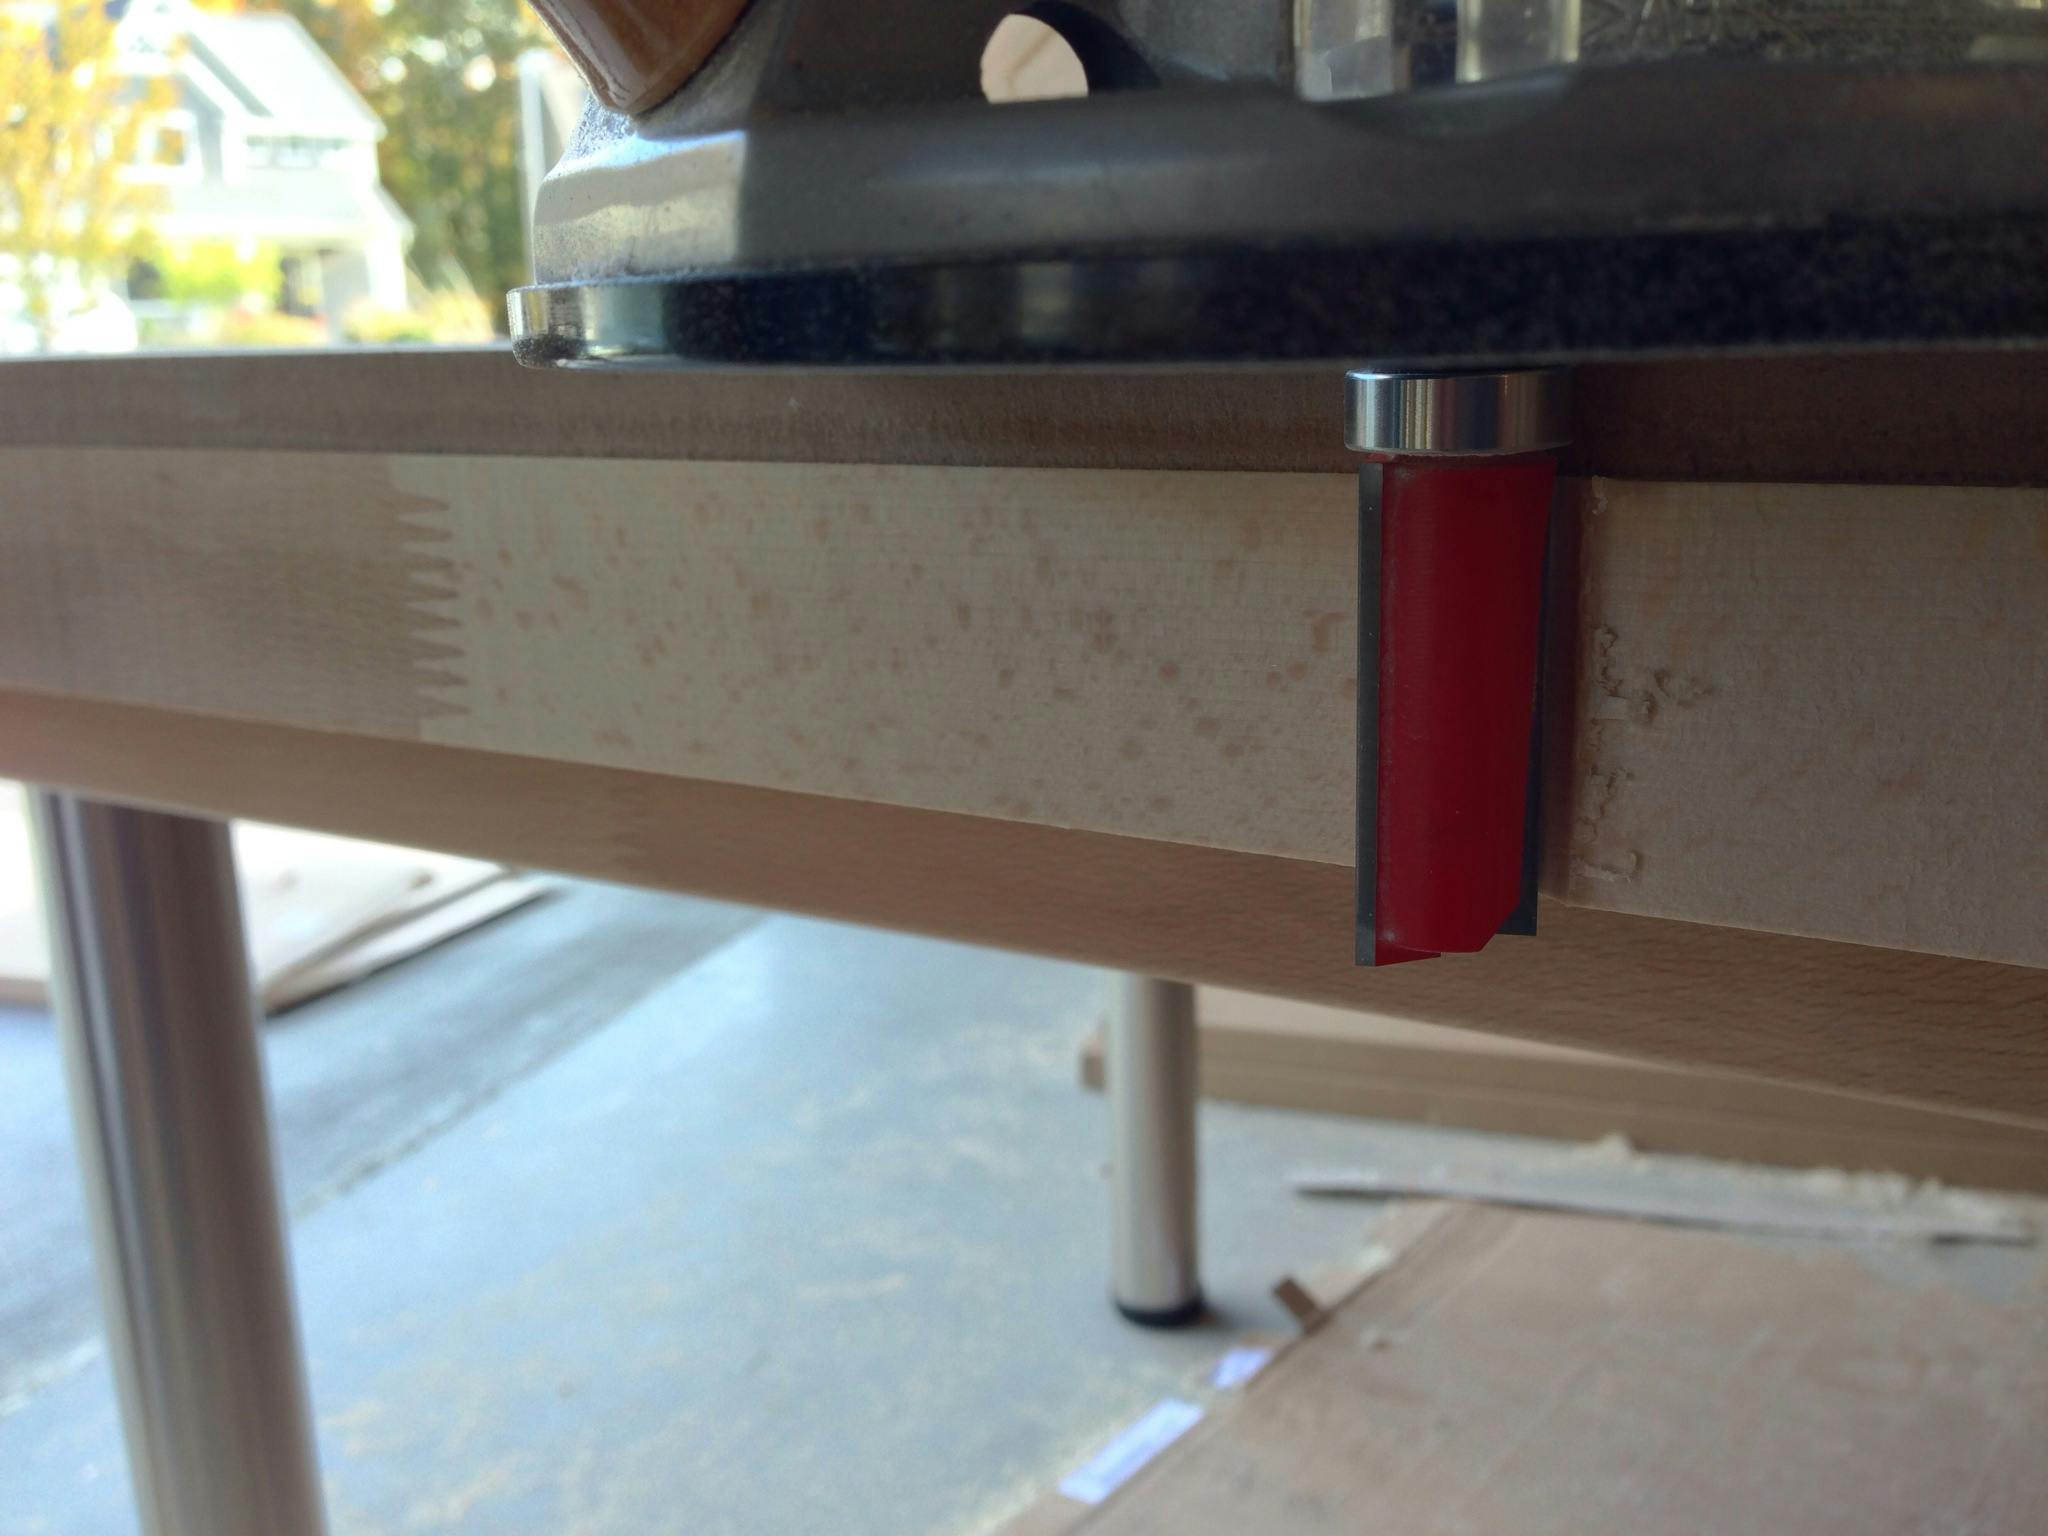
In order to make the slot for power management, we need to cut a groove in the long side of each countertop that would make up our tabletop. A good router is the perfect tool for the job, along with a pattern bit.
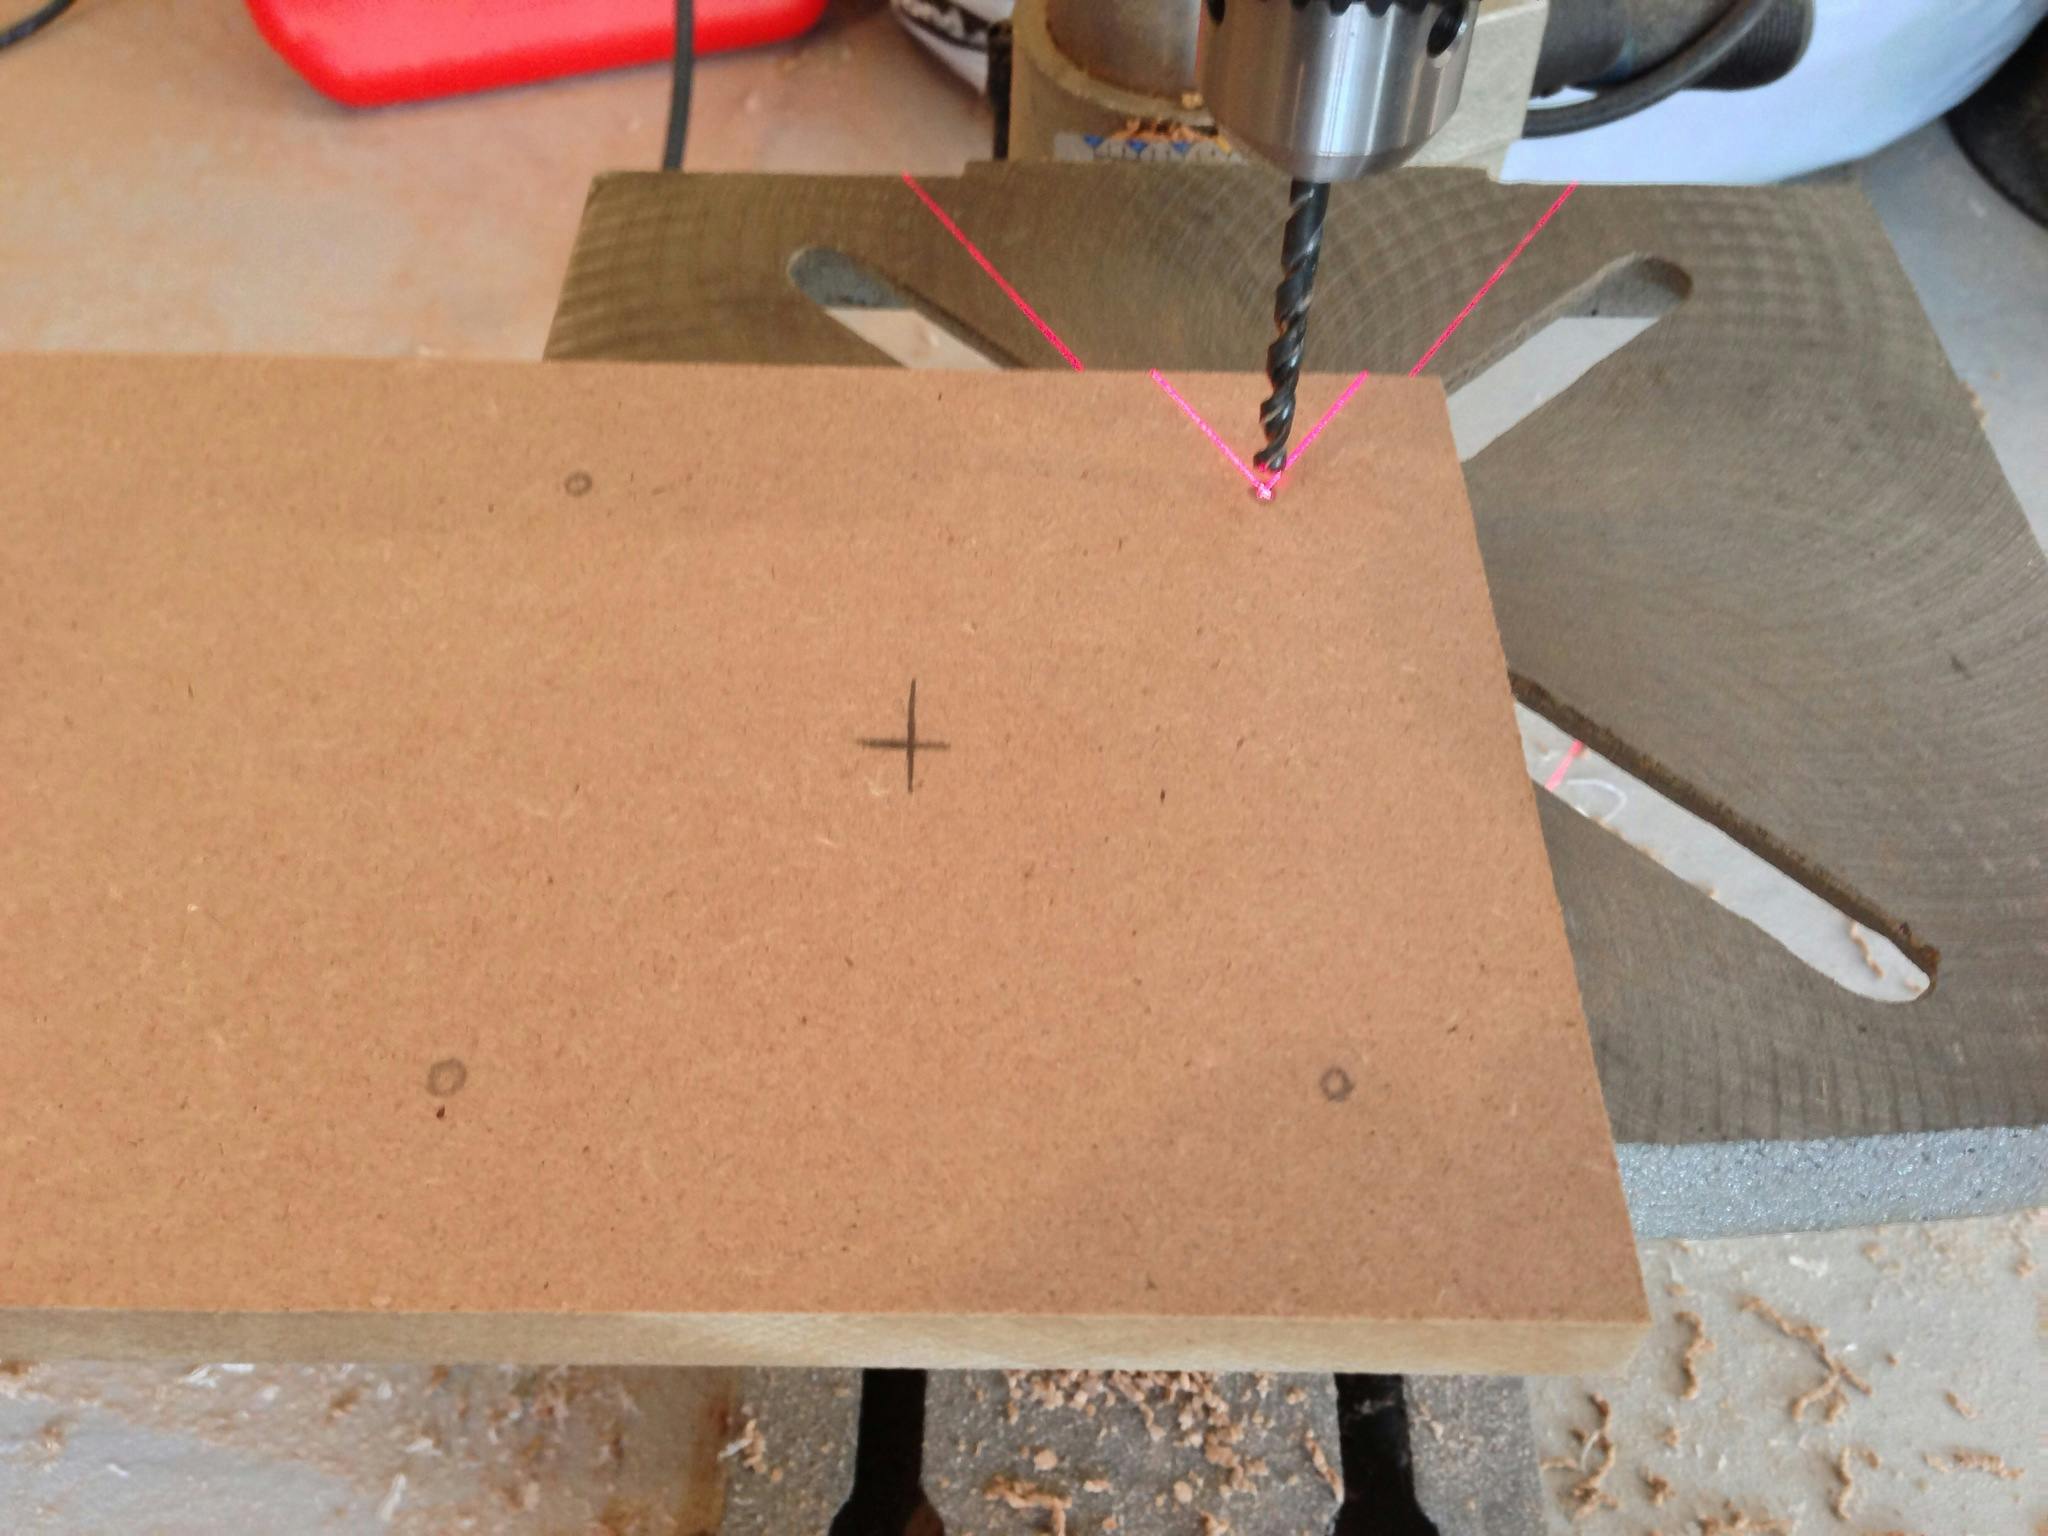
Using a straightedge and a soup can, I drew the rounded shape of the groove on a scrap of MDF (Medium-Density Fiberboard). I cut it out with my jigsaw and sanded to remove any bumps or imperfections. This one cut would be the template for all twelve finished grooves so it's important that it's done carefully.
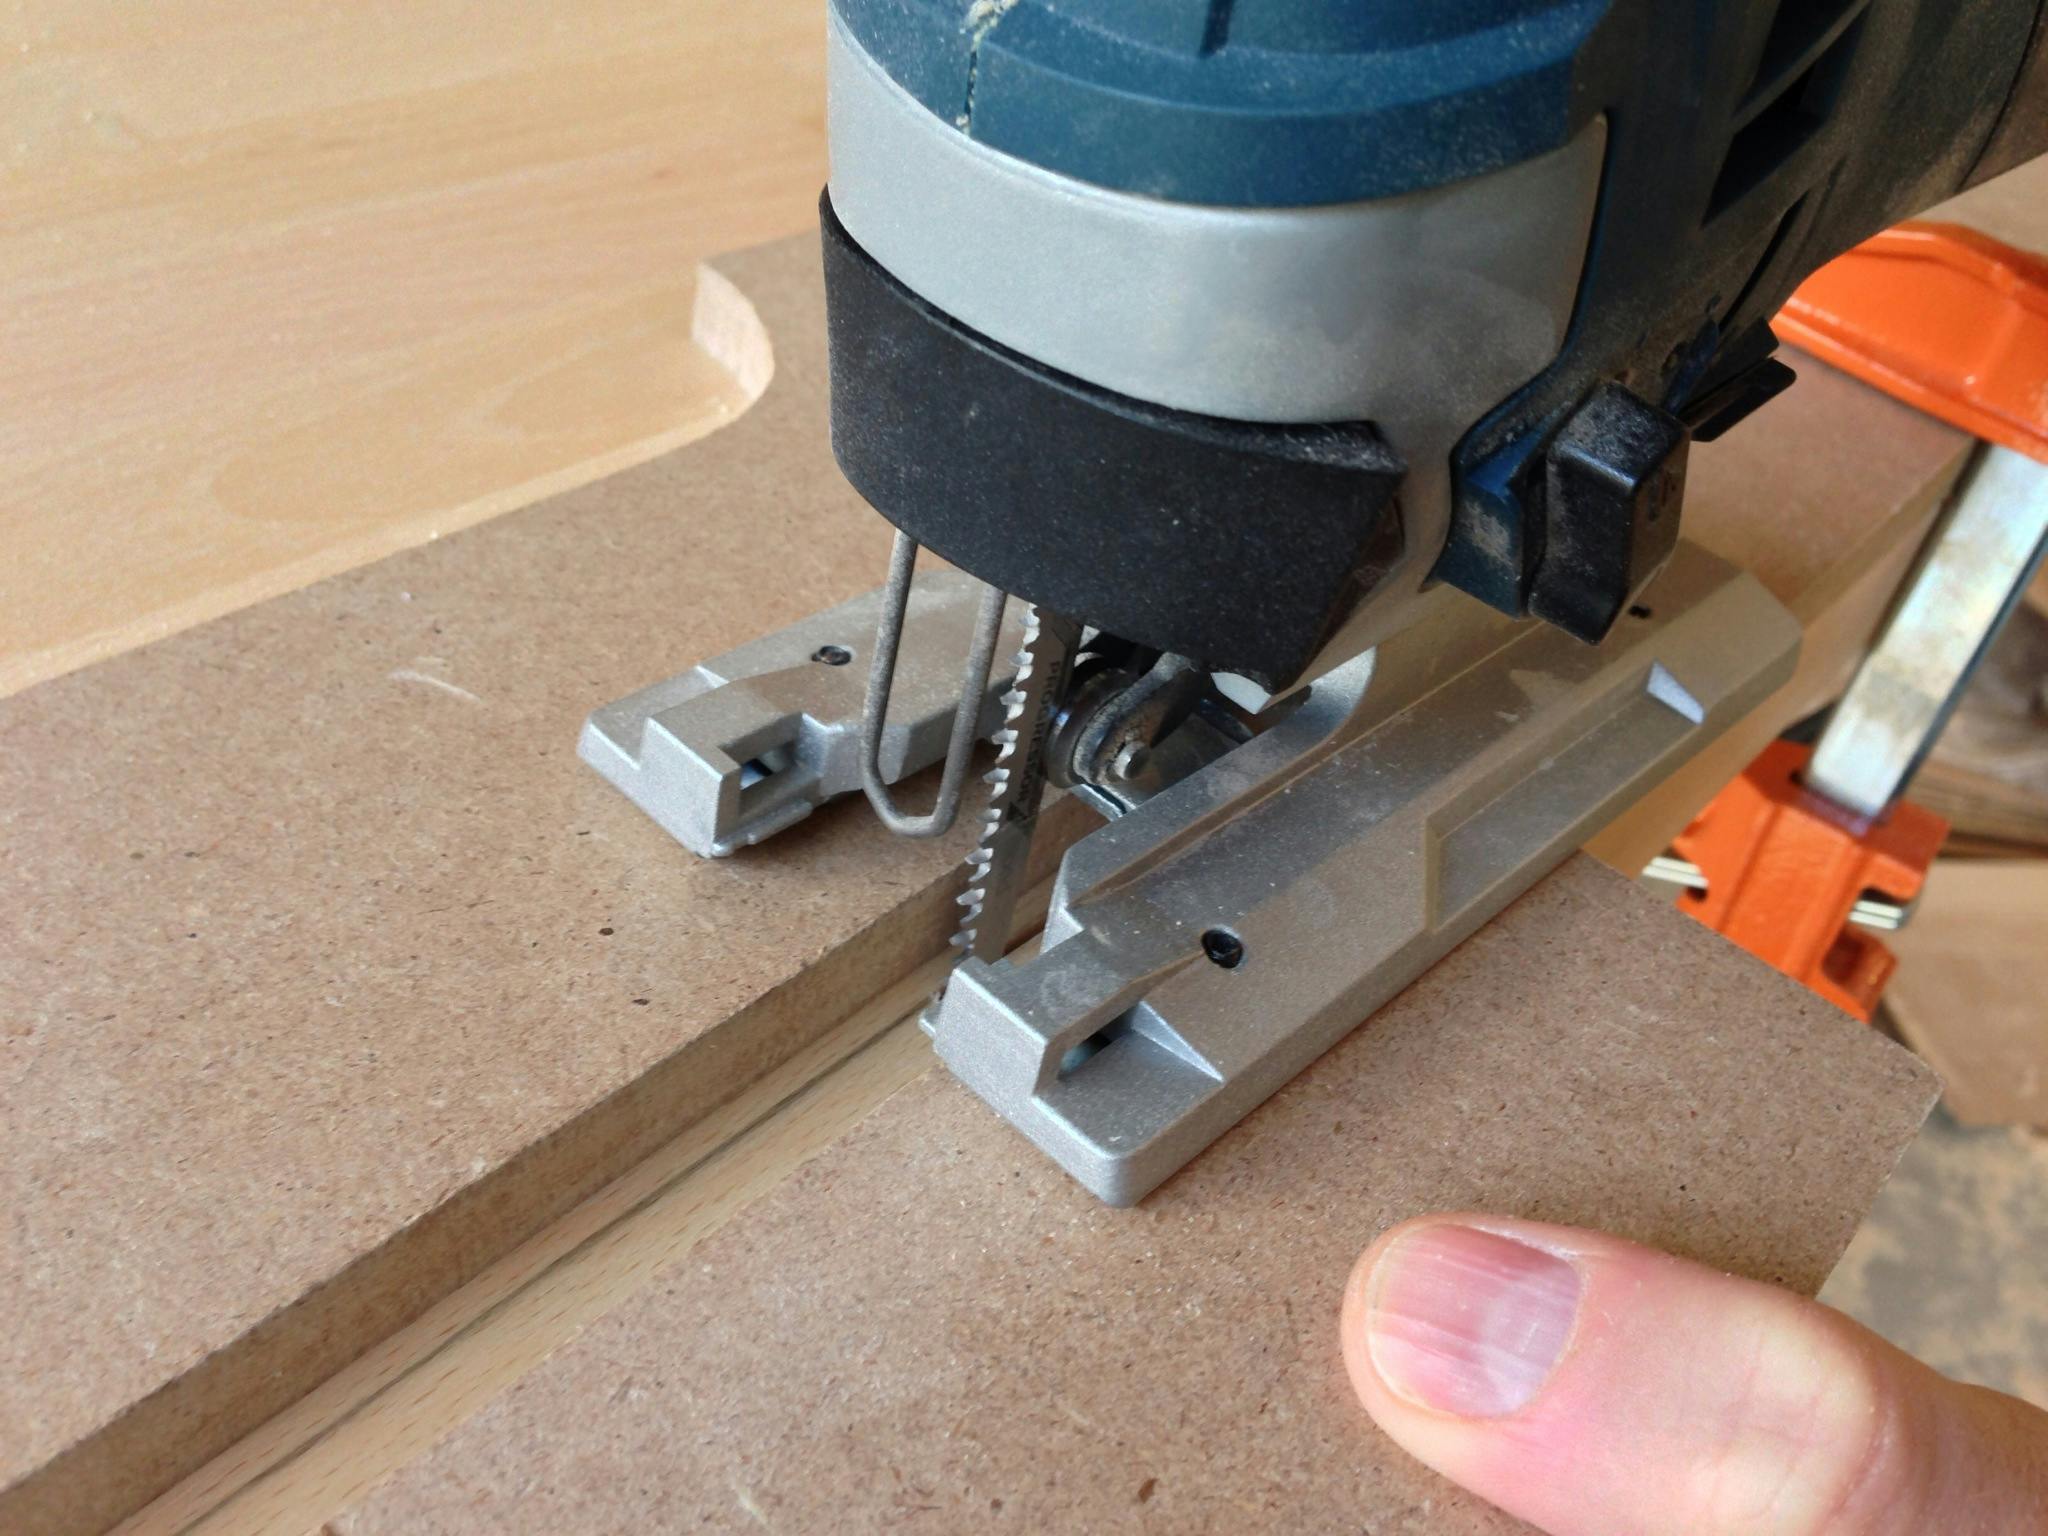
After hoisting the countertop onto my workbench, I clamped the MDF template onto the edge and traced the inside of the curve with a pencil. Beech is a hard wood so I'd have to remove most of the material with my jigsaw before I could use the router to finish it off with a clean edge.

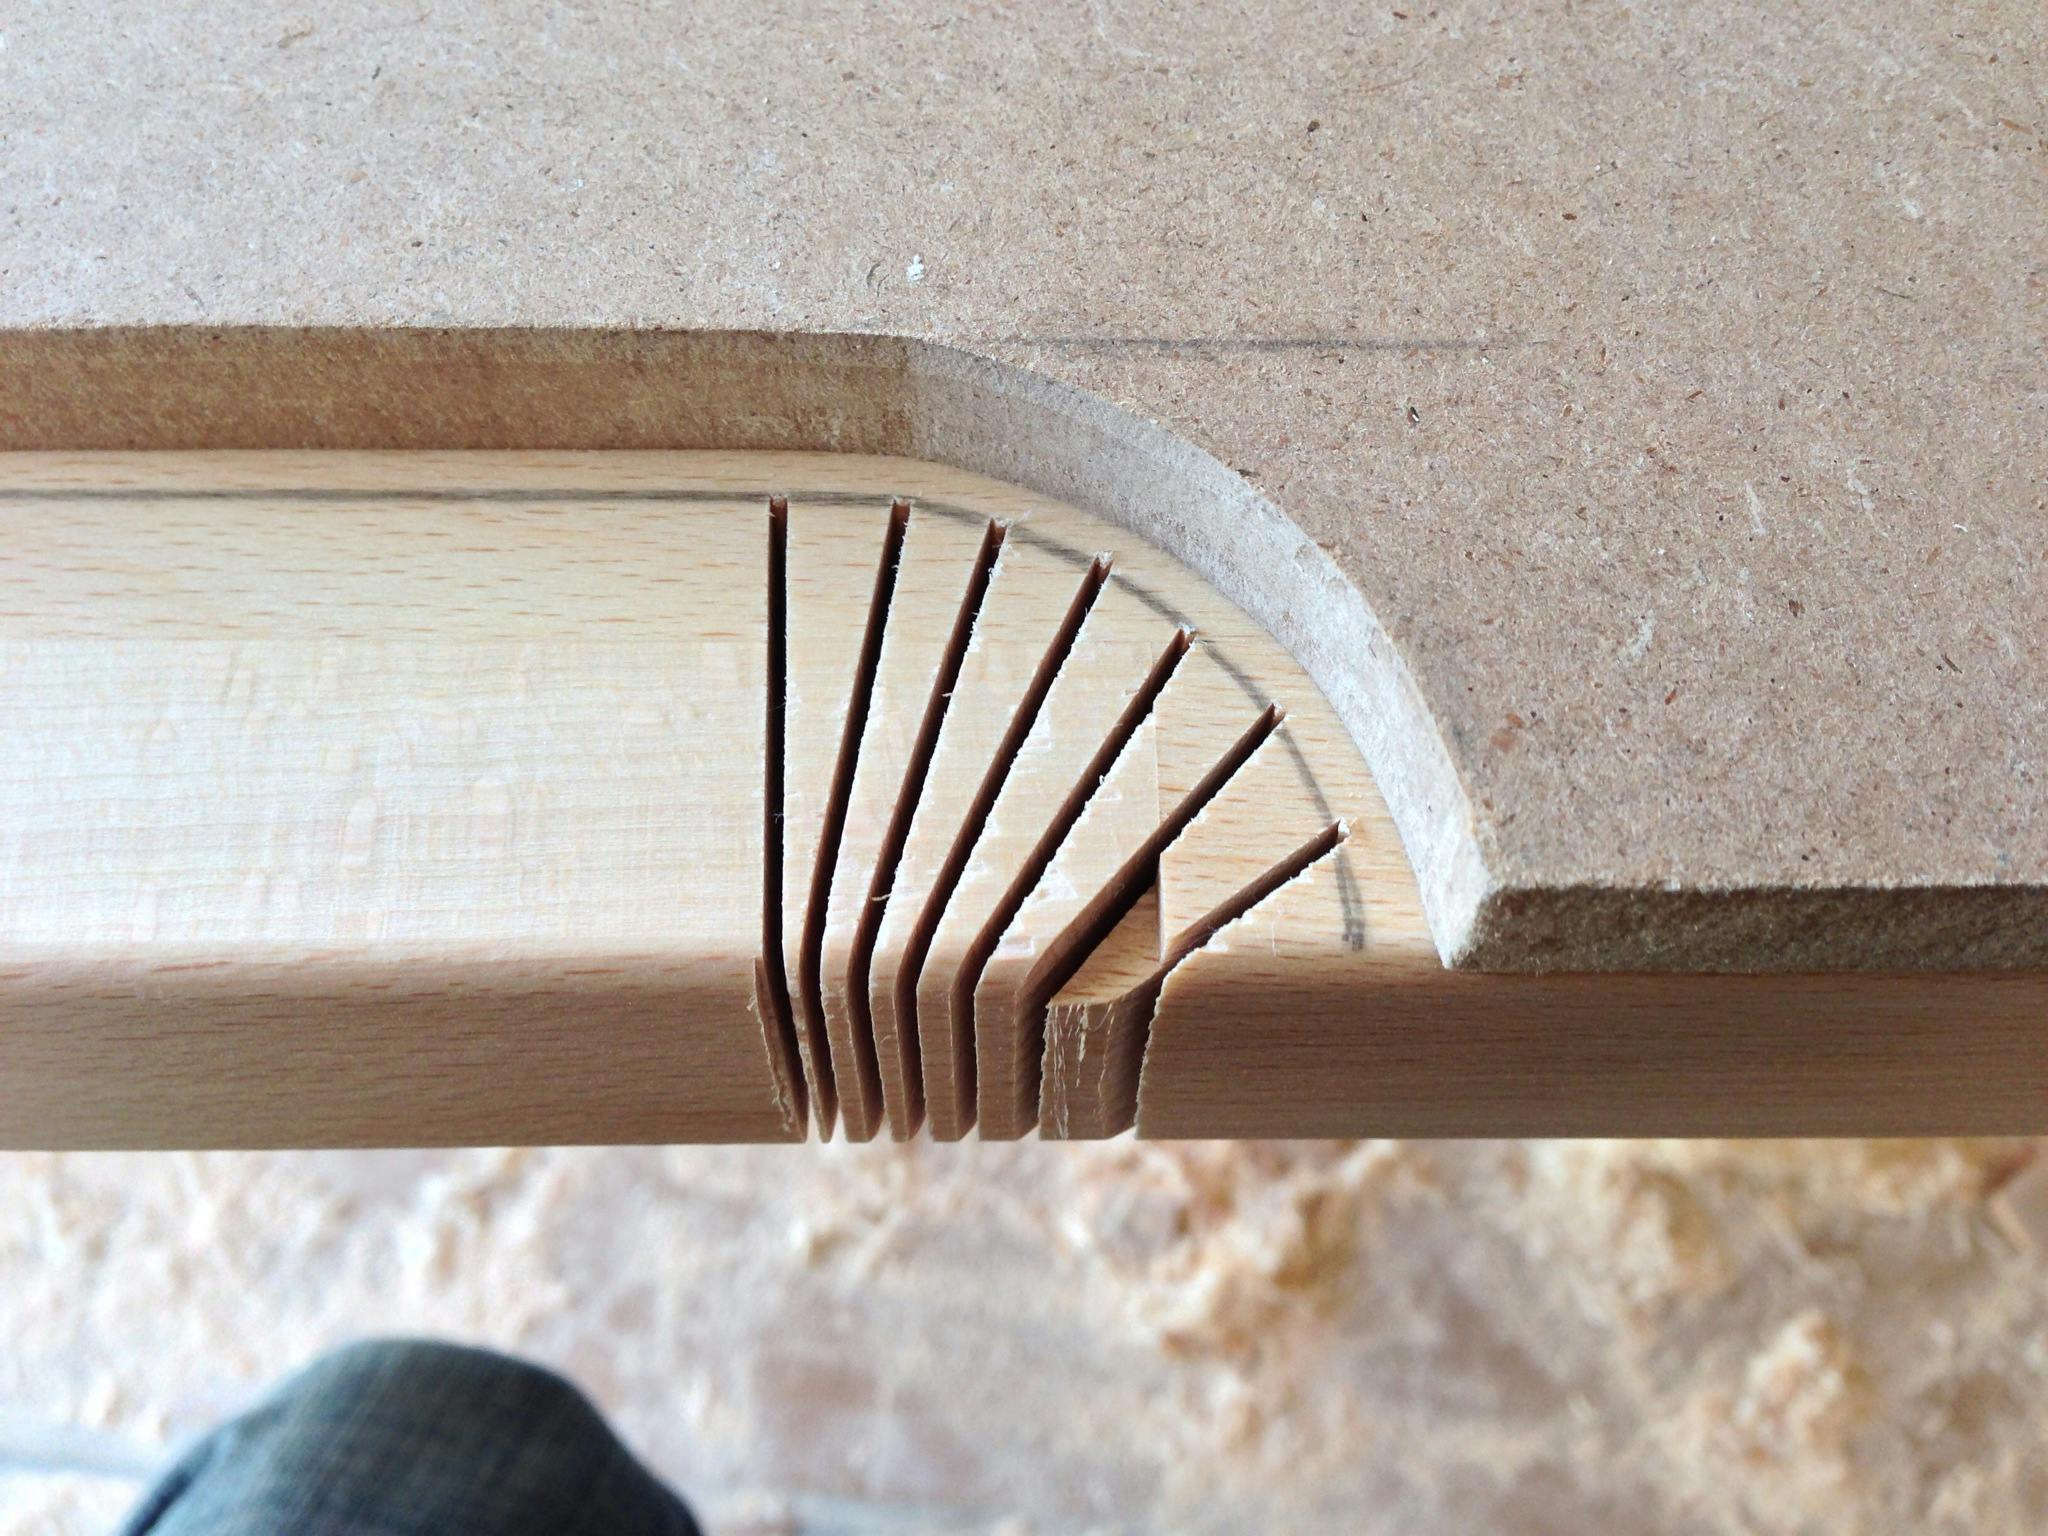
The curves of the groove have a tight 1½" radius which is difficult to cut with a jigsaw, especially when the stock is 1½" thick. To make it easier, I cut into the curve at several places along the radius. This makes cutting the entire curve easier by simply connecting the dots.
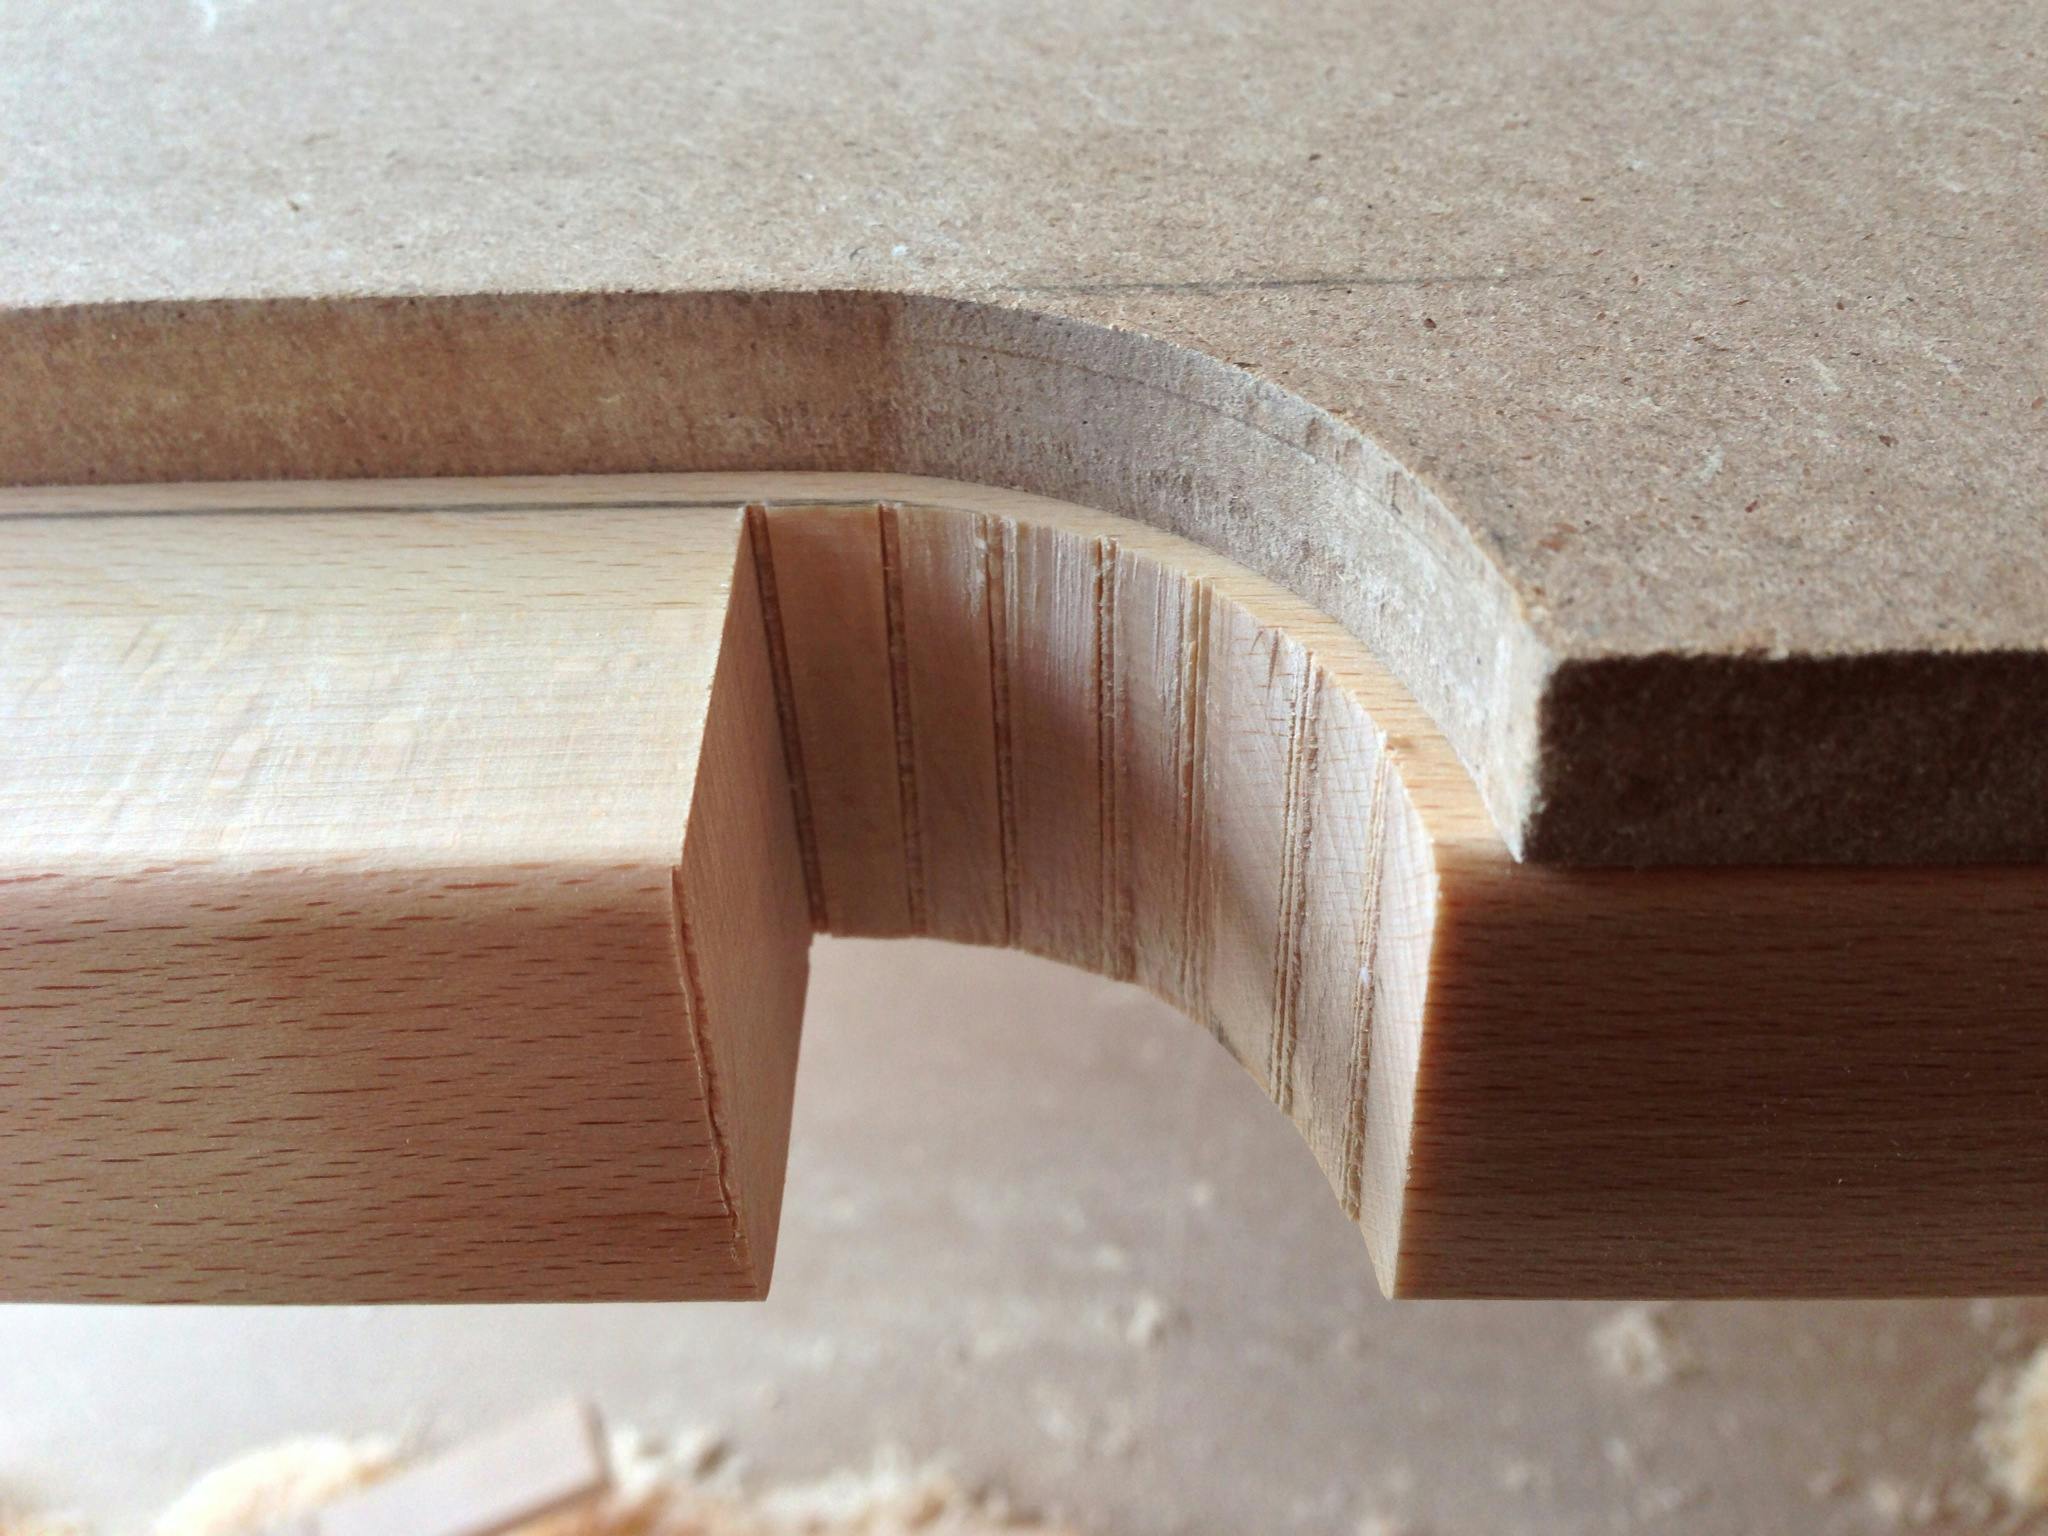
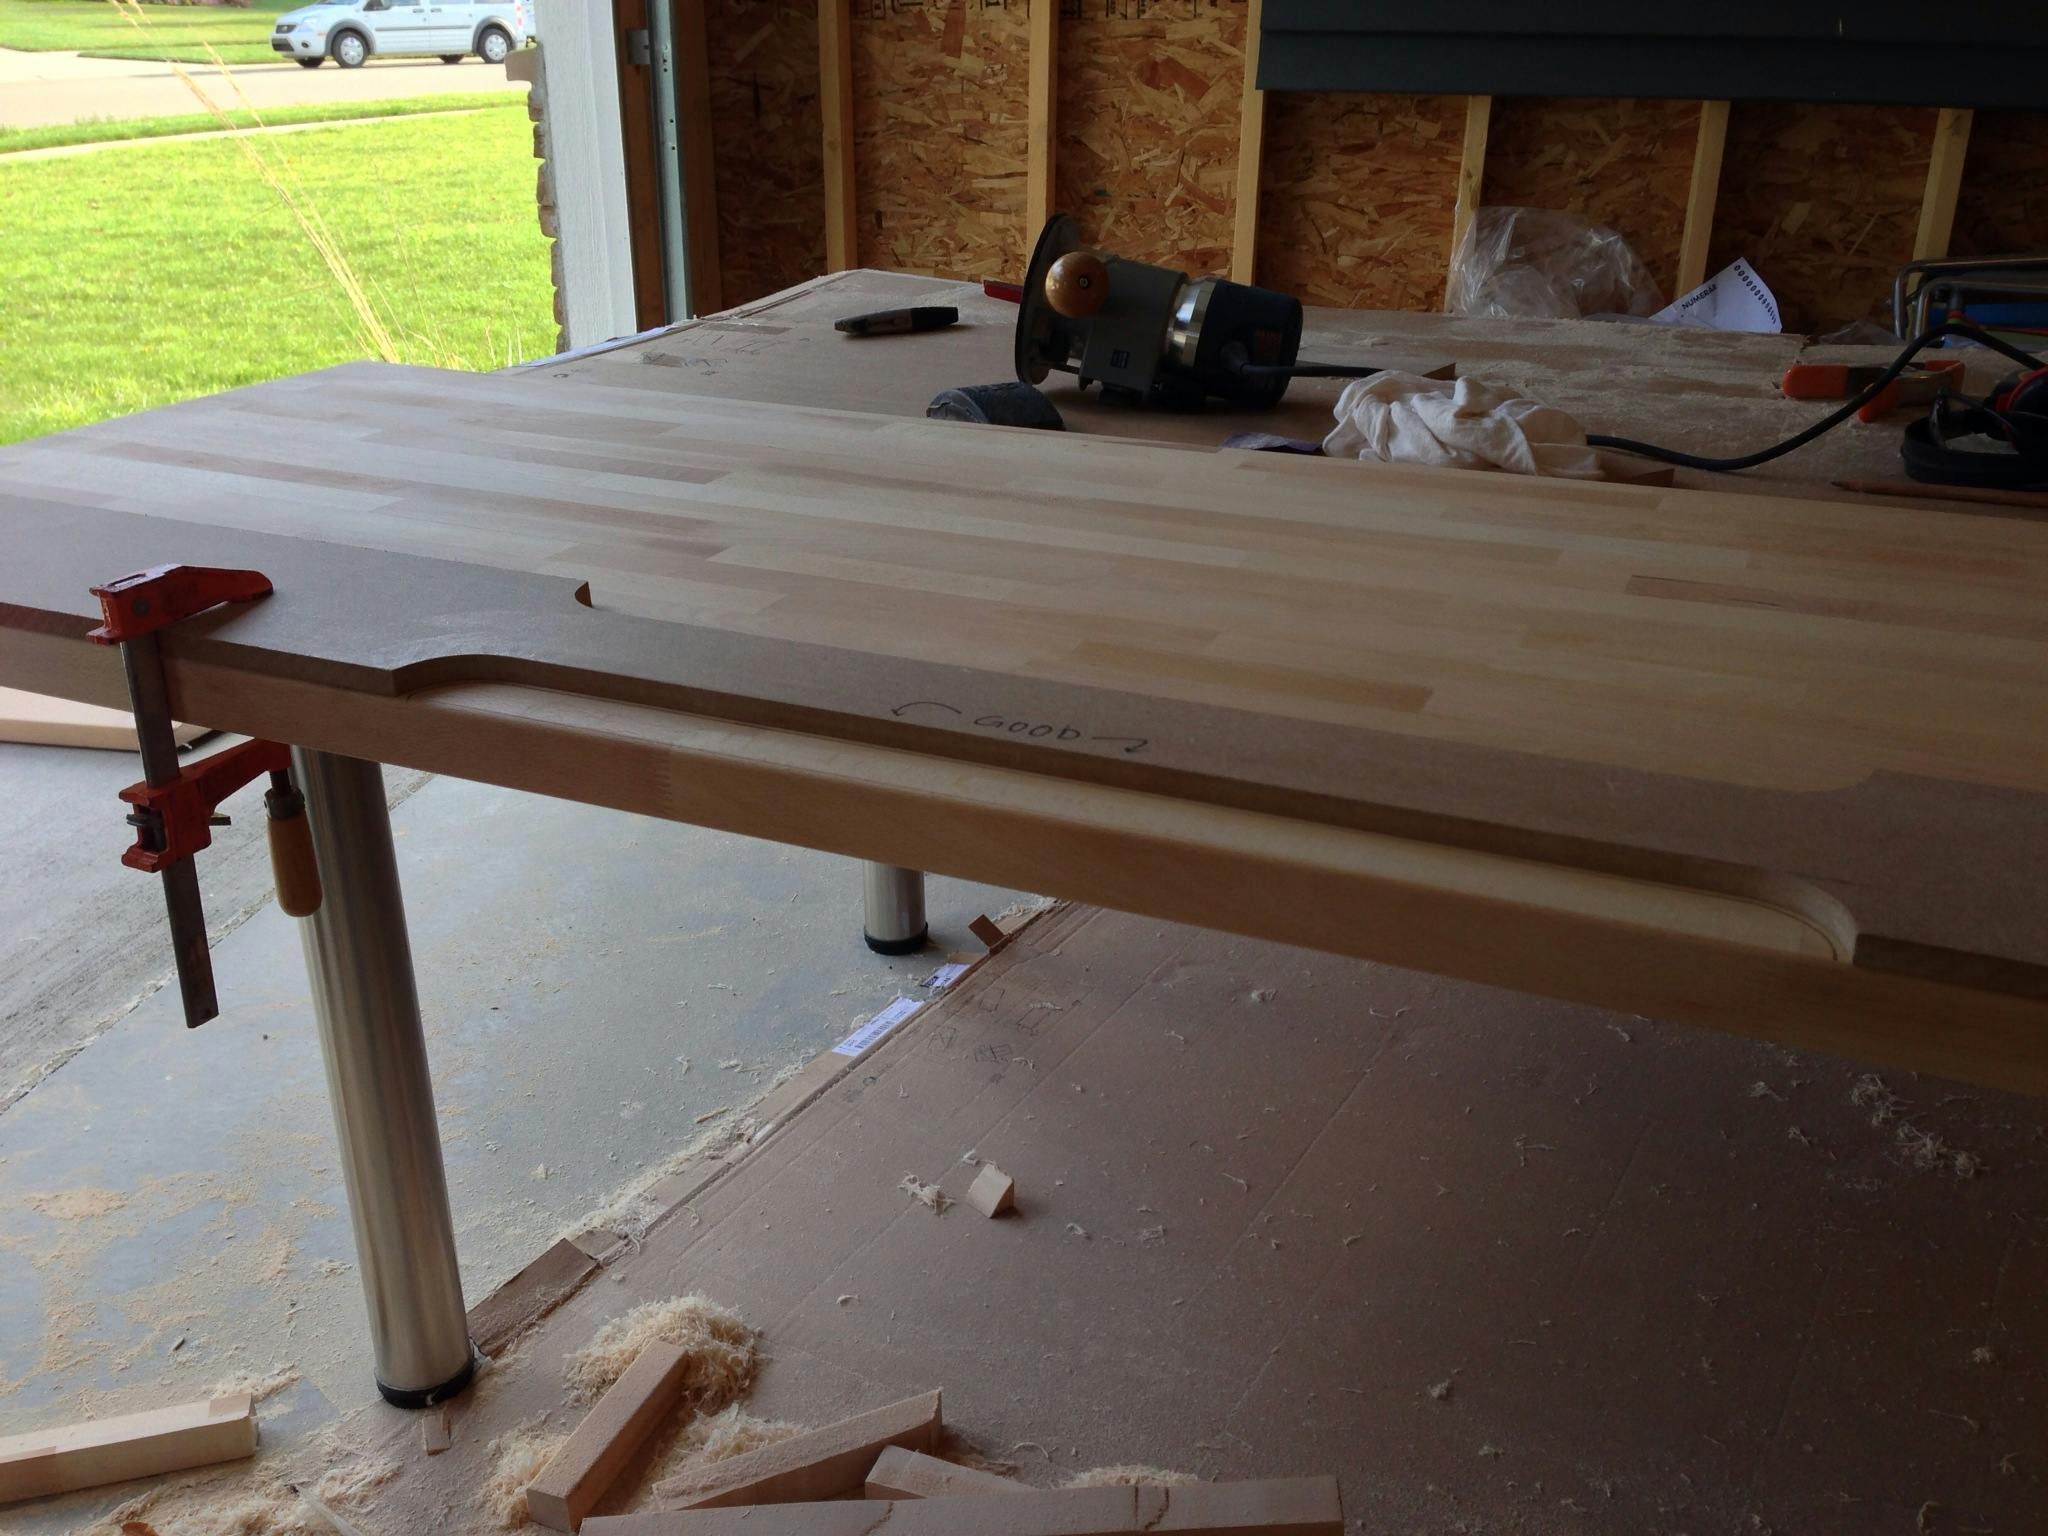
With the curves cut, I finished the groove by cutting lengthwise down the countertop. This gives me my rough cut that's ready for the router.
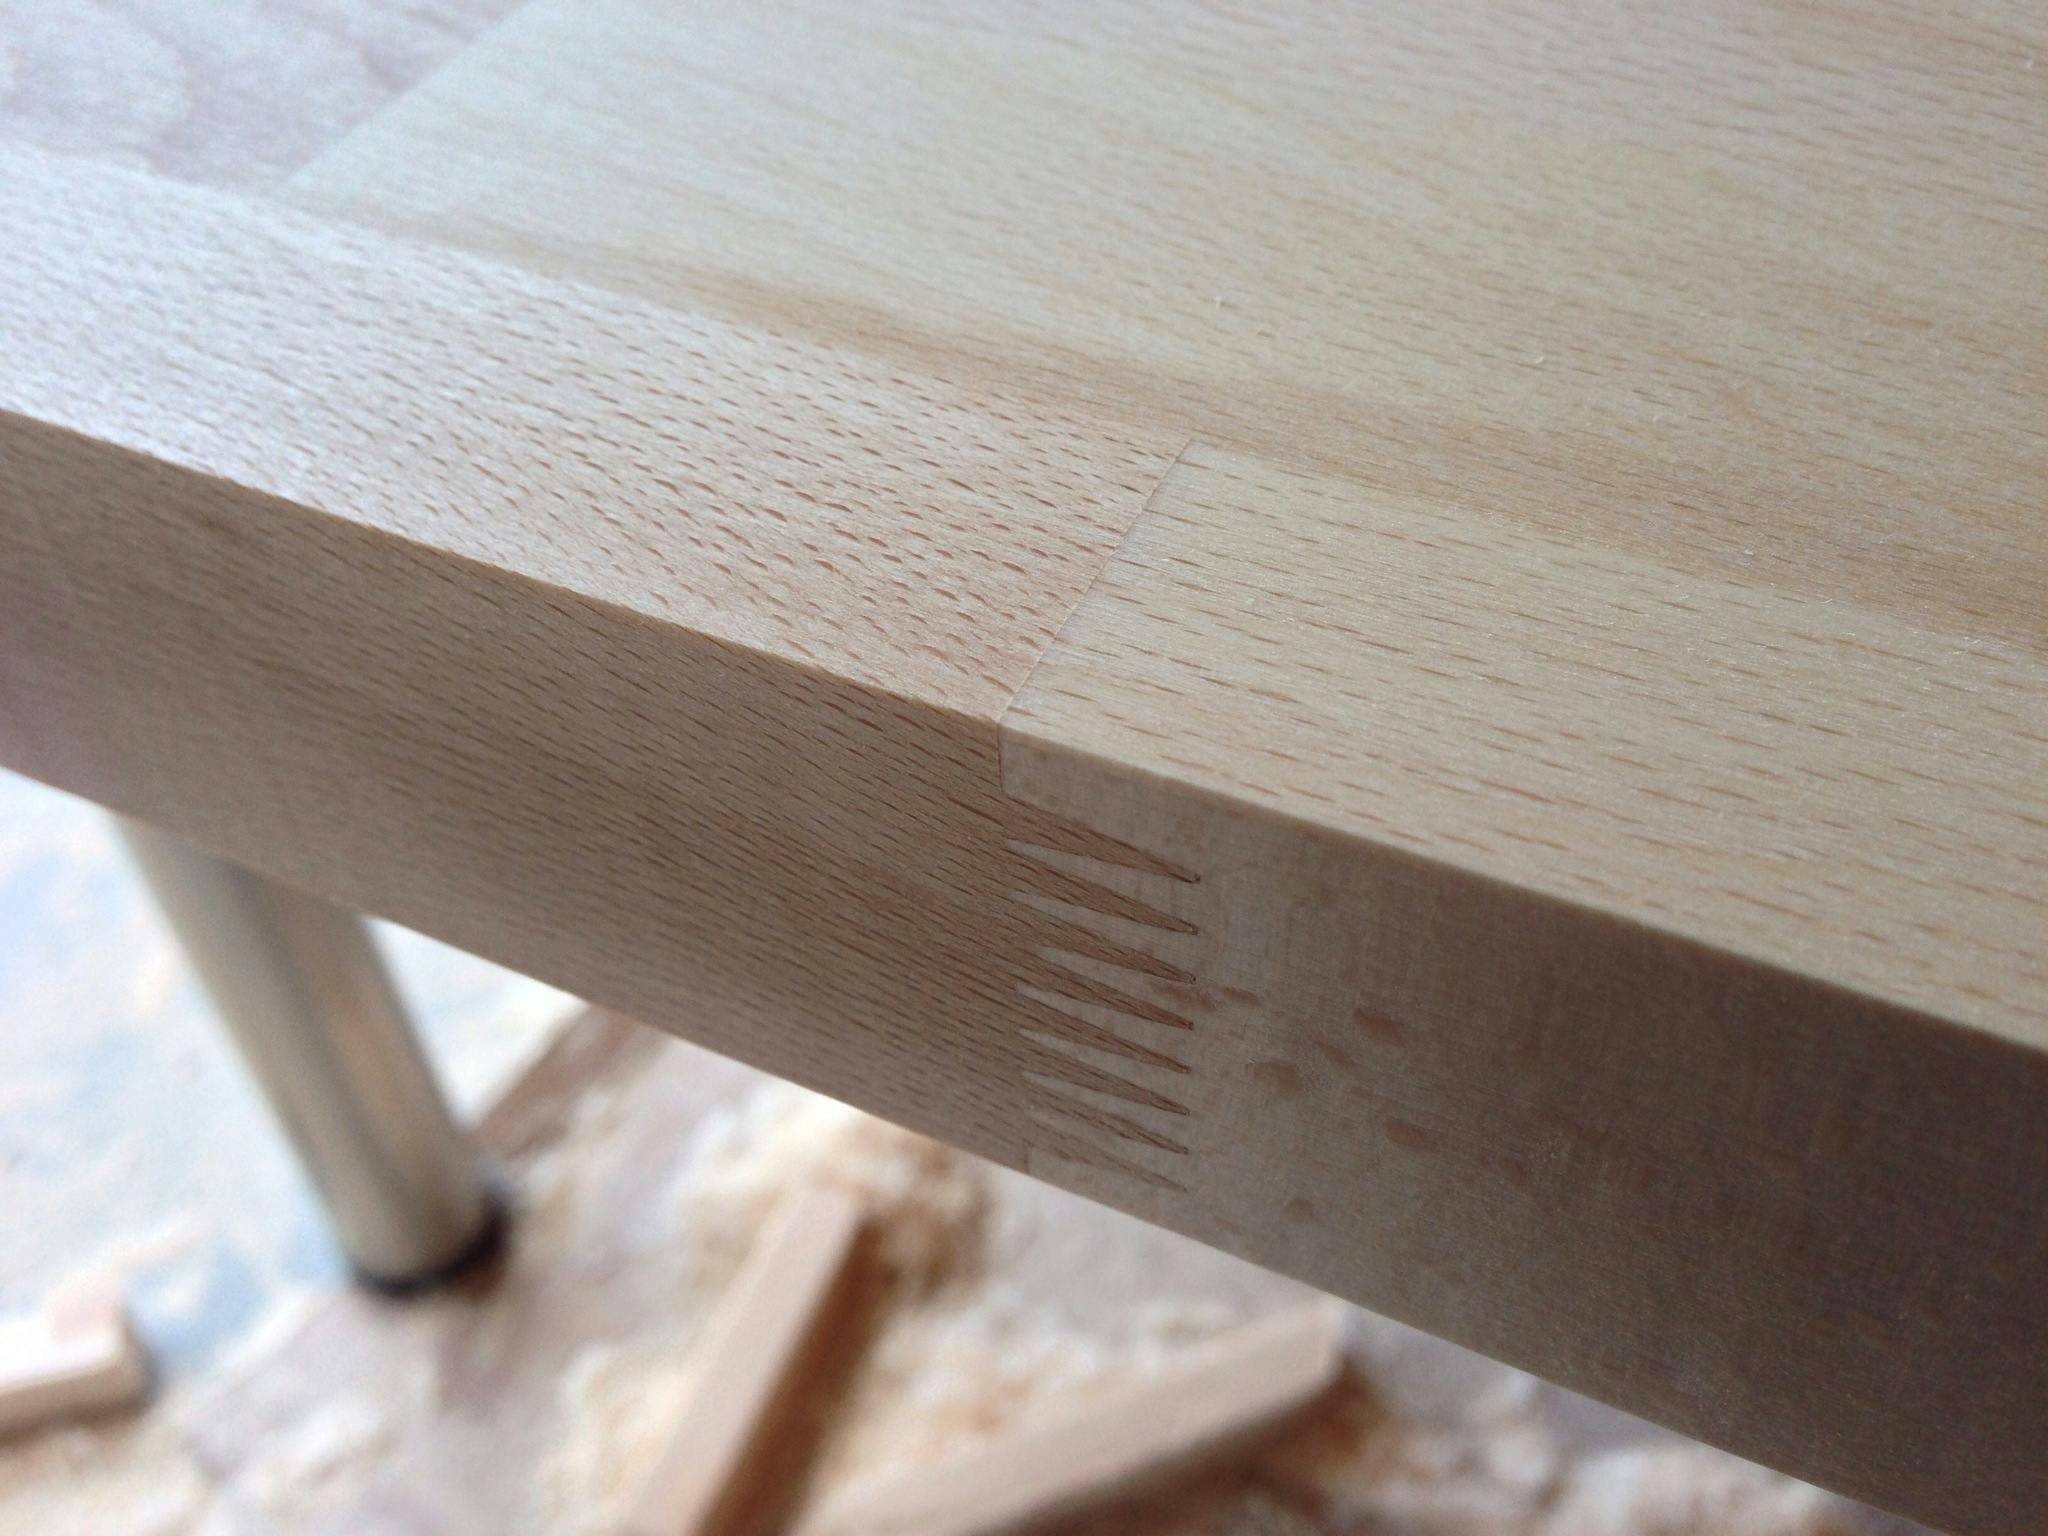
The pattern bit I'm using in the router has a ball bearing at the top that rides along the MDF template and cutters below that remove the material. Slowly working from left to right, the router has no trouble eating through all of the excess material that the jigsaw left behind. We're left with a clean edge.

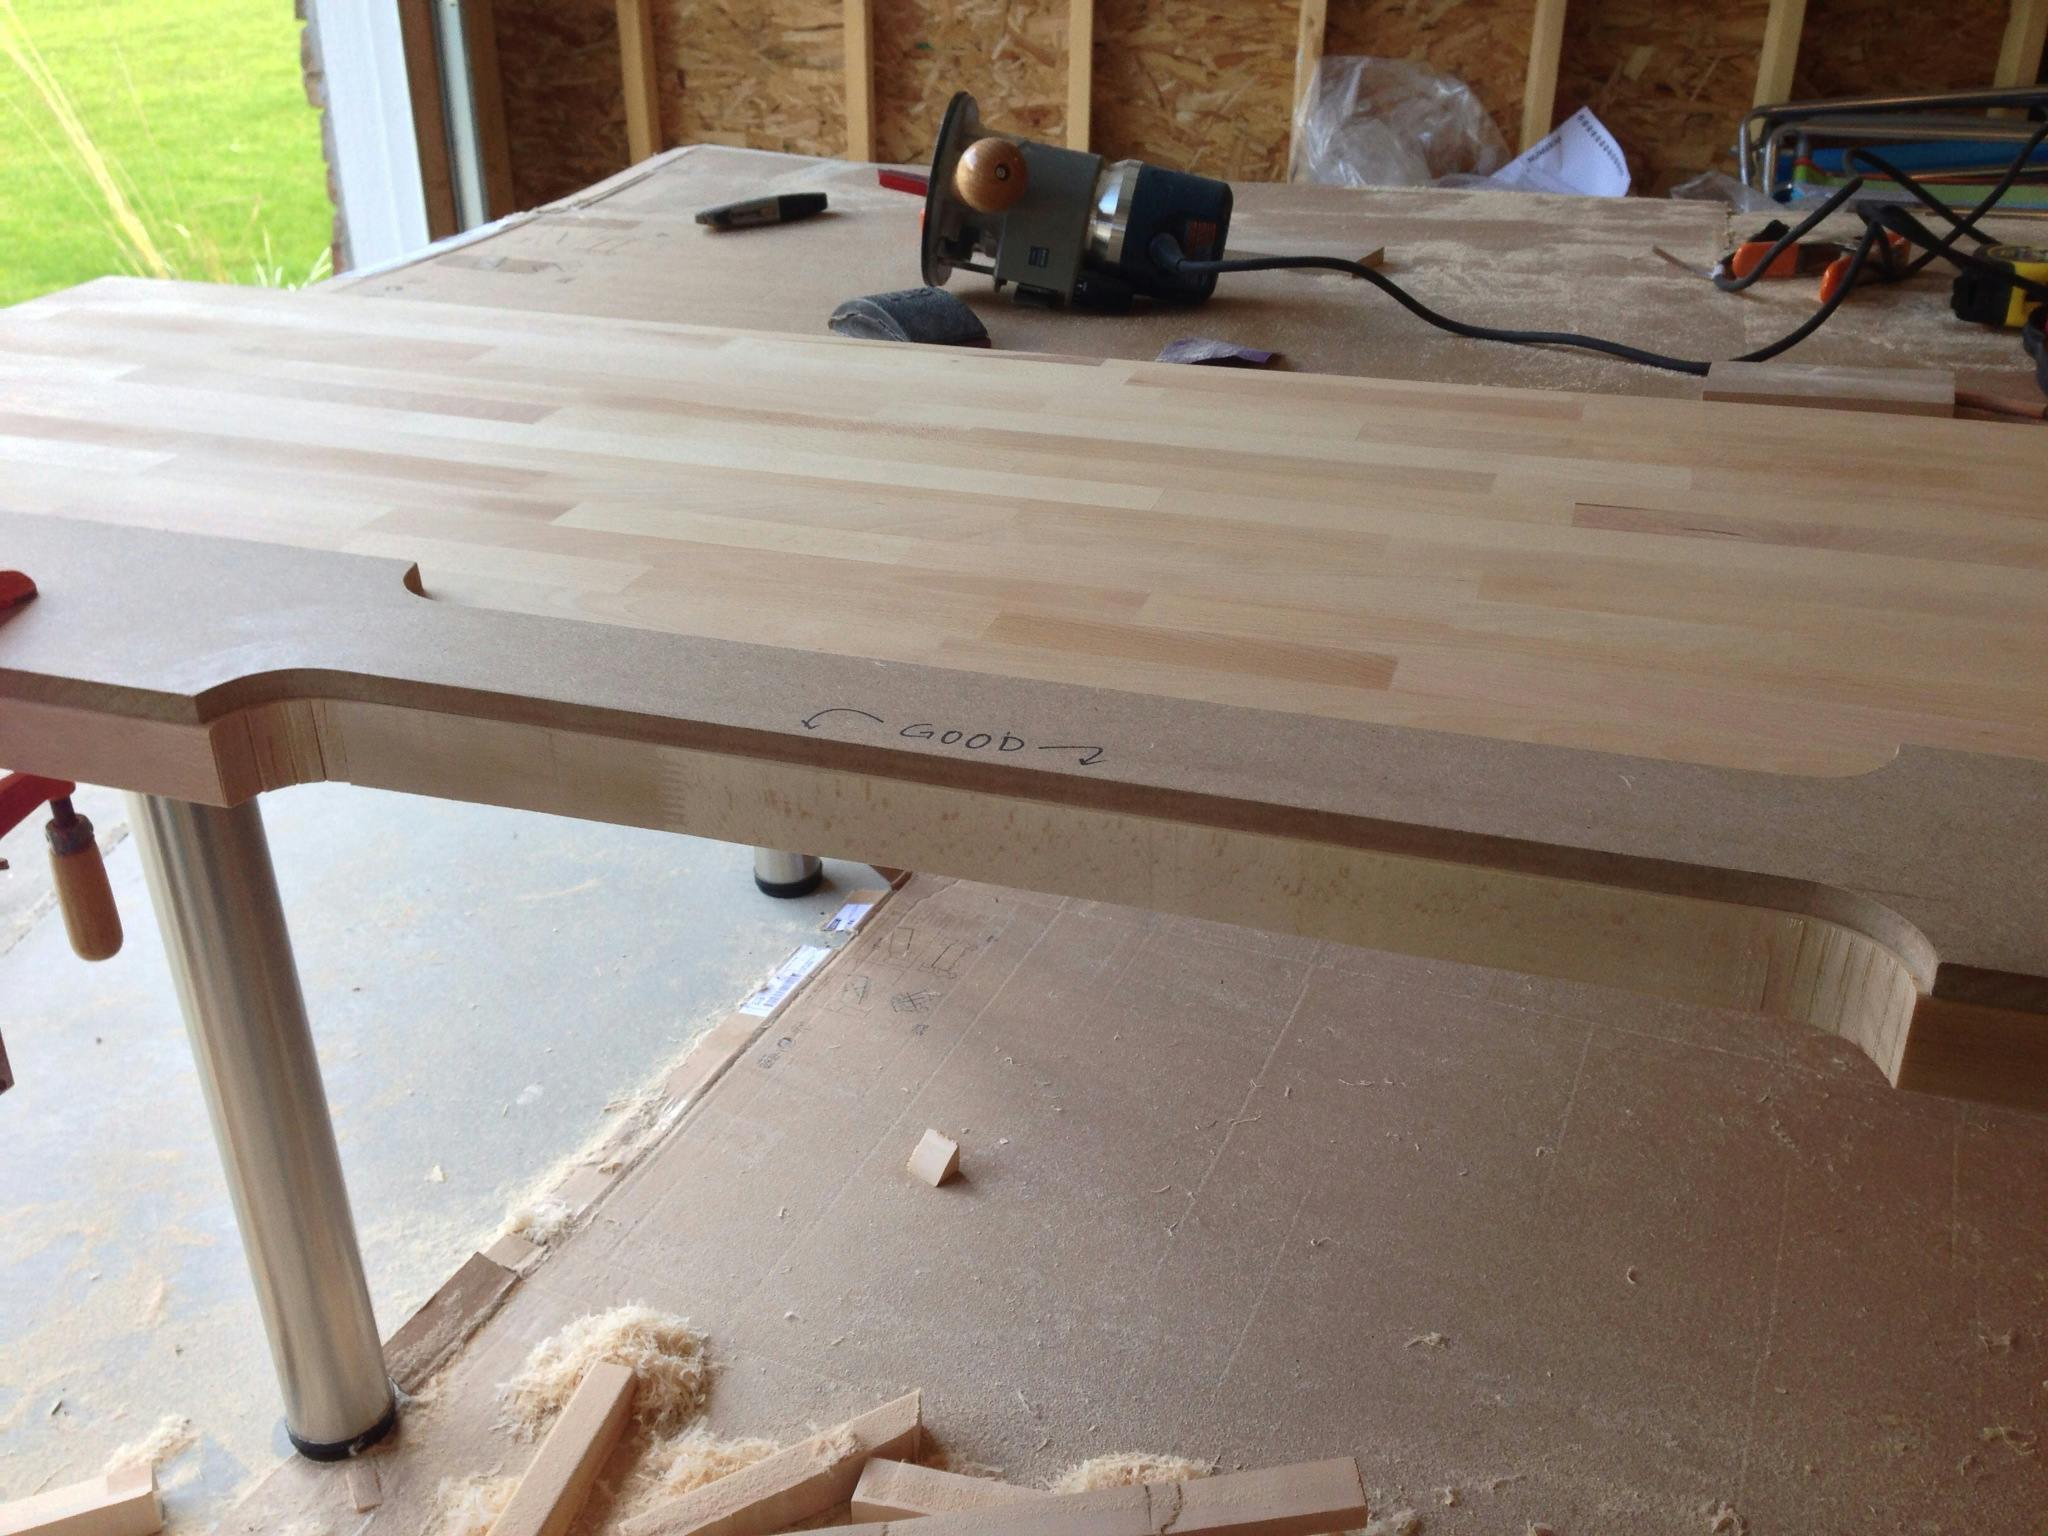
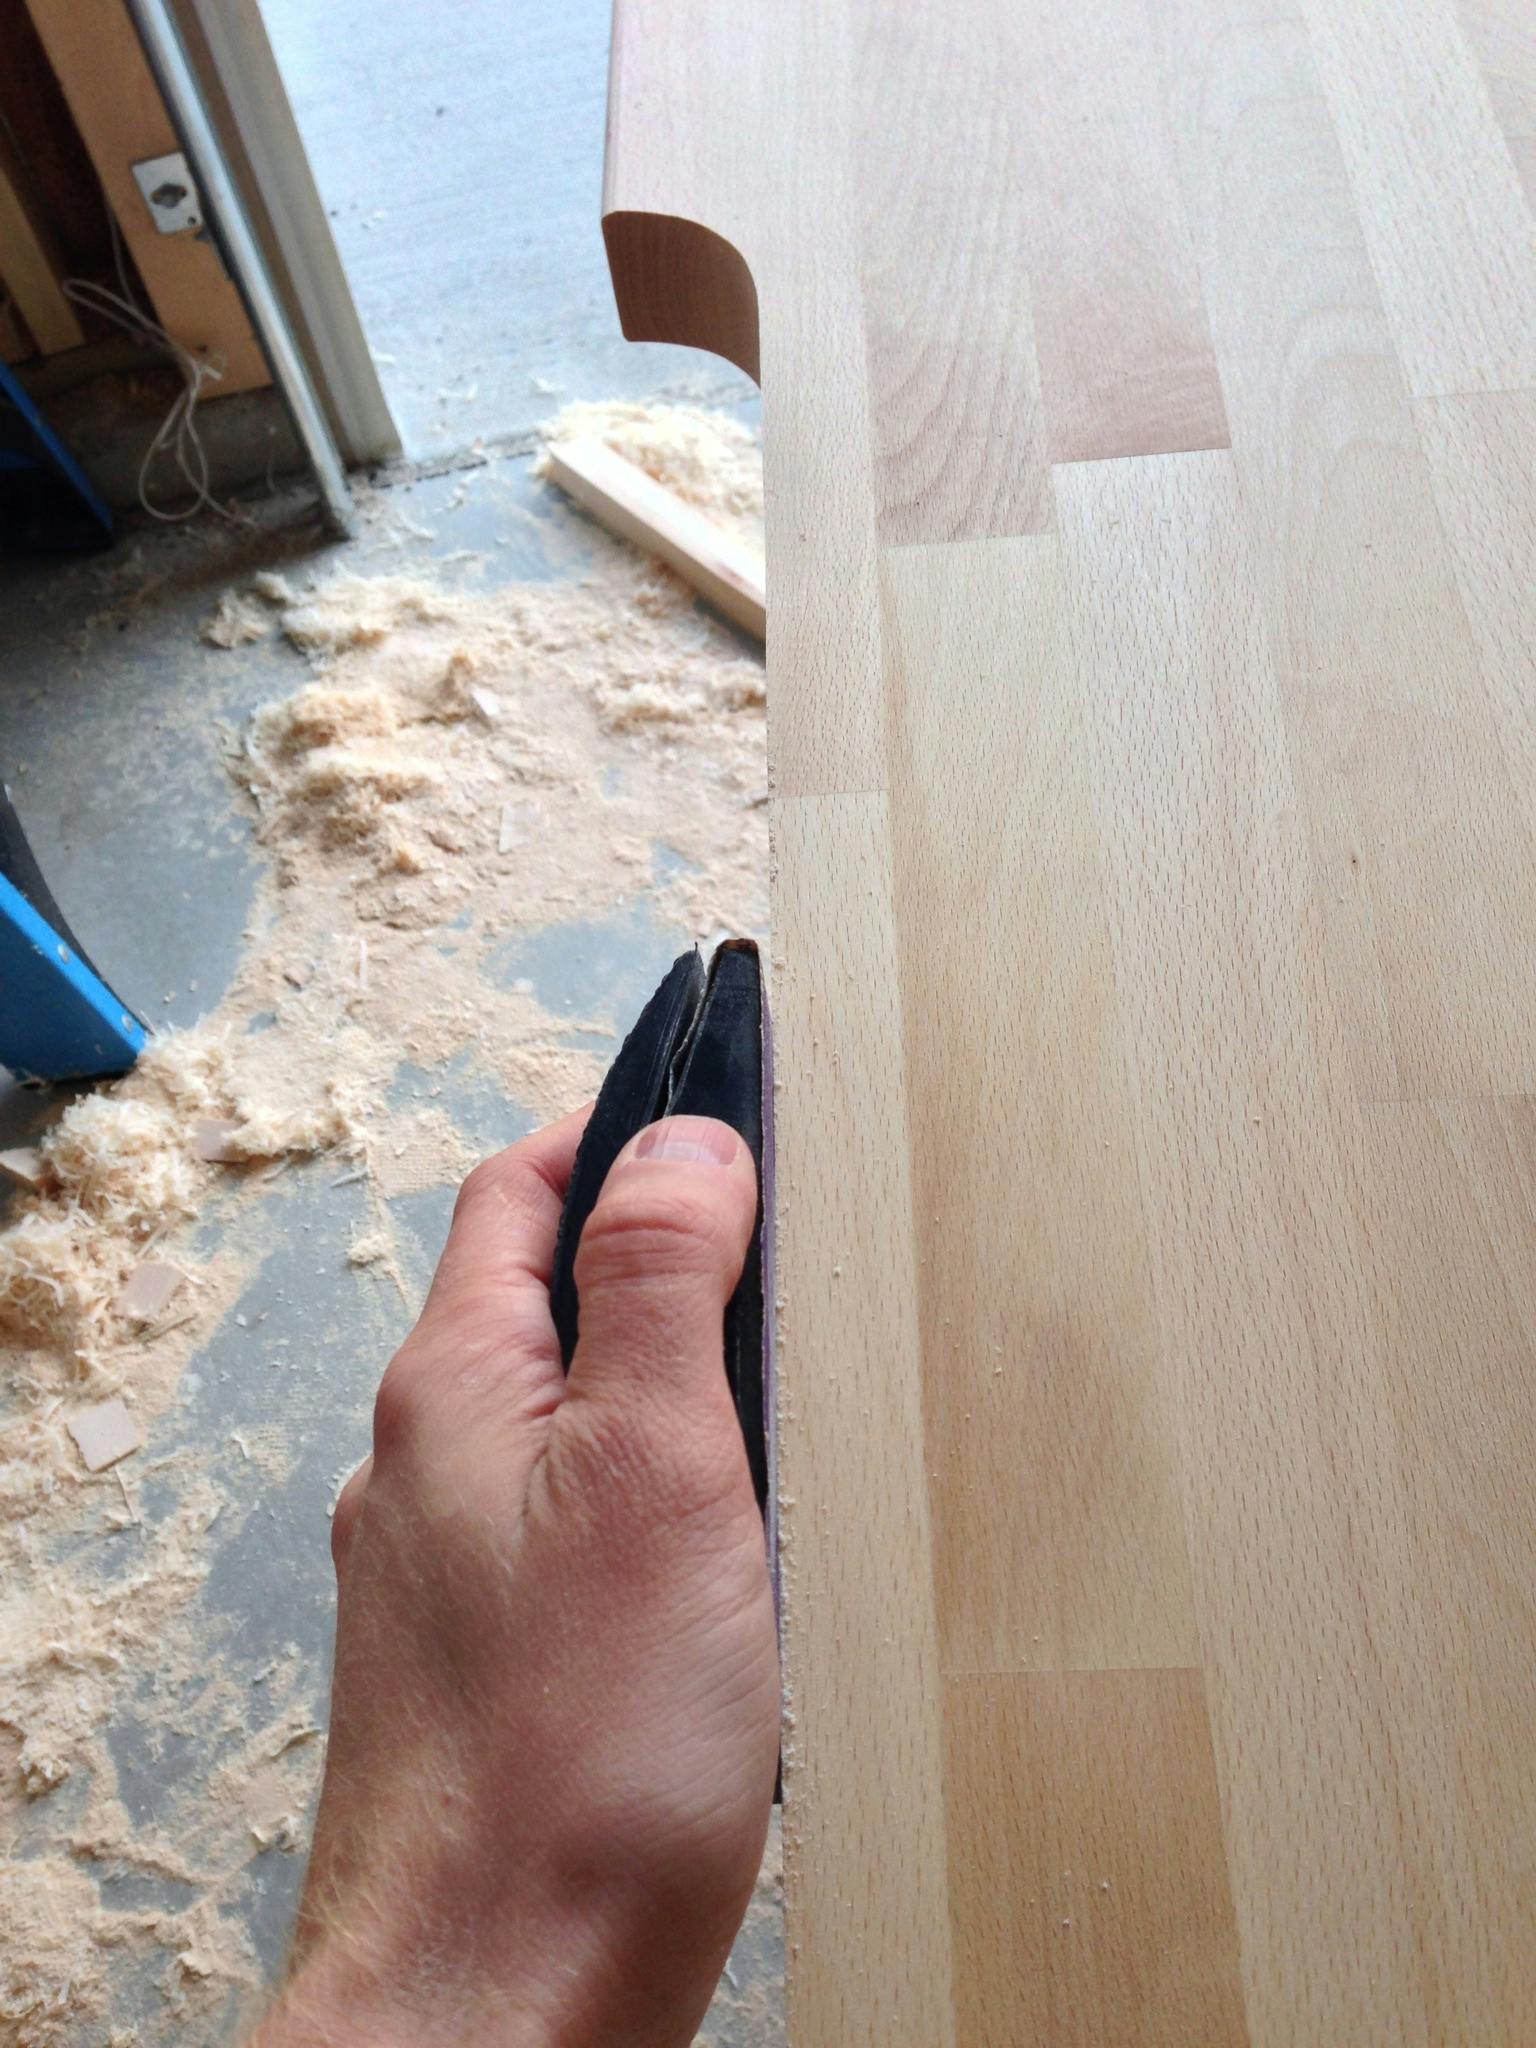
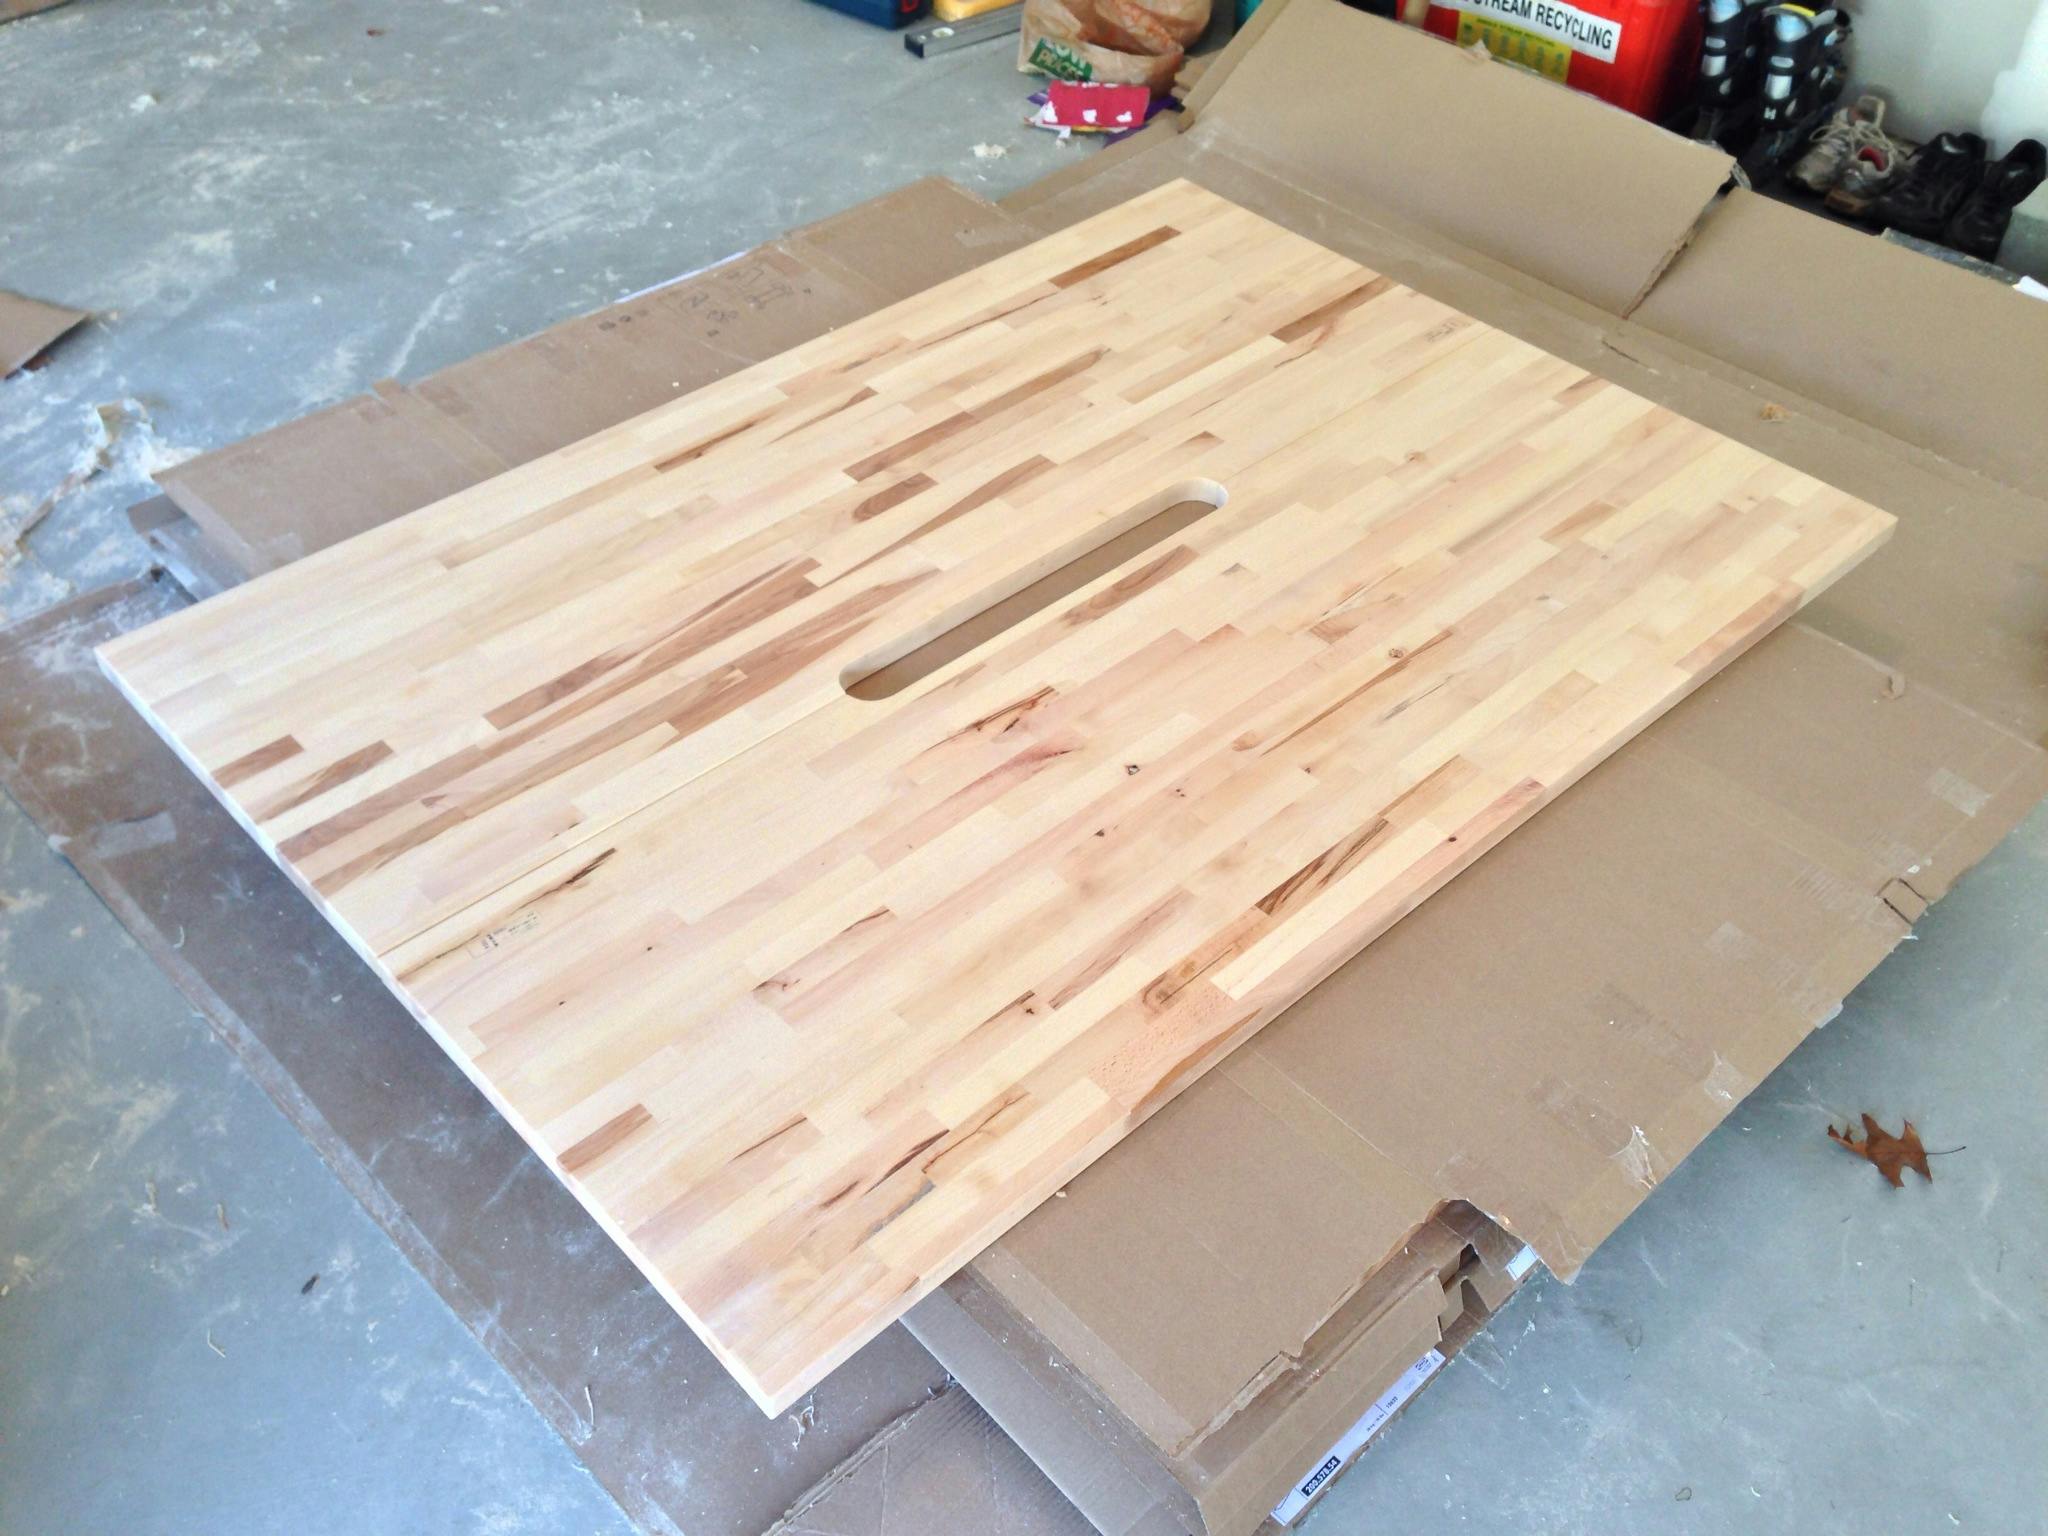
A quick sanding removes any ridges left by the router and knocks down the hard edges and corners.
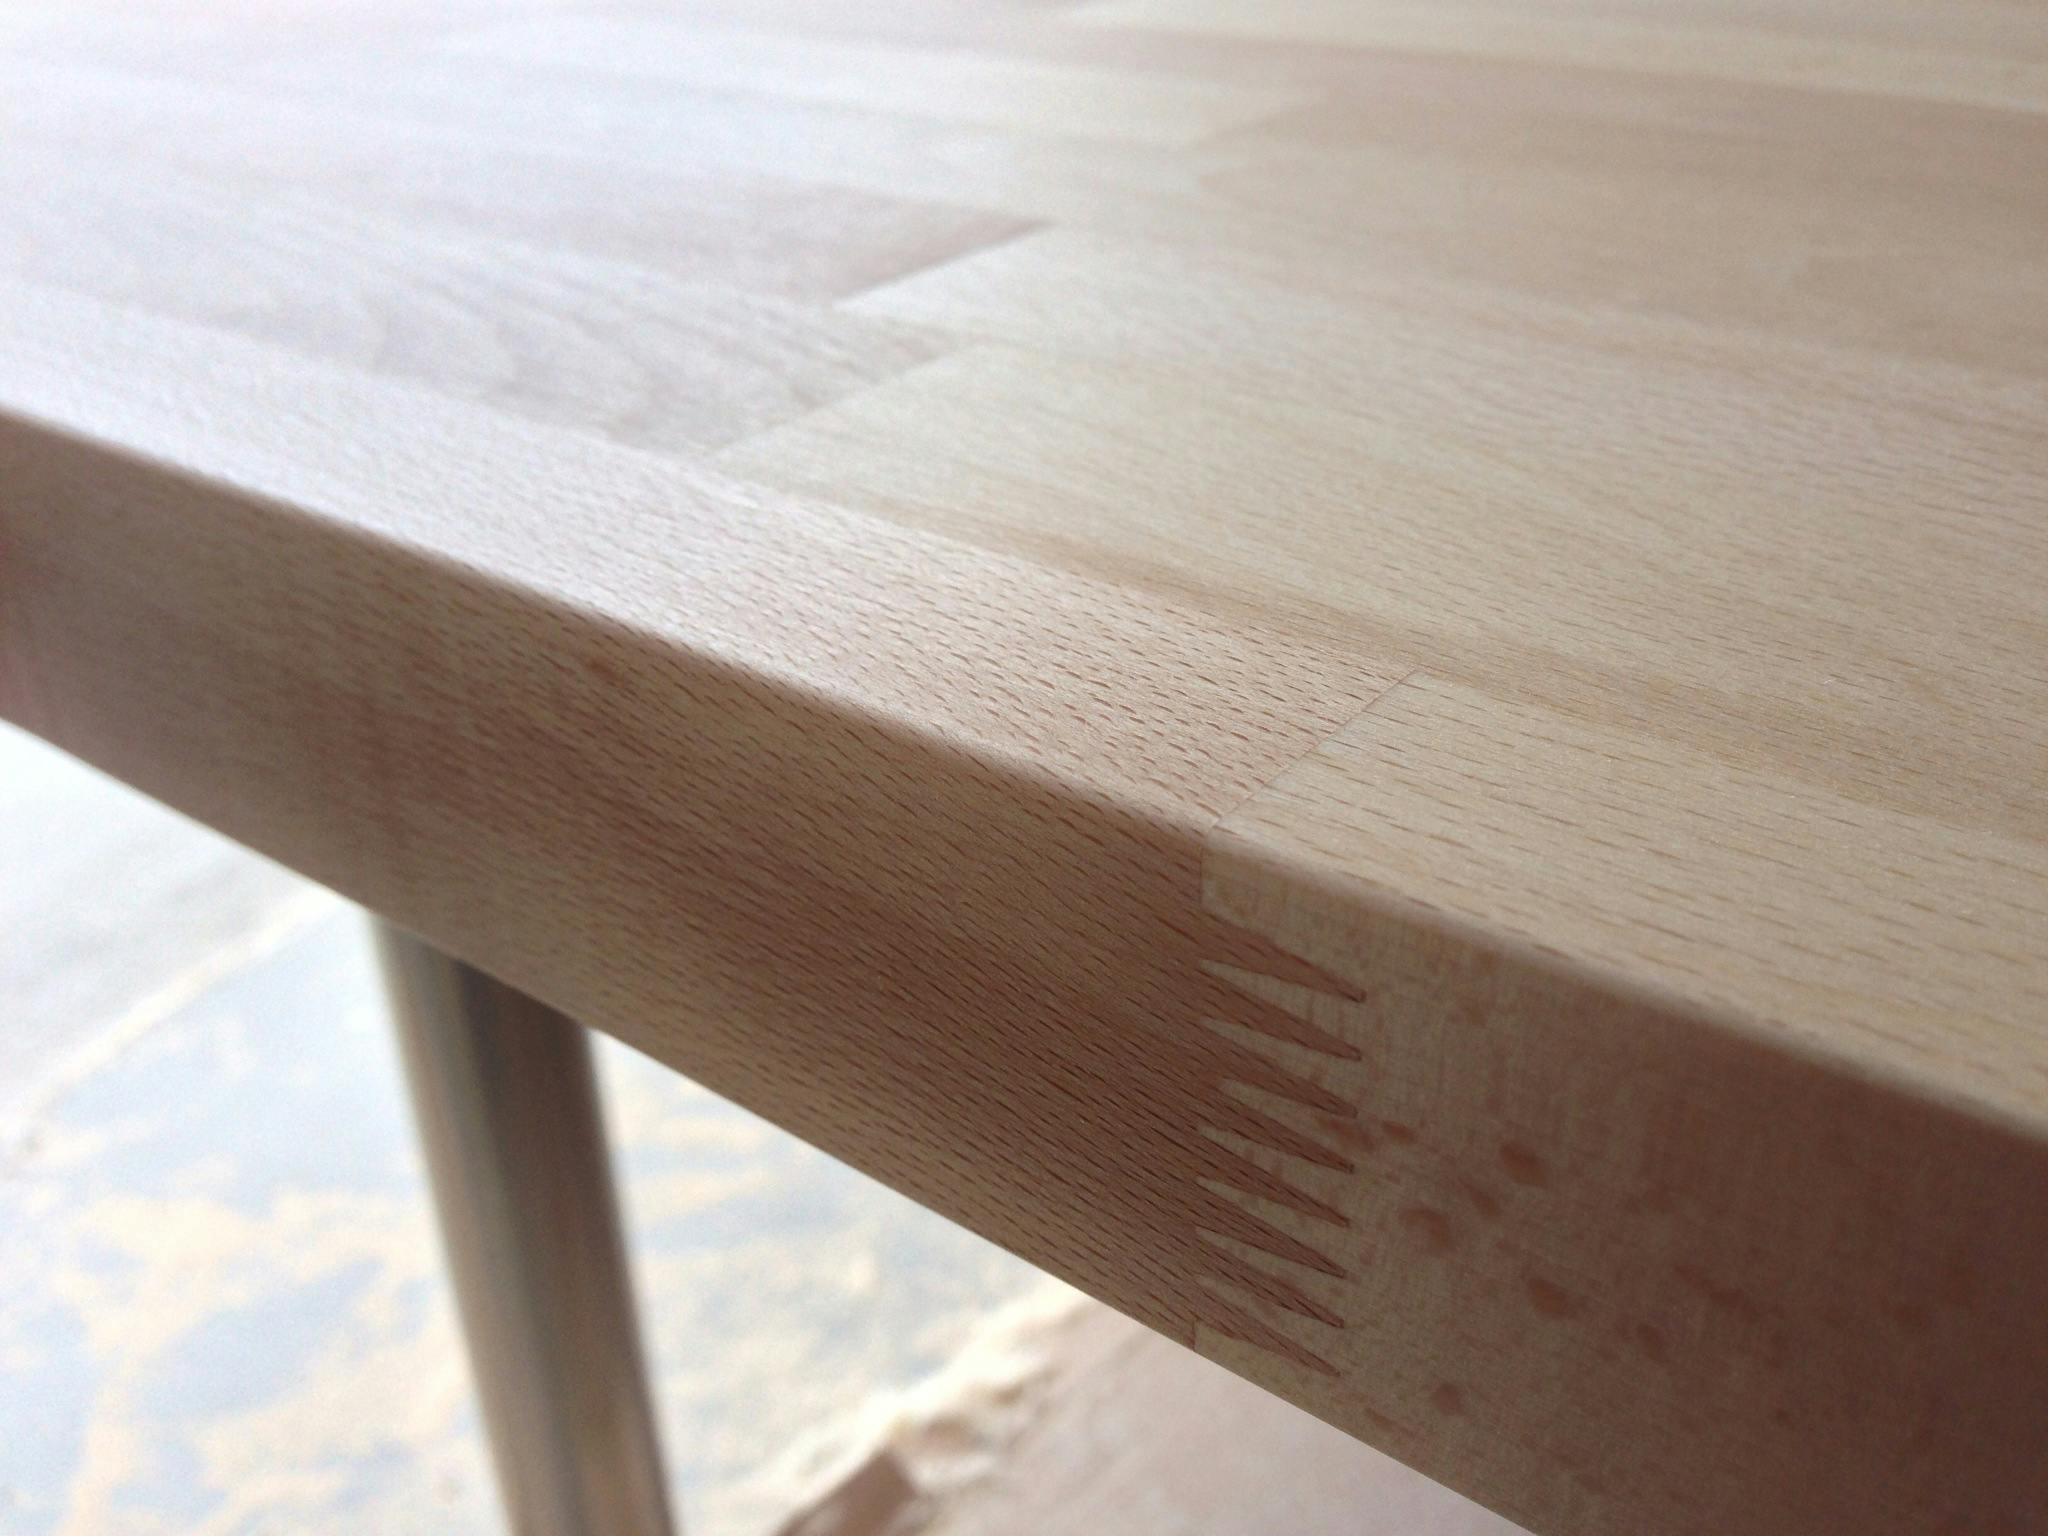
That's it for this one countertop. One more just like it and we're ready to start assembling the tabletop.
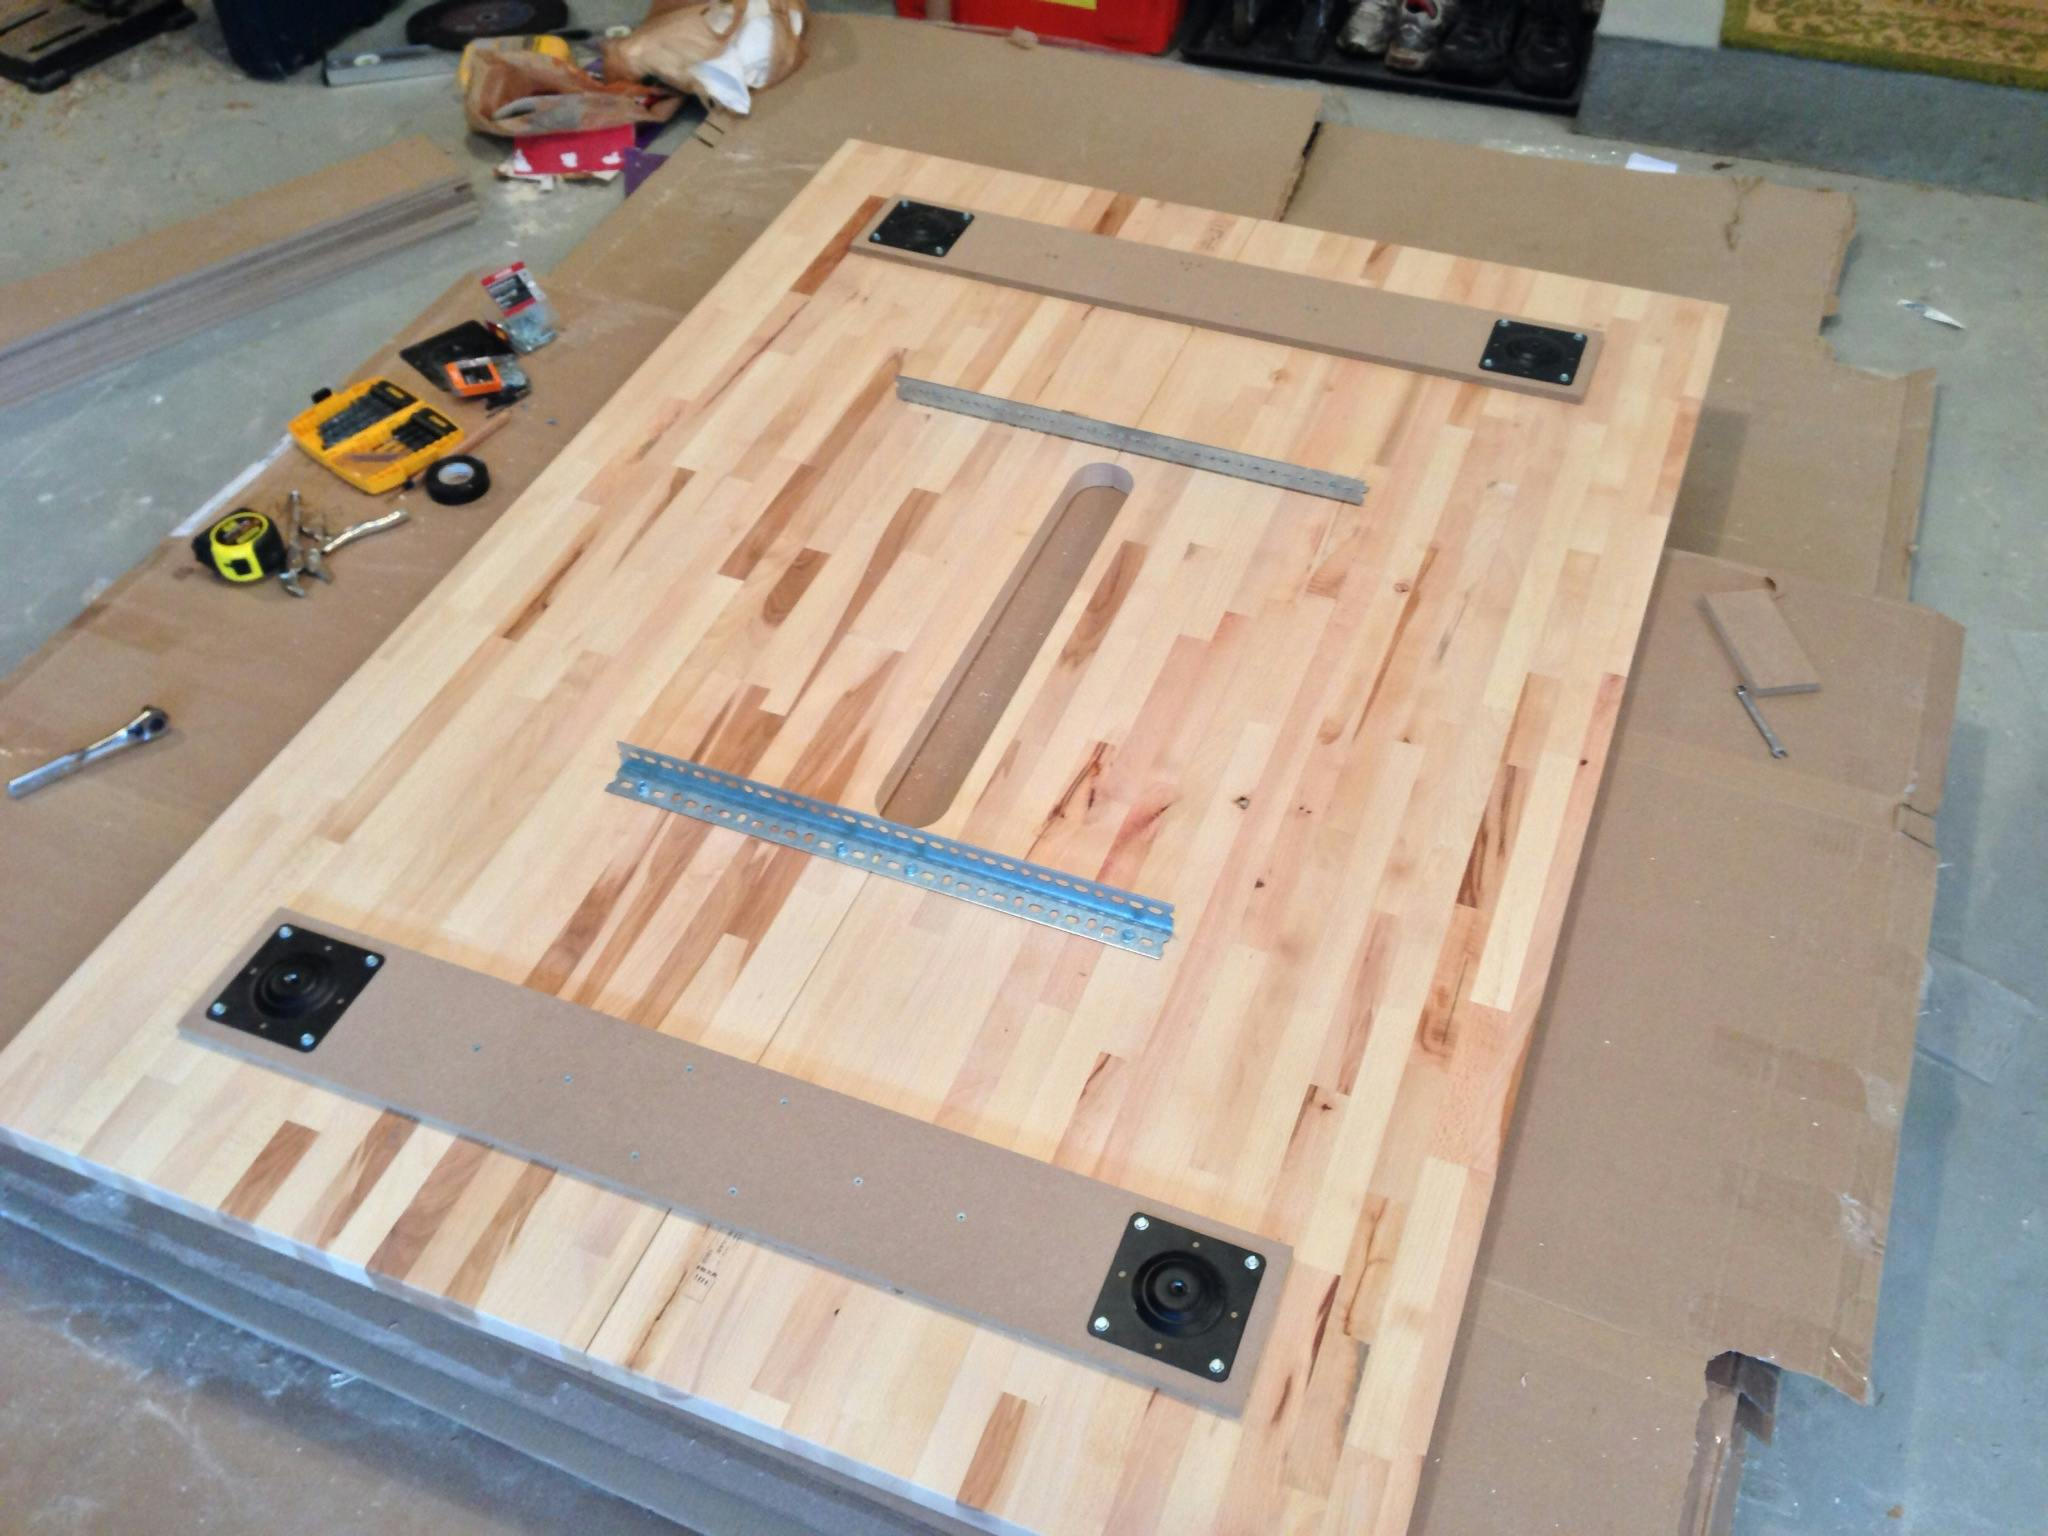
Attaching the Stringers
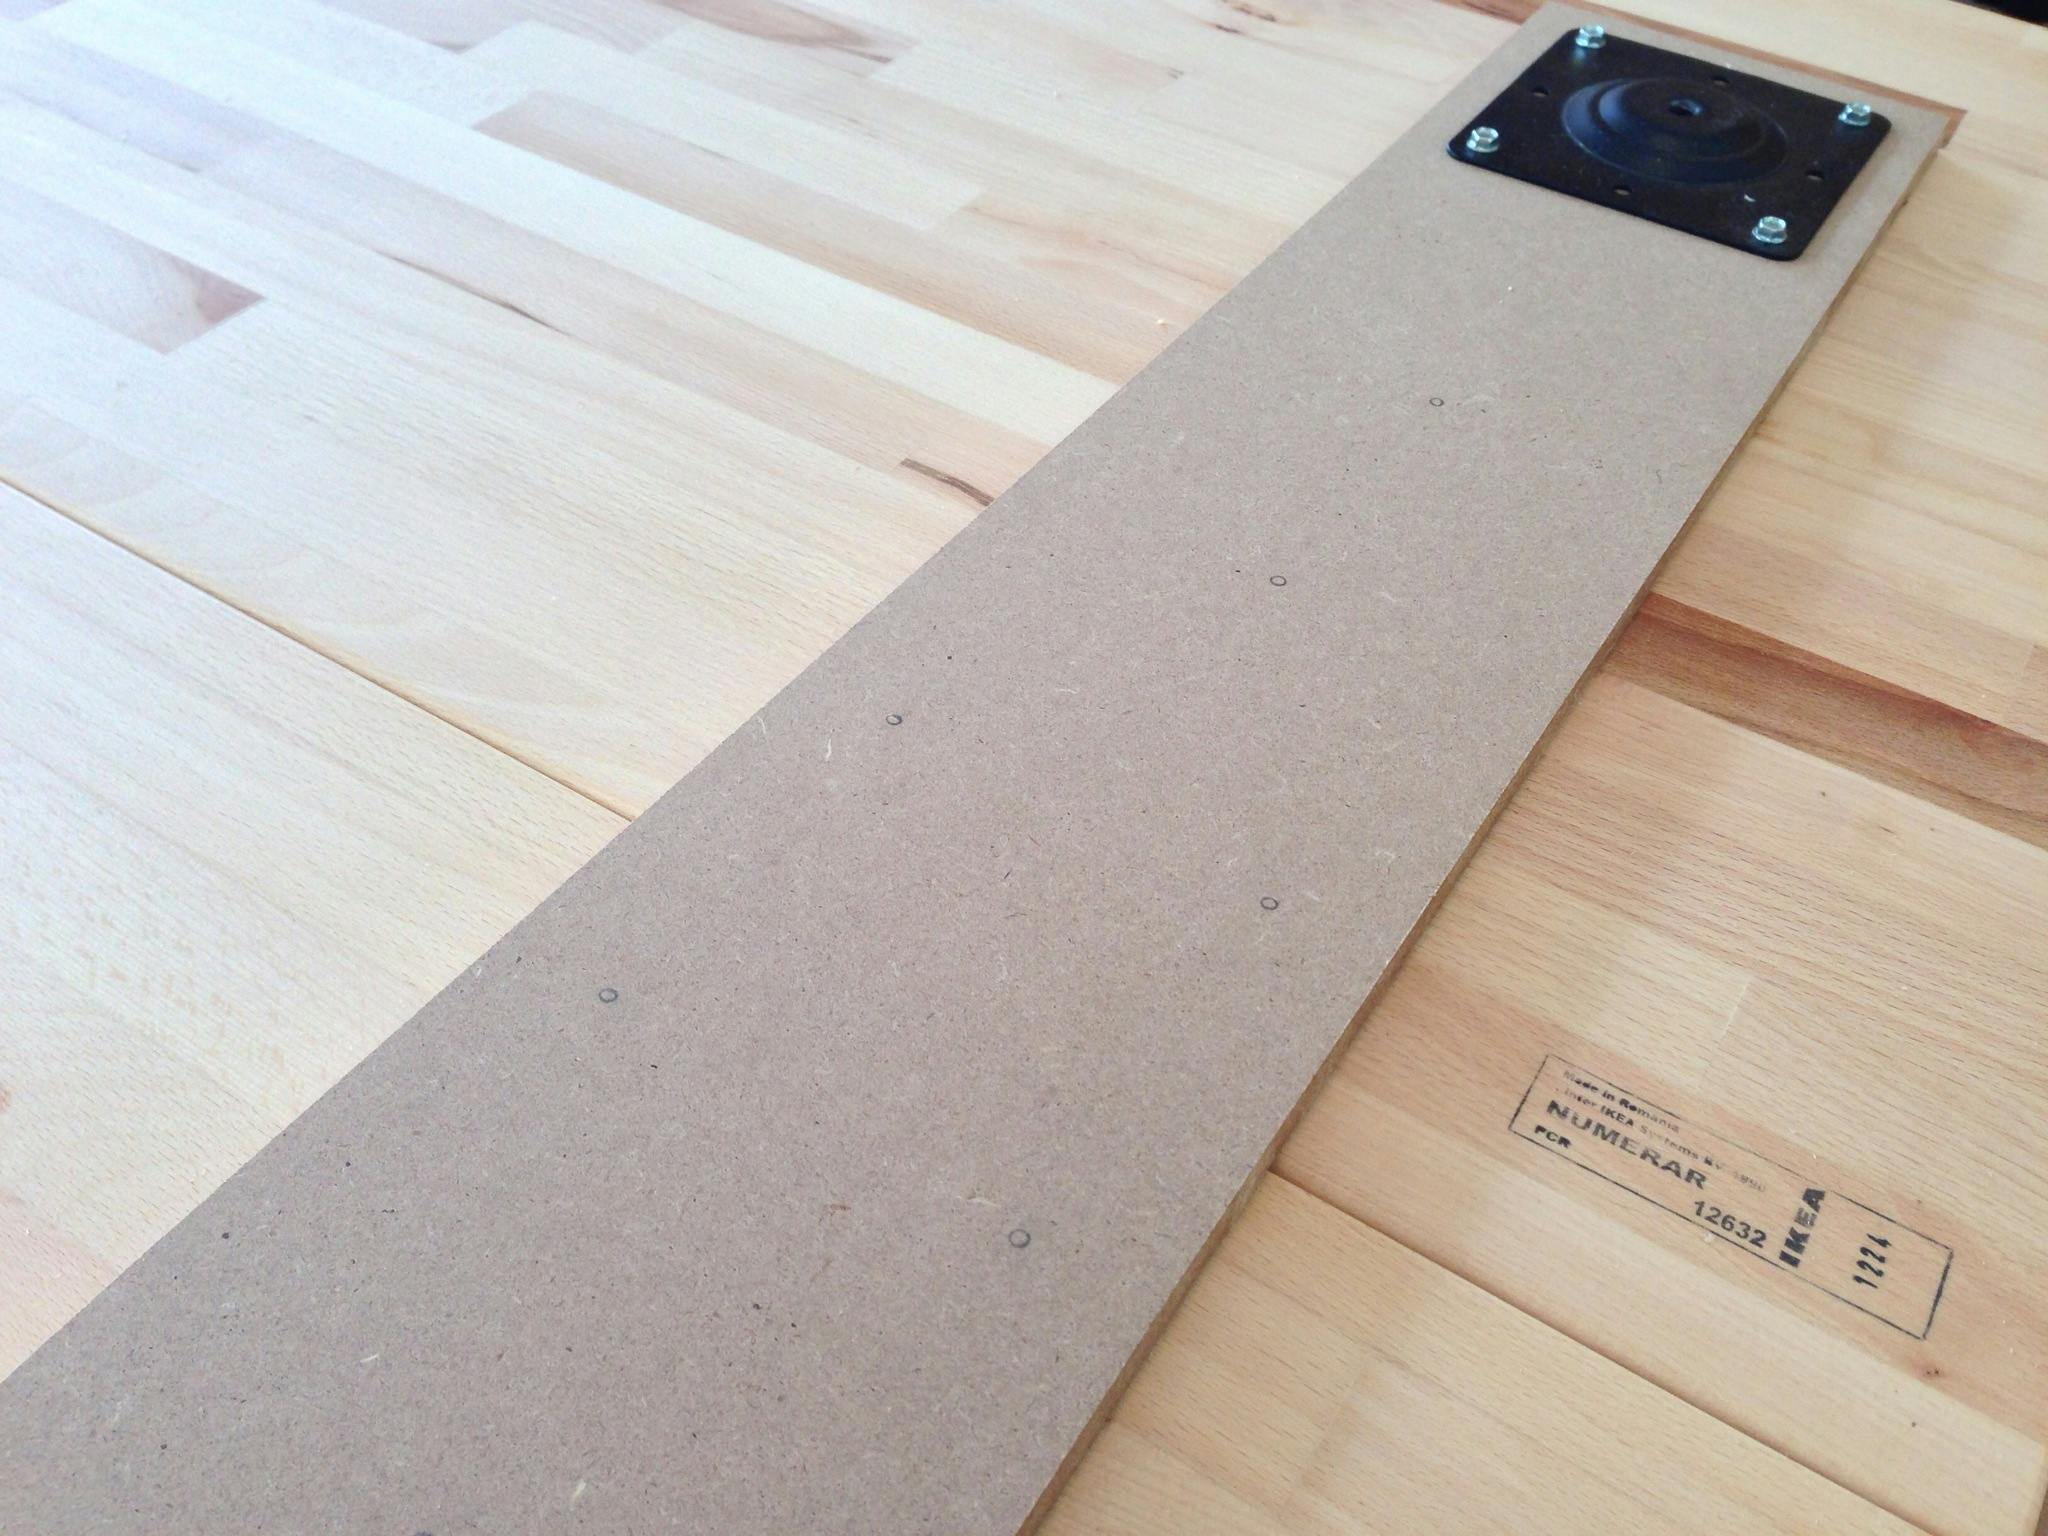
The first thing to do was flip the countertops over so that we're working with the underside. Sounds obvious, but important! Each countertop has one better side intended to be the top surface. IKEA stamps the underside.
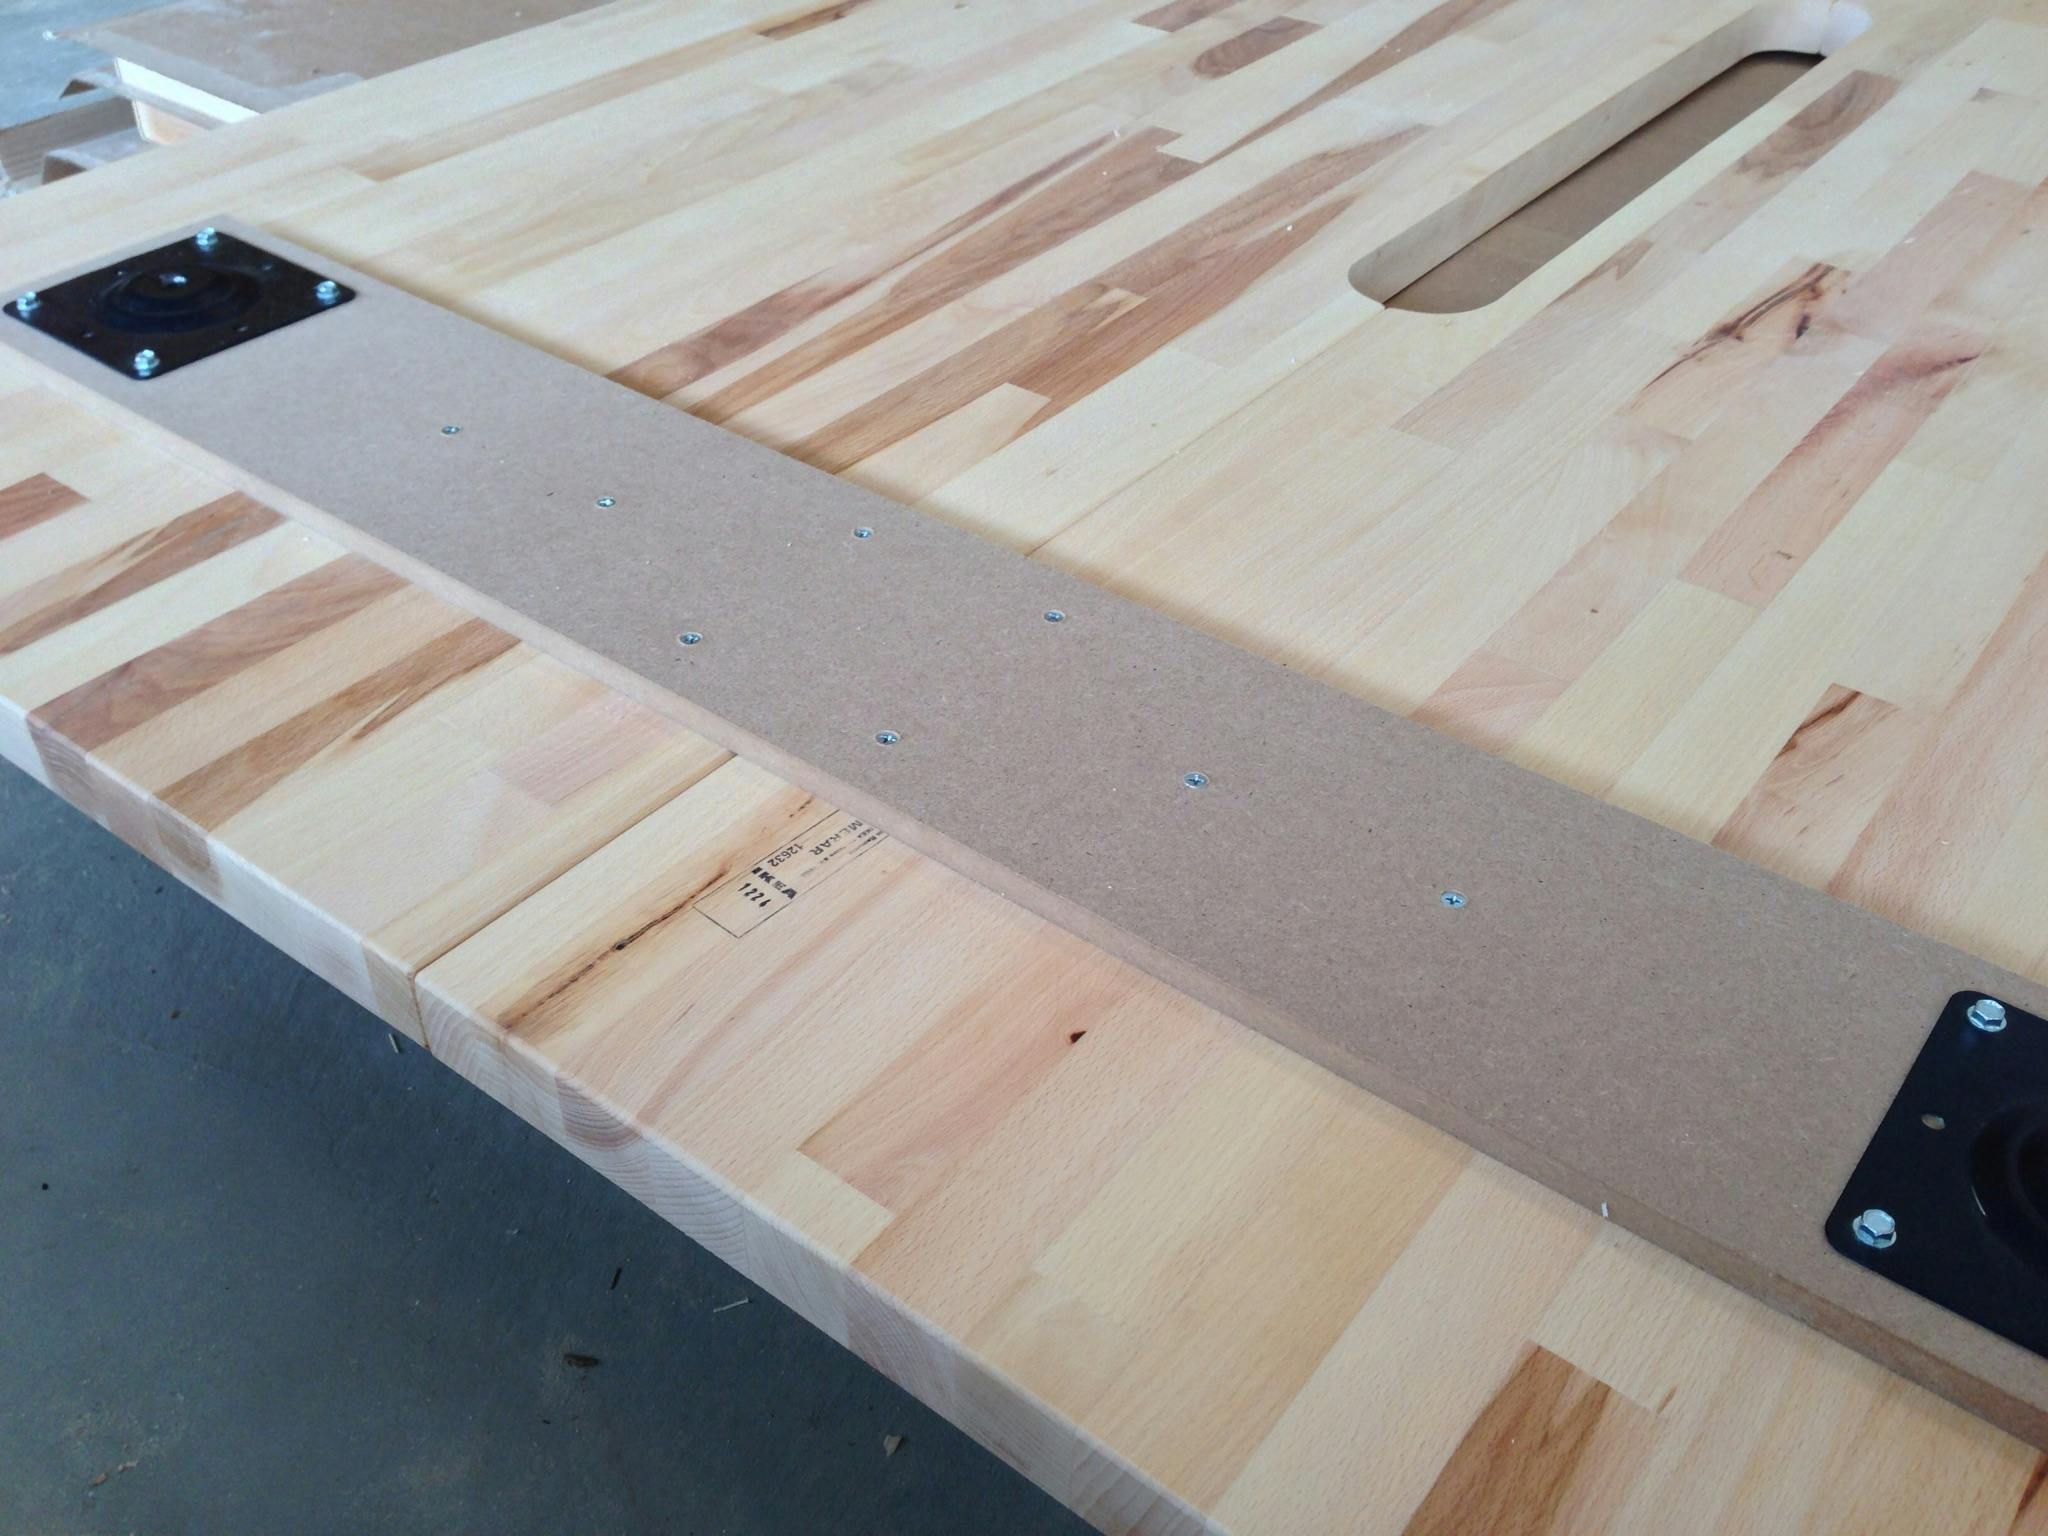
I cut the stringers from the same MDF I used for the groove template. These will attach the two countertops to each other and provide locations to attach the legs. The MDF is ½" thick, giving us our desired height once the legs are attached. Each stringer has four holes pre-drilled at each end to accept leg brackets. The holes should be big enough for the screws to pass through easily. We don't care about the screw threads gripping in the MDF.
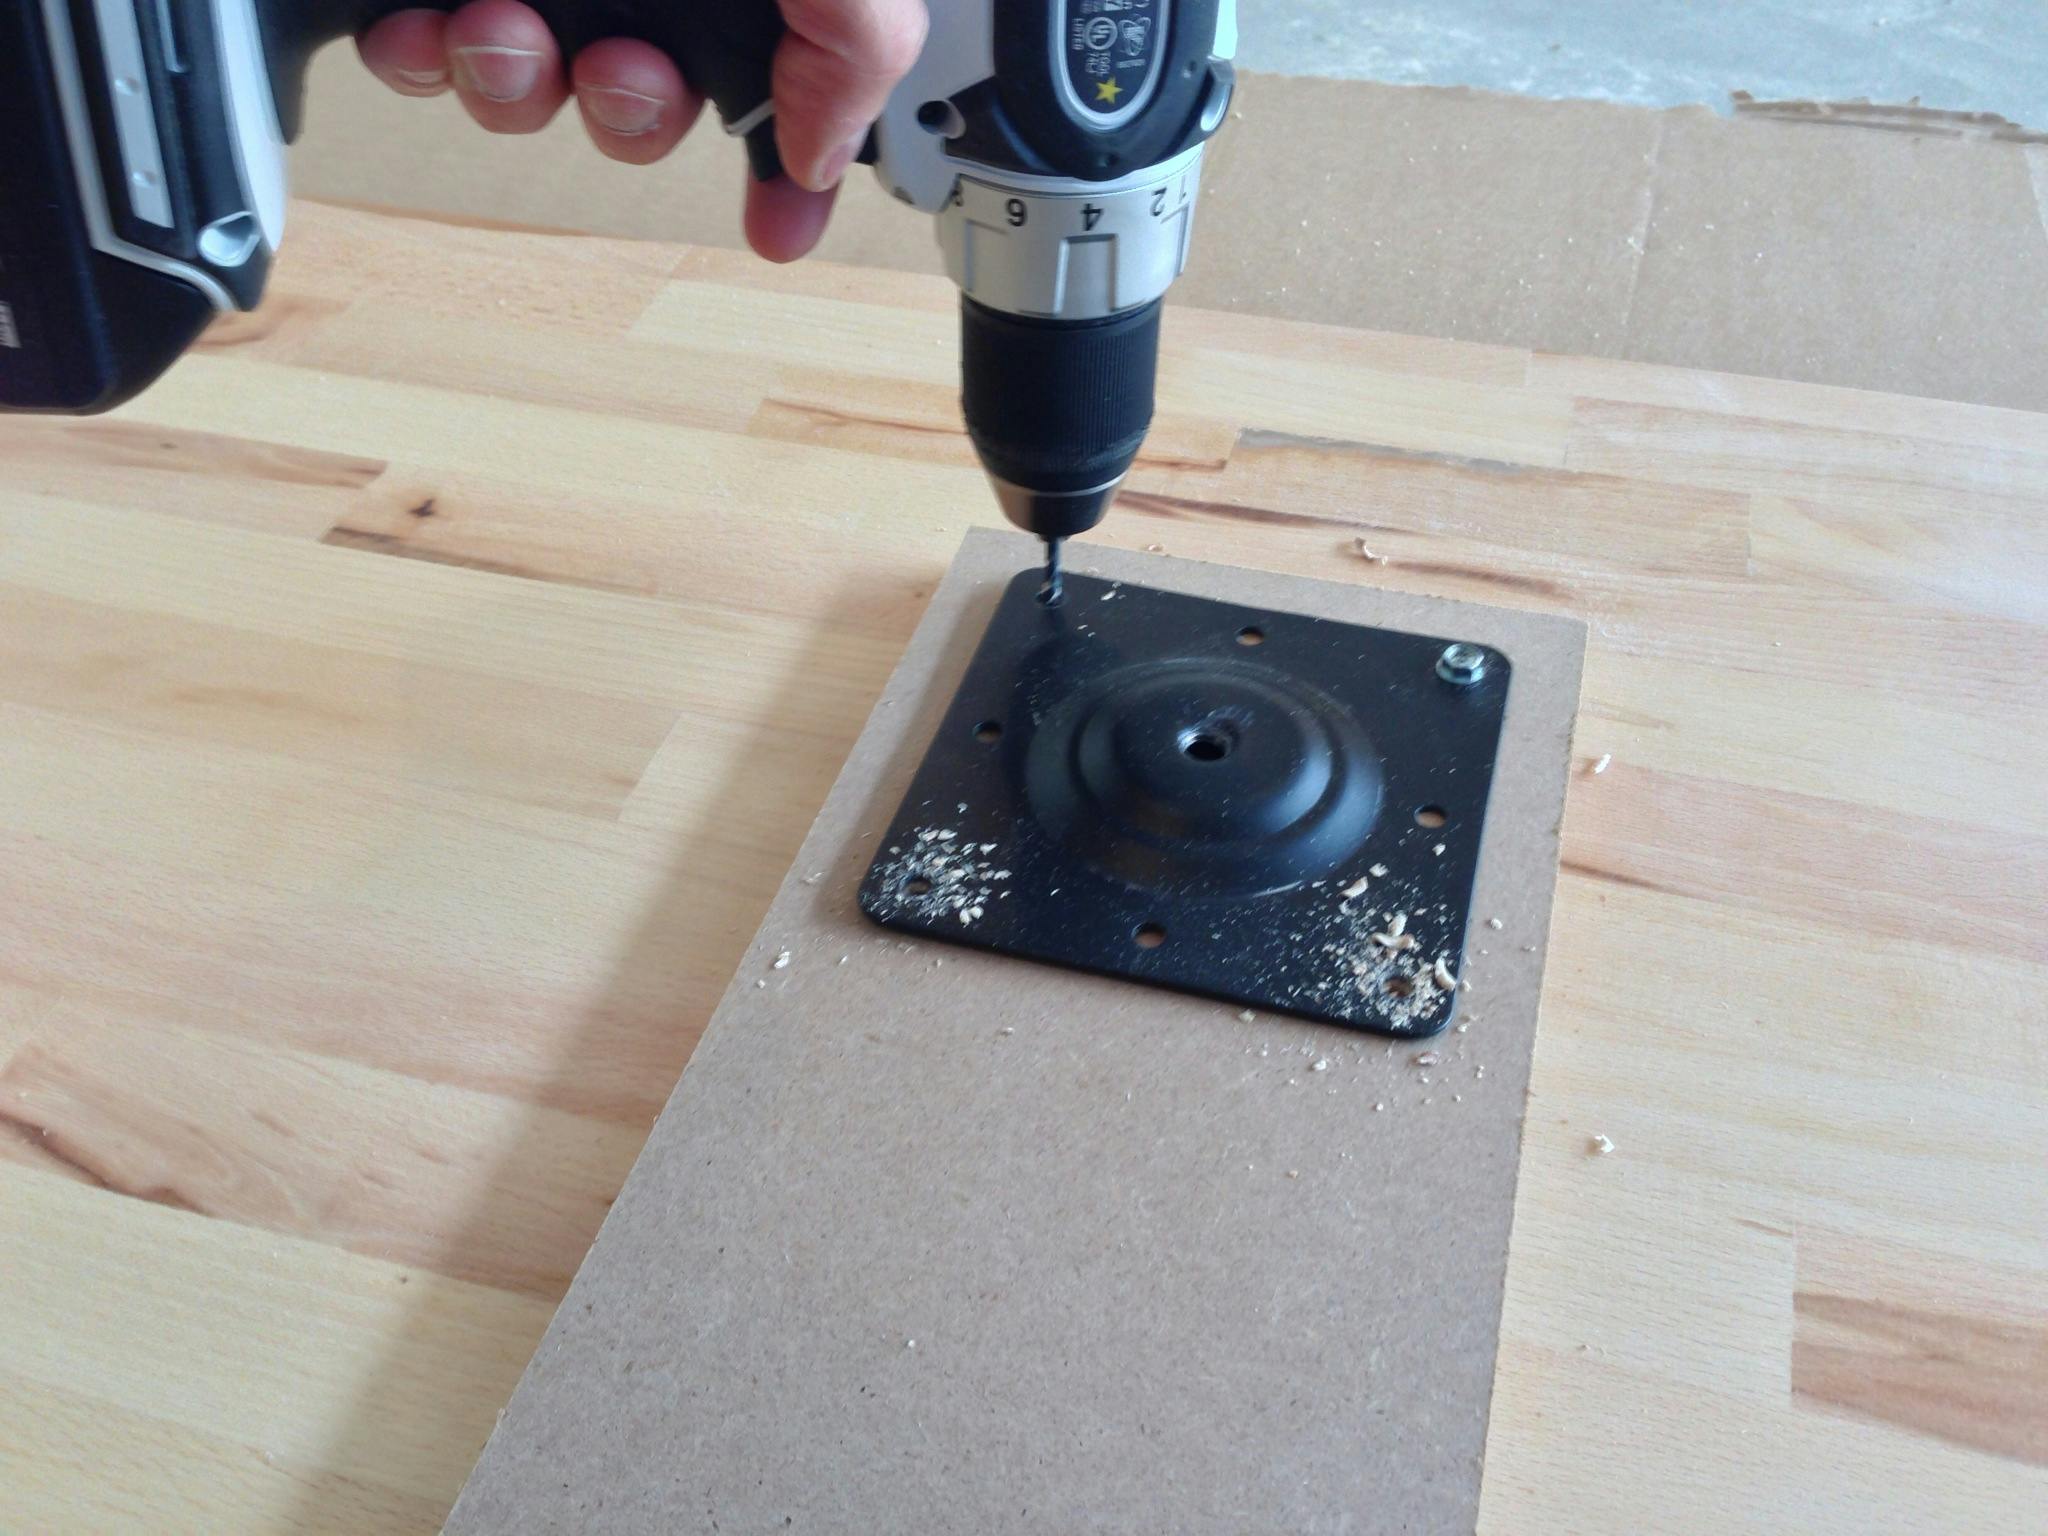
The stringers are positioned so that the center of each leg is 8½" from the edges of the table. This will put the surface of the 3" legs 7" from the edges of the table to allow enough room between them for stools but also help avoid accidental kicking. Once the stringer is in position, we drill through one of the holes in the stringer and attach the bracket and stringer to the countertop. Then we make sure the other end is still in position and repeat. When one screw is attached in each countertop, we can pre-drill the remaining holes.
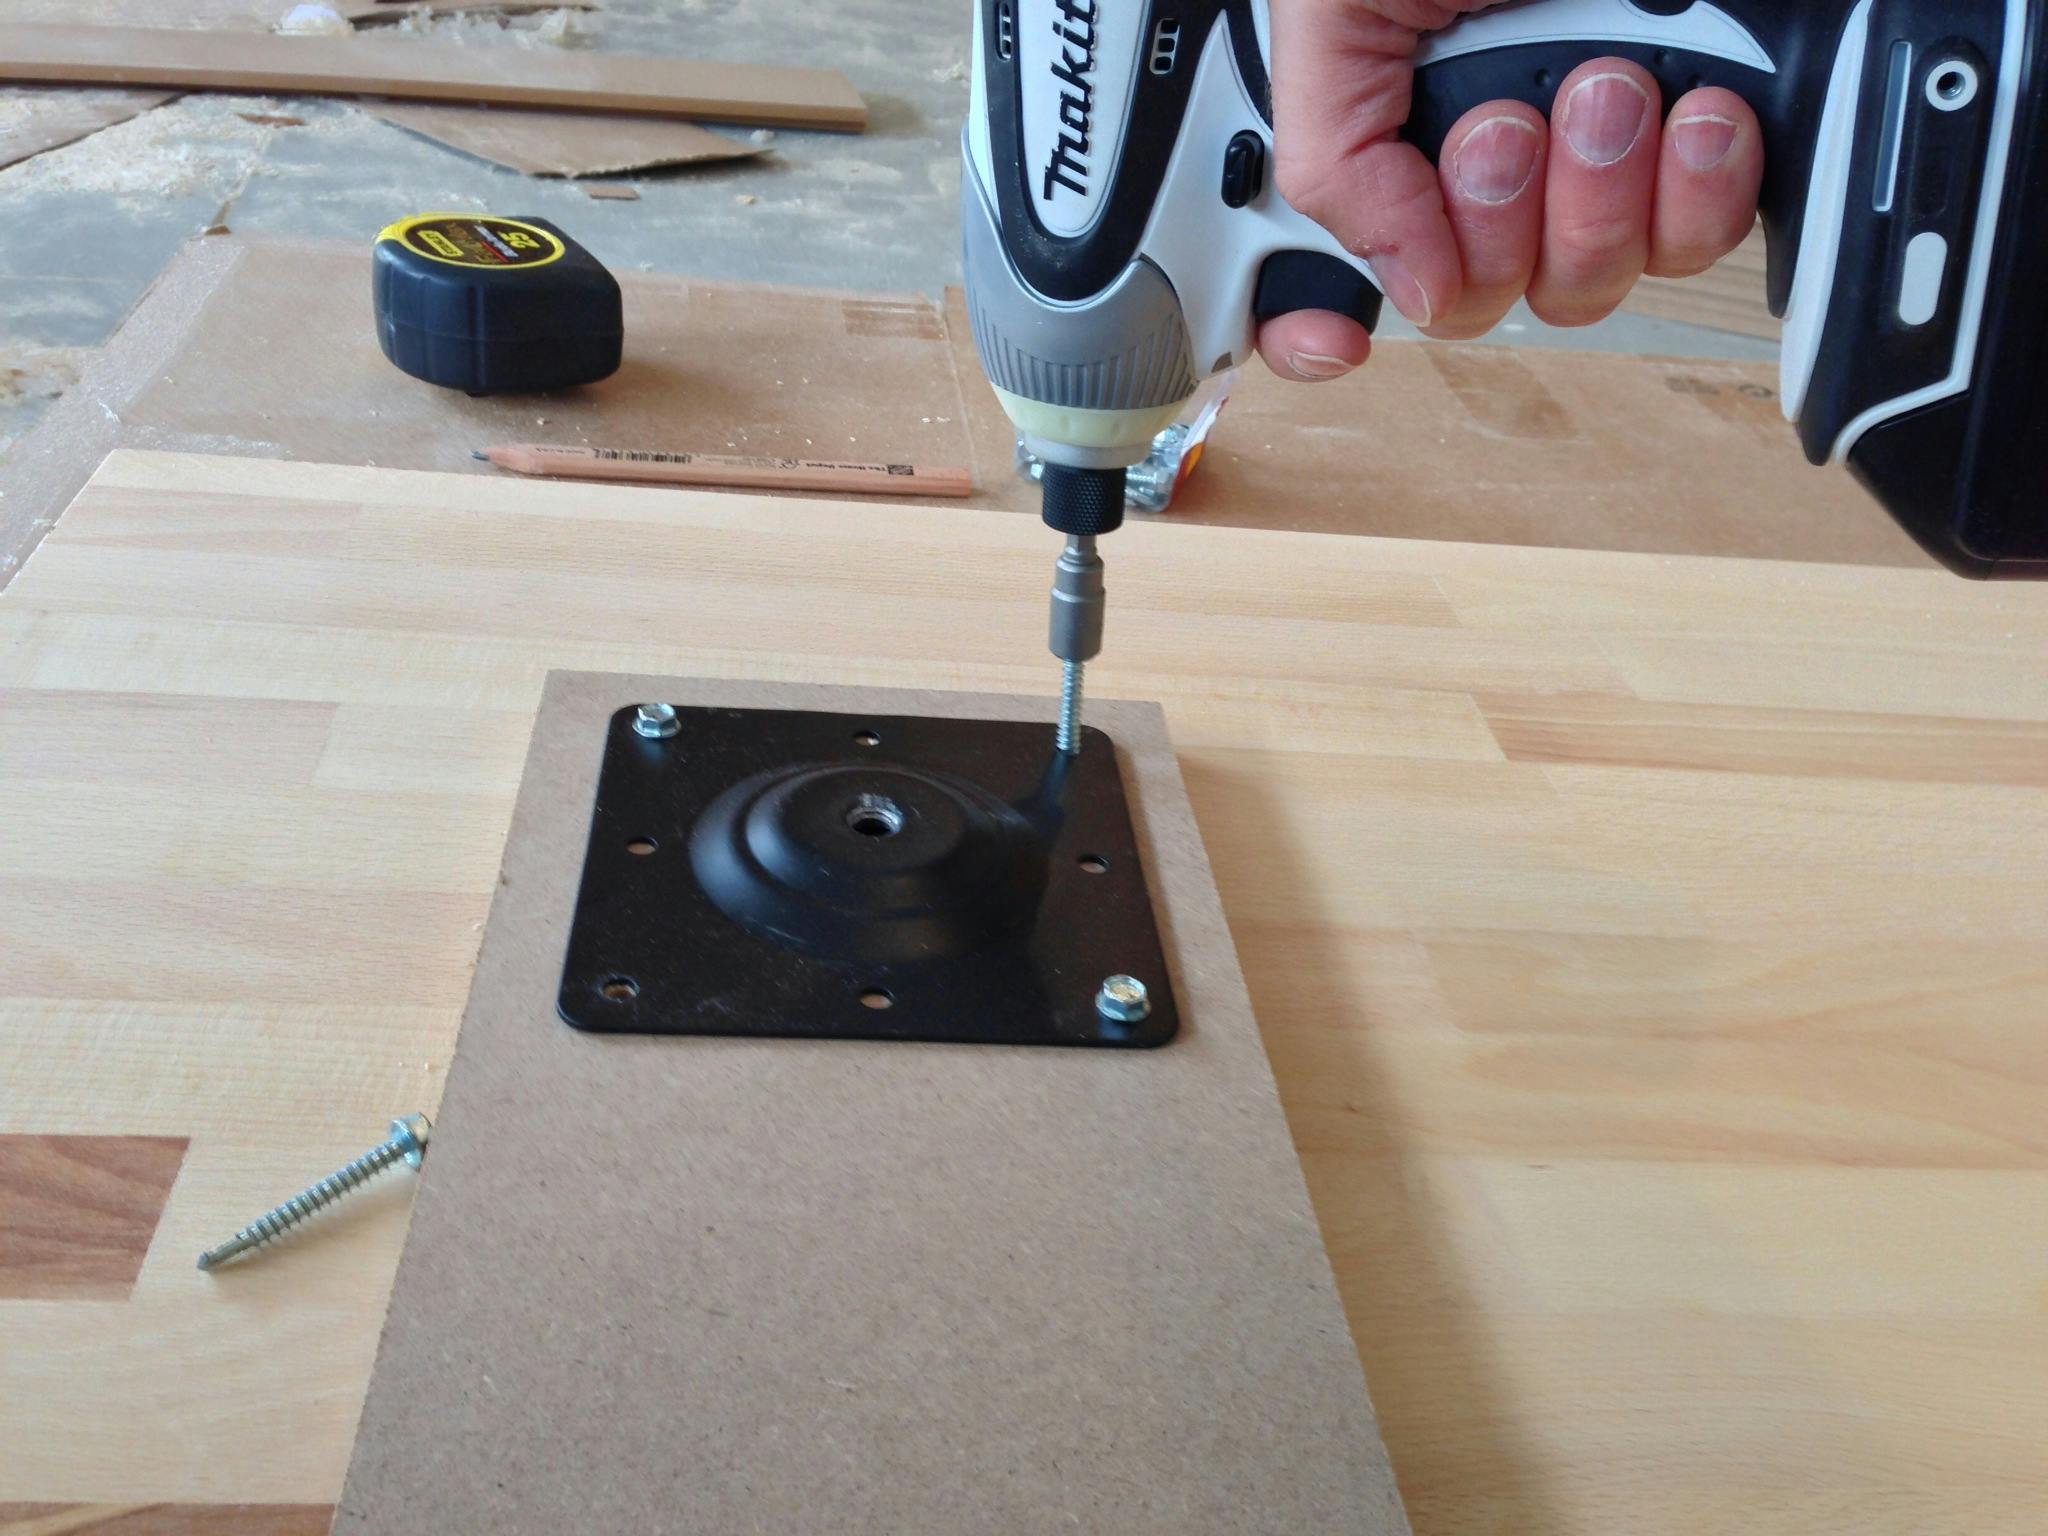
Starting with the opposite corner of each bracket, I secure the remaining screws. I'm using \#12 1½" self-tapping screws. They have great grip and are easily driven in using a power nut driver.
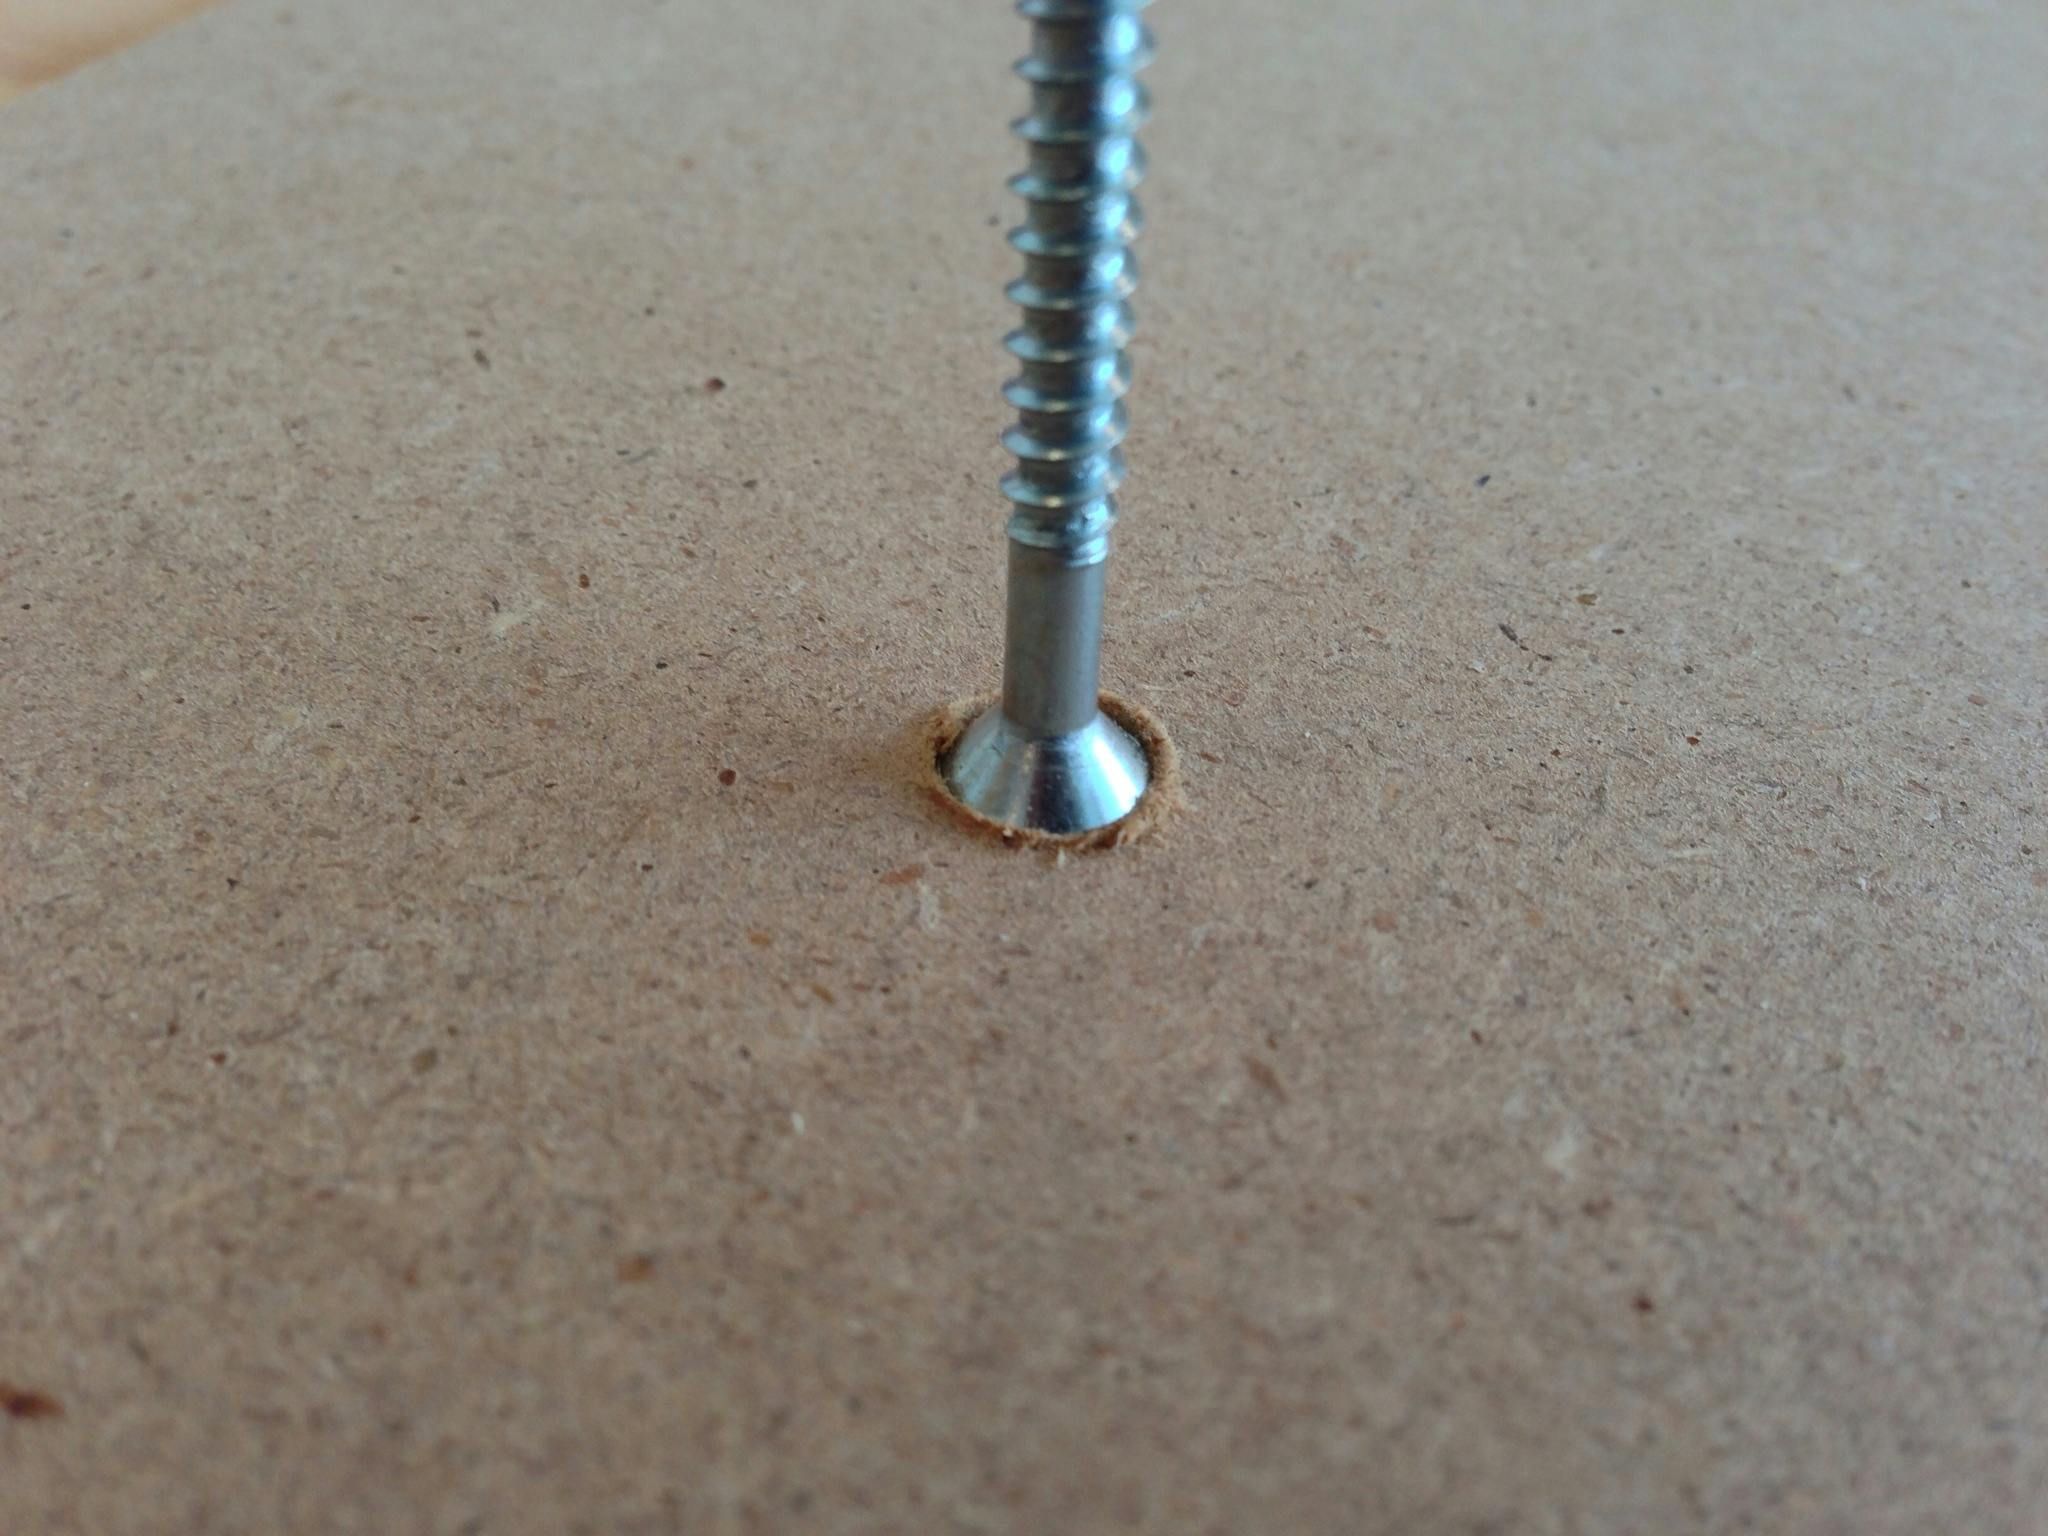
MDF is fairly flexible so in order to minimize the length of the stringer that is subject to bending forces, we'll attach the length of the stringer to the countertops using standard \#10 1½" wood screws. Each screw hole is marked, pre-drilled and countersunk.
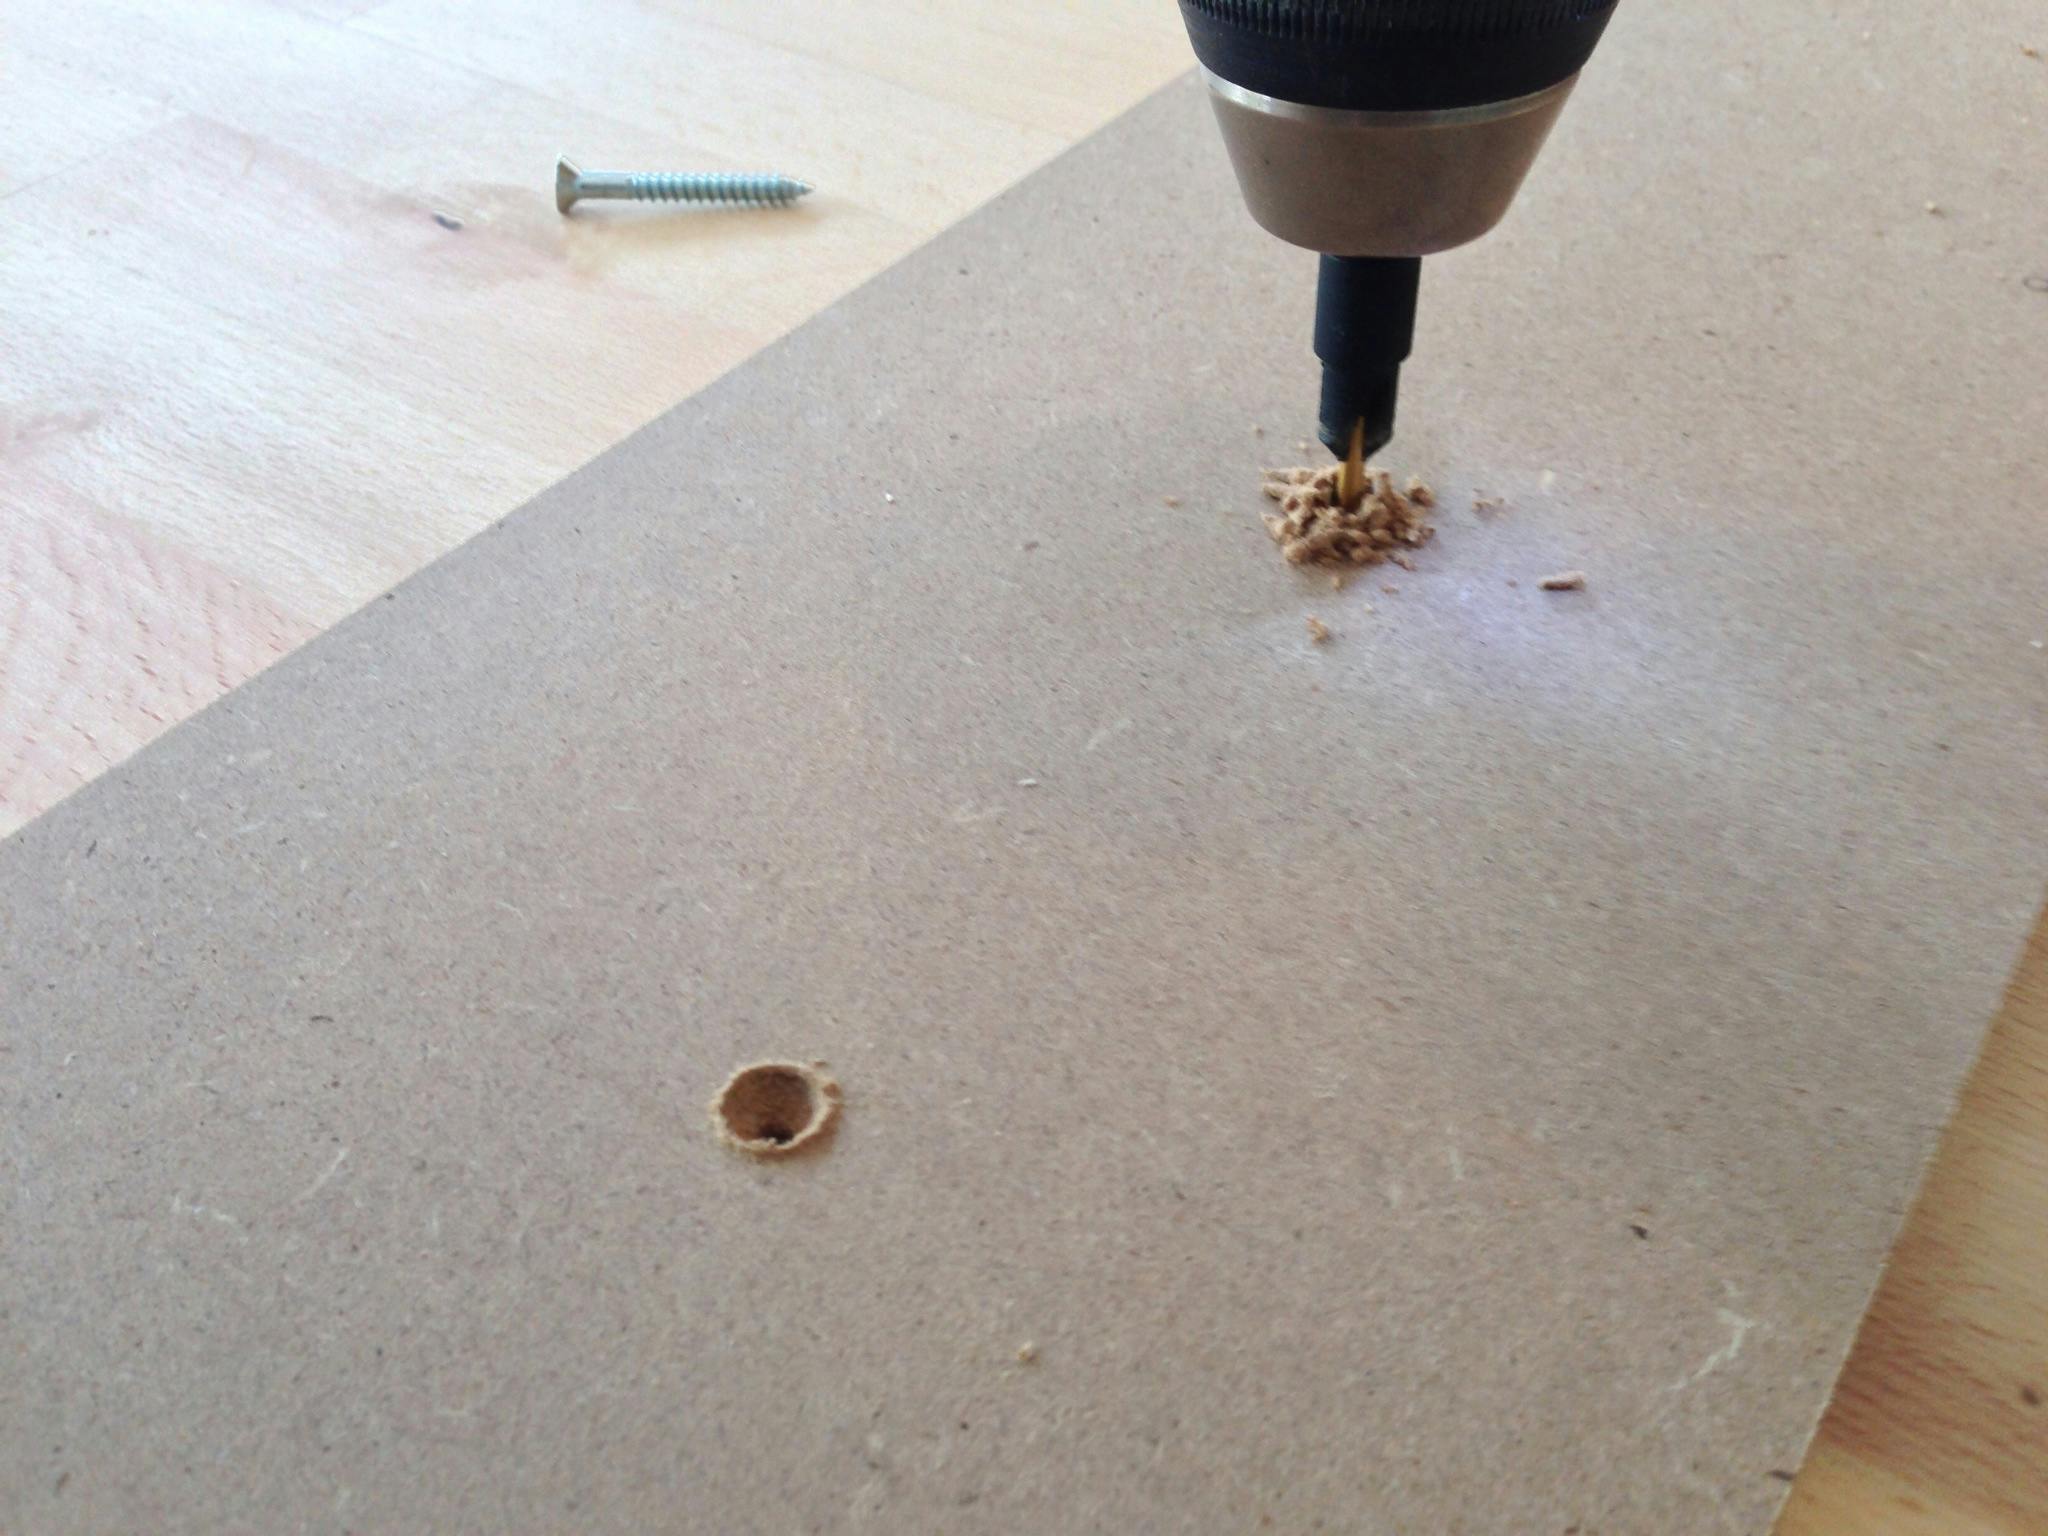
You can gauge how far to countersink by drilling until the head of the screw fits in the opening.
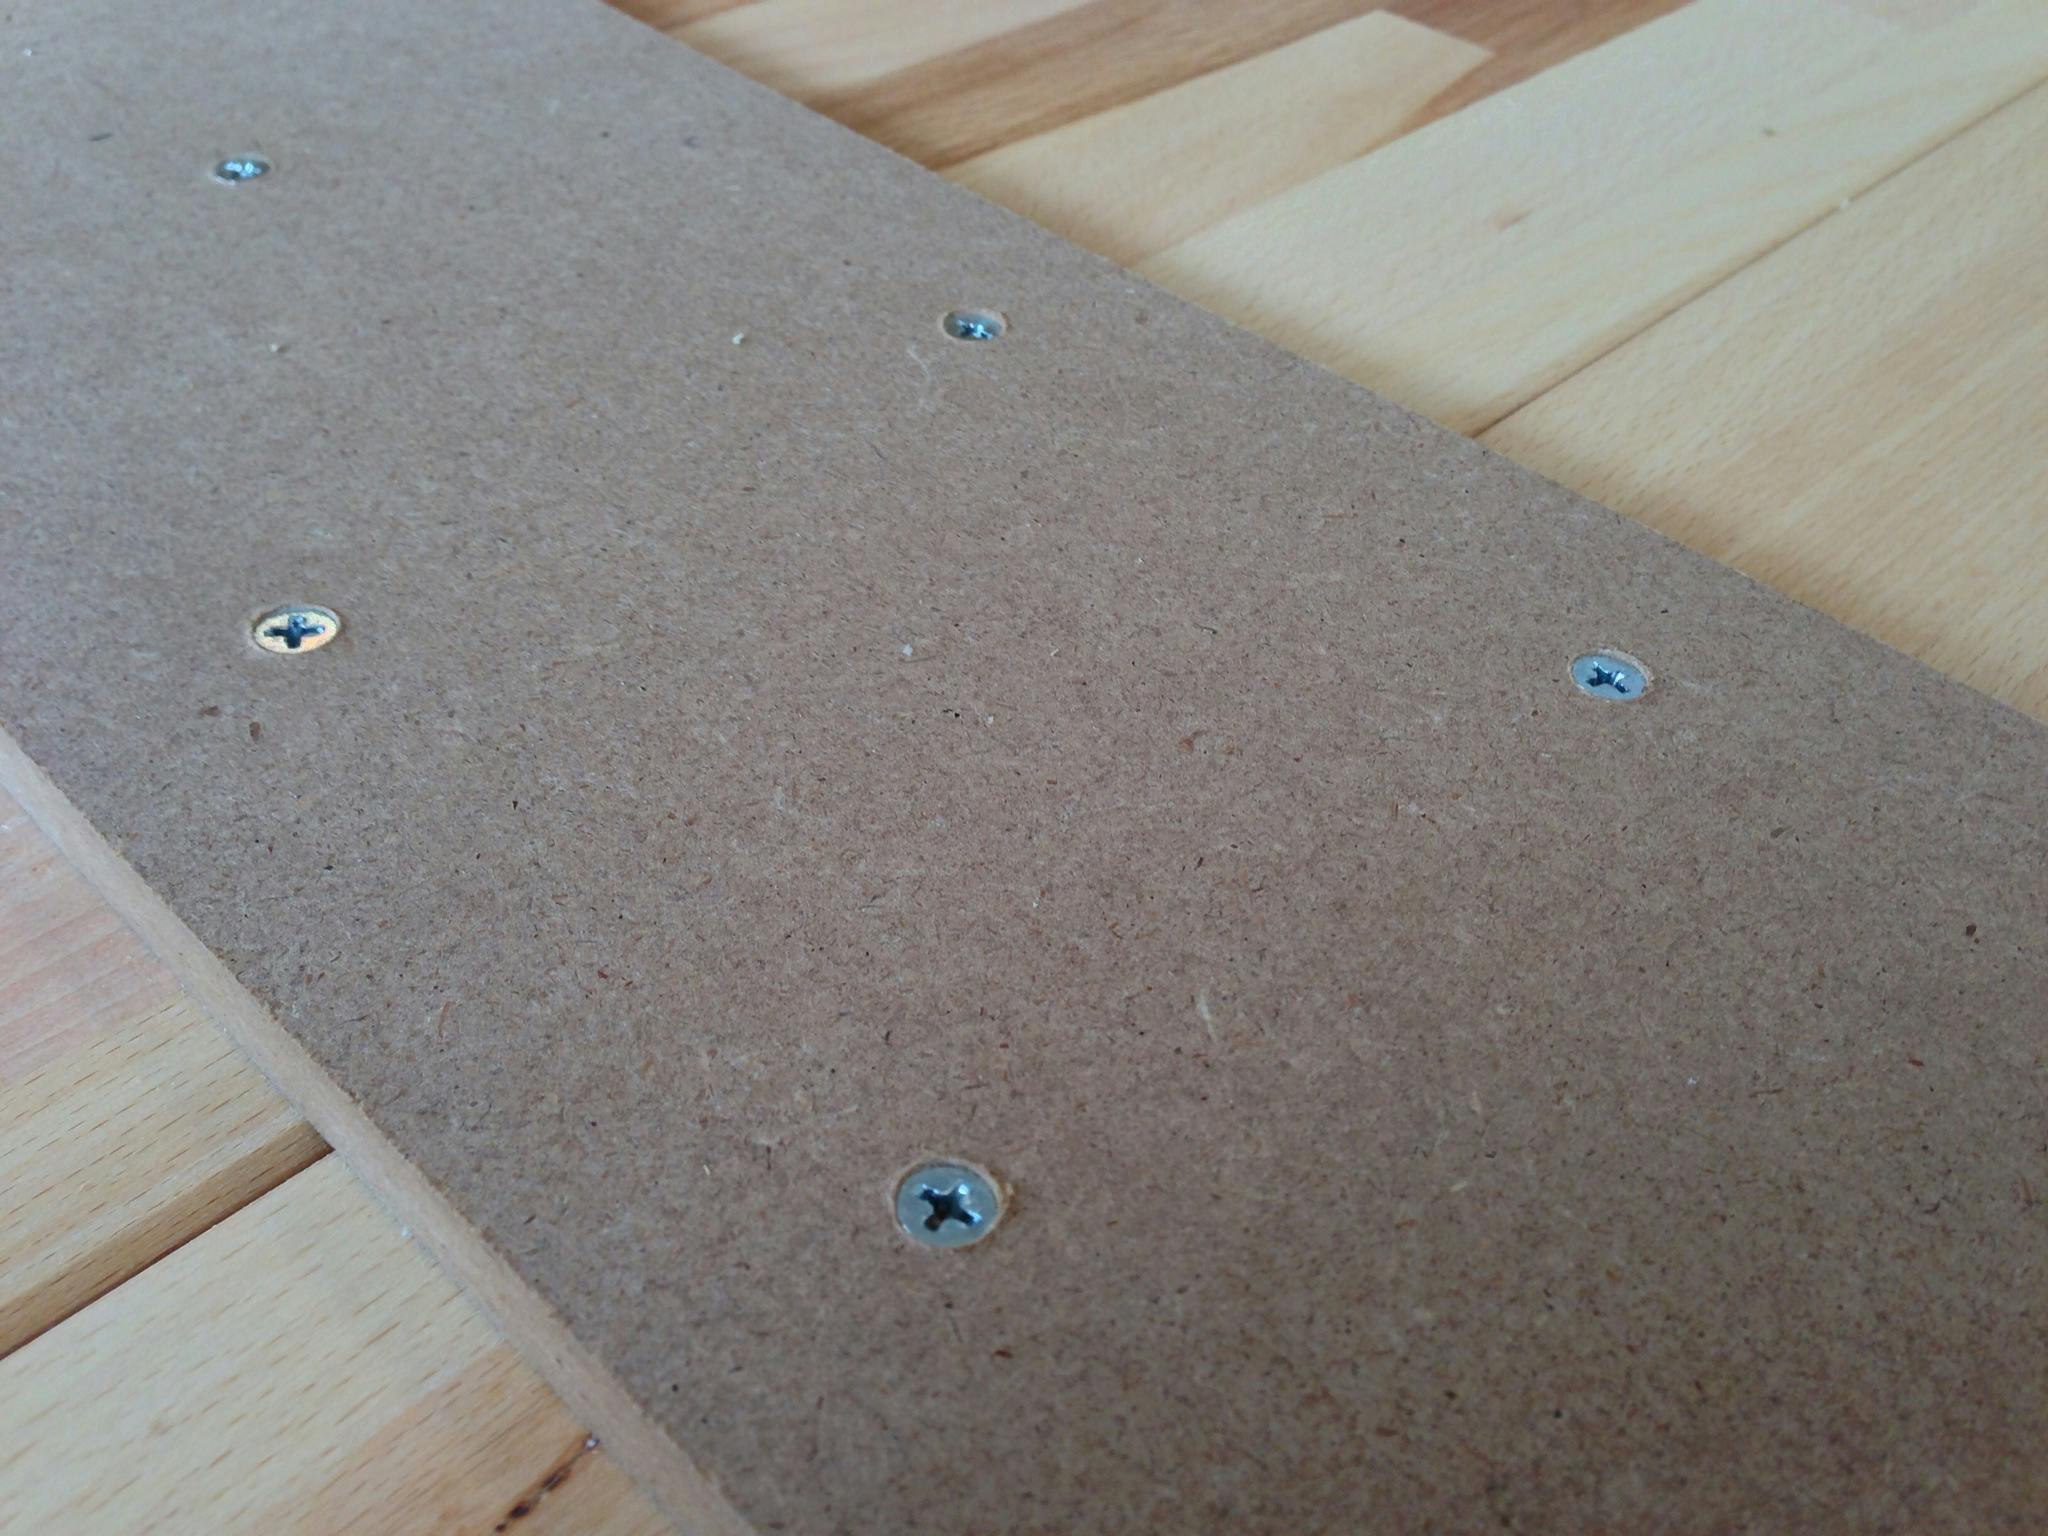
Then all screws are driven.
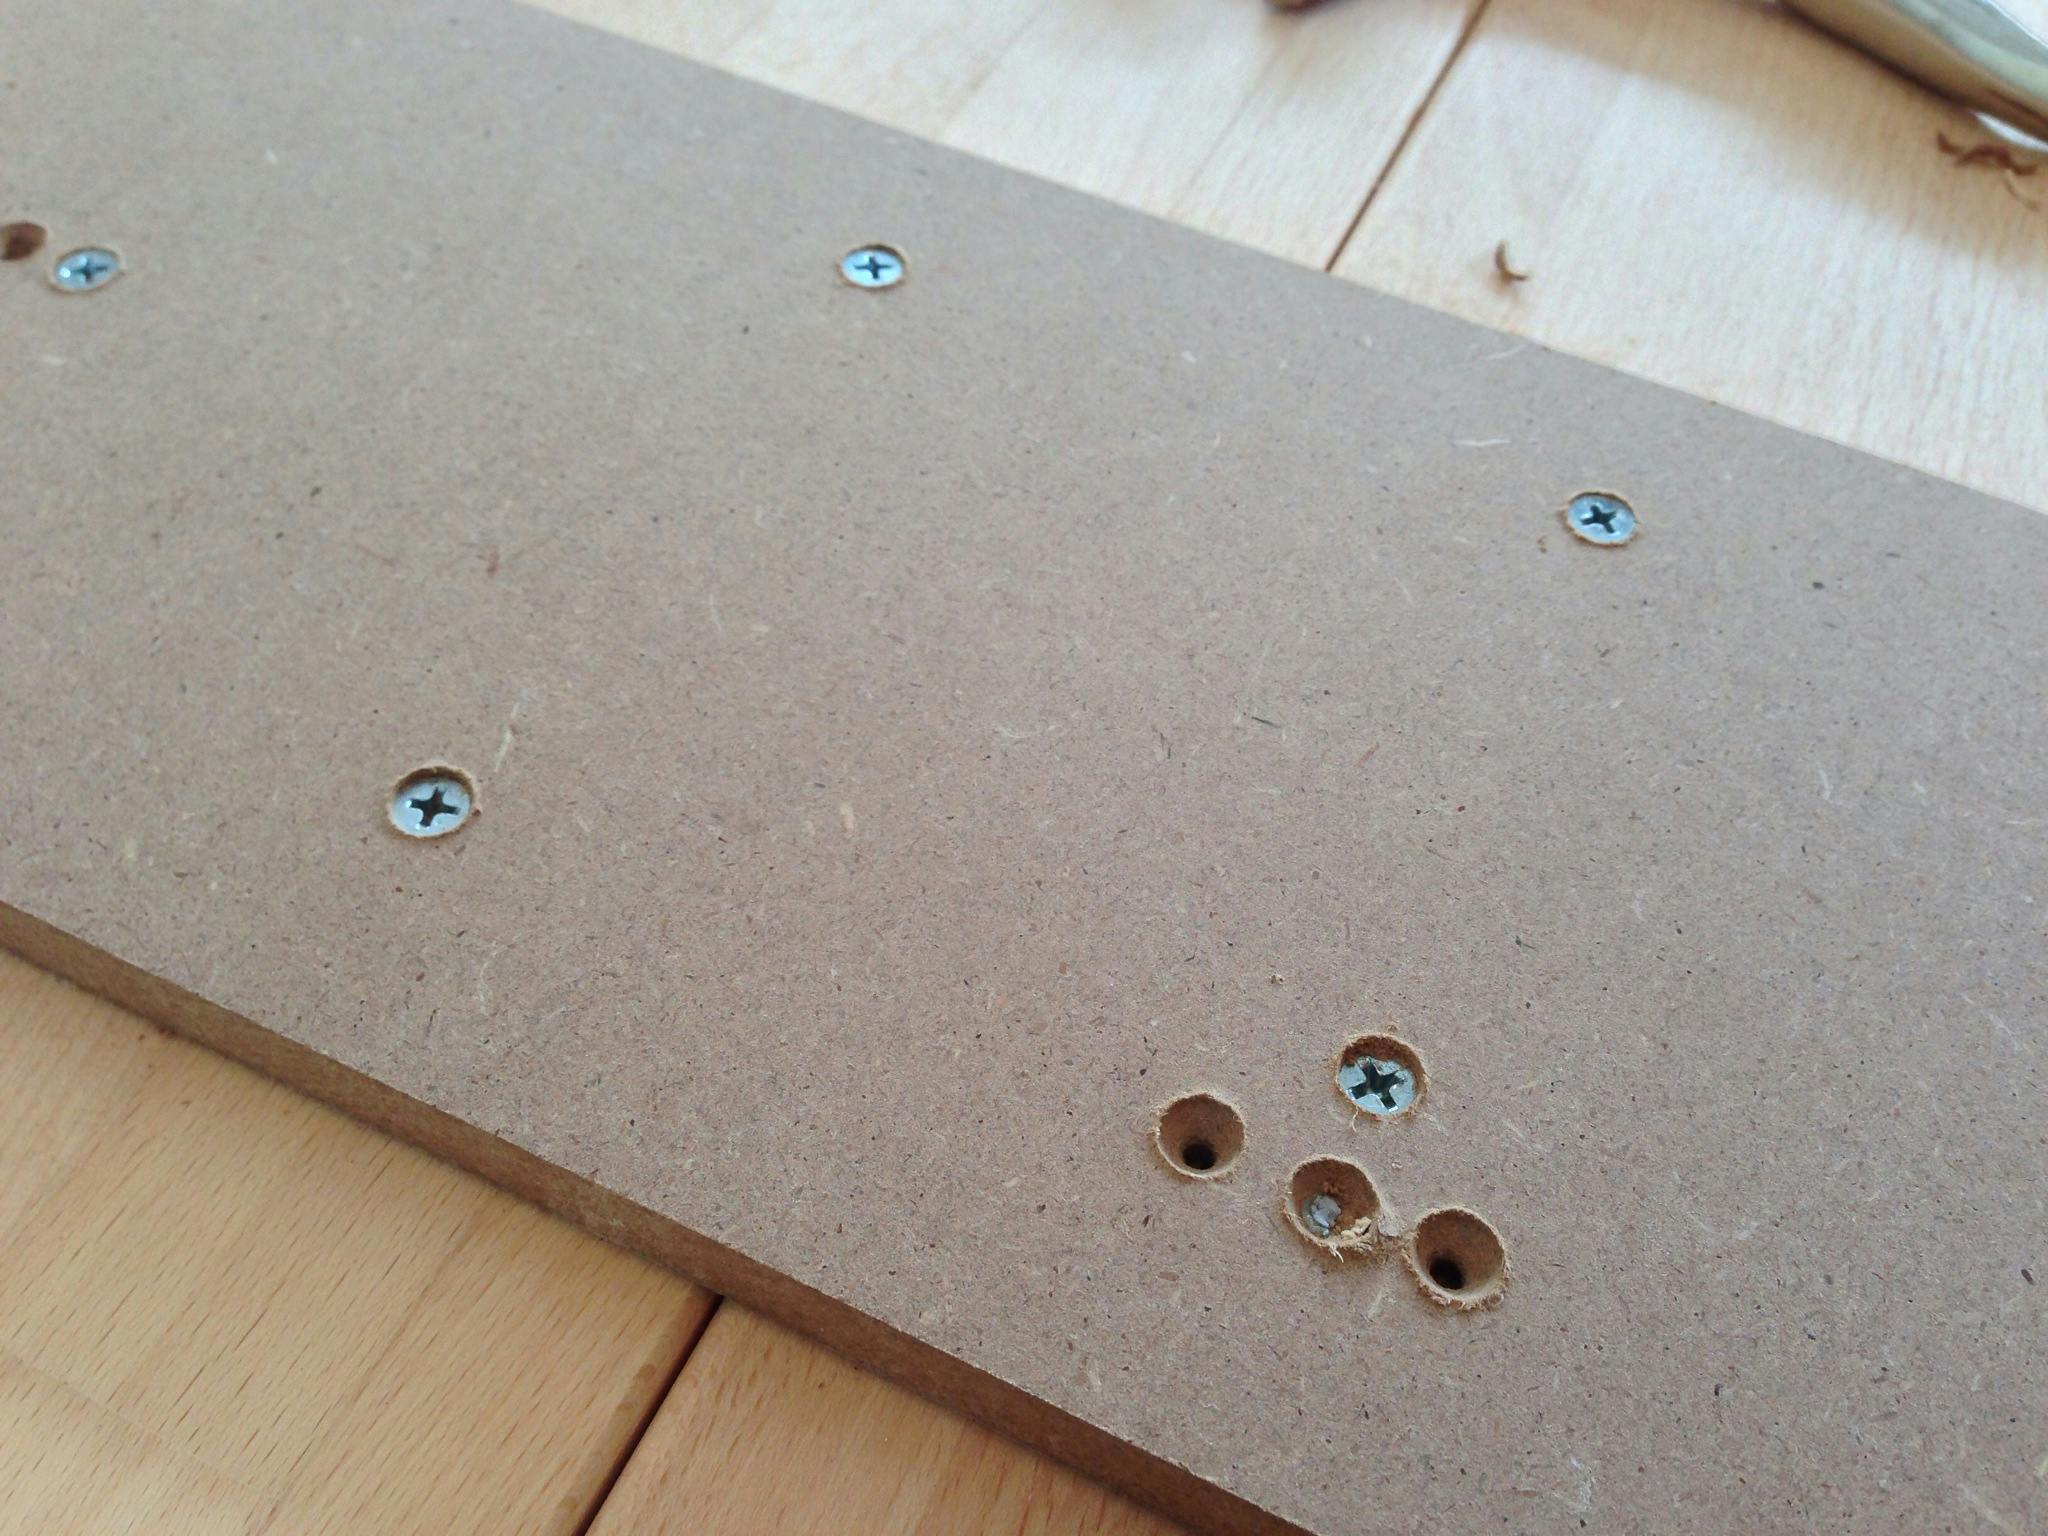
What Not to Do
I learned the hard way that if your pre-drilled holes aren't big or deep enough, the beech countertops are so hard that you can spin the heads right off of the screws. As usual, trial and error wins the day!
Adding the Supports
Butcher block is resistant to flexing lengthwise but our tabletops have a structural weakness. The load of cinema displays near the center of the table will subject each countertop to twisting forces. To distribute those forces across both countertops, we're adding angle iron supports near the center. Angle iron is extremely resistant to flexing.
Each support is attached to the countertops using four \#14 1¼" self-tapping screws; two at the far ends and two near where the countertops meet.
Be careful when pre-drilling these holes. Without the addition of the ½" stringer, it's easy to pre-drill too deep and drill through the top surface of the tabletop. To prevent that, wrap the drill bit in tape at the proper depth so you know when to stop drilling.

Once pre-drilled, we tighten the supports to the tabletop with screws and washers.

Wrapping Up
At this point, this tabletop is done! Flip it over and admire.

Placing the table in position is a two-person job (at least). First we put the tabletop upside-down on the floor where we want it to be. Two people are needed because each tabletop weighs around 200 lb. and they're big! The stainless steel legs are then hand-twisted into the brackets.
Finally, we flip the table over into its upright position. It's important to keep an eye on the legs while flipping the table. If a leg gets caught underneath the table while flipping, the lateral force can damage or break the leg and bracket. These legs are built for vertical forces.
The Result
We’ve been working from our new office for a couple months now and we love it. After applying a few coats of a clear satin finish, the tables are working and looking great. All told, we built two sit-down height and four stand-up height desks.


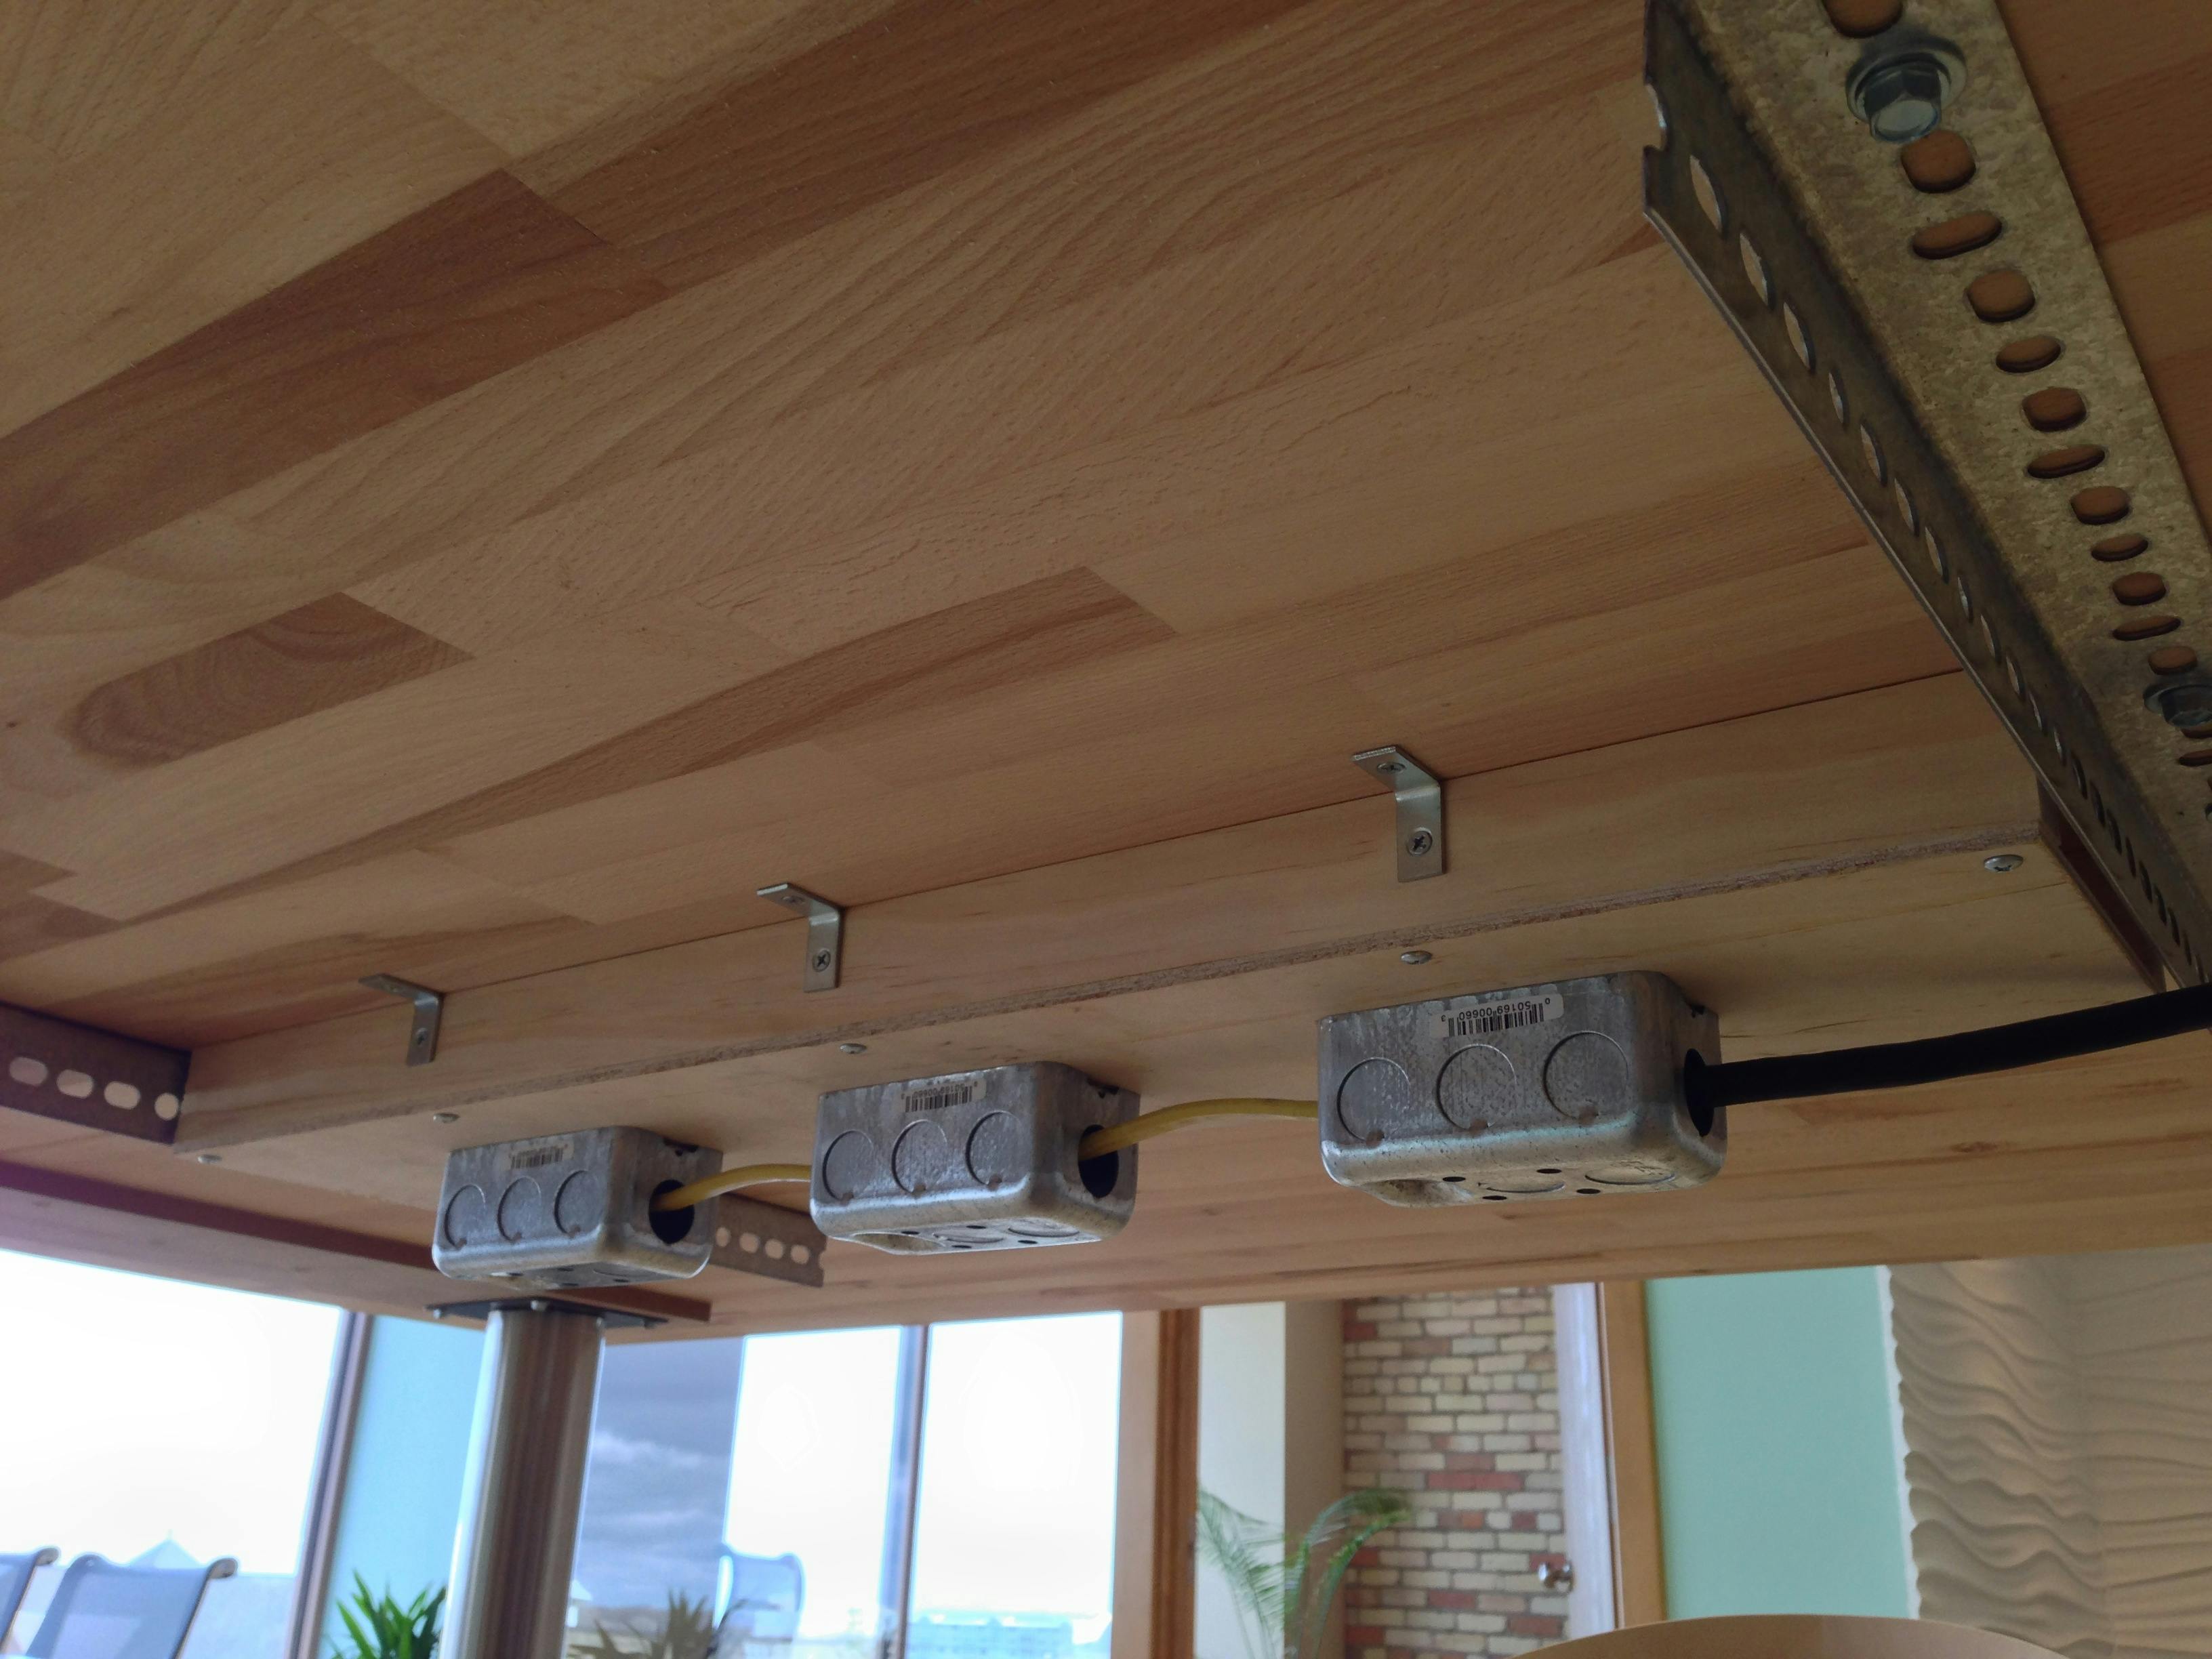
We also finished installing power management in each desk and made them chainable to clean up cord clutter underneath.
So far, we’ve been loving them. Come on by and see for yourself. We’ll save a spot for you!

Comments
Woah, nice job!
I too have used an Ikea countertop to make an 8 foot long desk that my wife and I share. I just slapped some legs on it and it’s great, but what you did with the butcher block looks awesome.
love it
Wow, you put a lot of work into the desks, and they turned out great! It’s cool to see the planning and craftsmanship that went into them. I recently installed an adjustable-height base on my desk, and enjoy spending most of my days standing.
Is the width of one slab deep enough to set the monitor back? I feel like I’d want the surface to be somewhere in between the combined depth.
Awesome job. This is something I’ve been looking for.
Any ideas on how to accomodate staff of varying height? We’d like a standing station that we can work together at, but our heights very by about a foot… Have you run into that issue?
Alison Major we seem to have found a height that works for us. We’d consider adjustable desks, but that adds a bunch of cost. High stools help too.
Mark our Thunderbolt displays overlap a little bit. we just offset them a couple inches so the bases aren’t touching.
Hi! How have the countertops held up over time? I have read elsewhere that they warp, such as where they are overlapping the cabinet for a breakfast bar type thing. Any problem with that? Or did the angle irons protect against it? We are thinking about building a dining table. Thanks!
Erin, the countertops have held up great! They don’t see a ton of abuse from us but they still look good and they clean up easily.
I was concerned when designing the desks about the sagging you mentioned, but with the combination of angle iron supports and leg placement near the edges, we haven’t had any problems.
The only unexpected behavior we’ve seen is that some of the countertops expand and contract with the seasons, and this can cause a gap between the two tabletop halves of up to ¼” at the worst. Not a big deal for us. It may have helped if we had sealed every surface of the countertops (including the underside) before assembly.
Hope that helps!