Part 2: ARKit Wall and Plane Detection for iOS 11.3
Display a visual grid on the detected ARPlaneAnchor
Abstract Architecture by Snapwire is licensed under Creative Commons Zero
In Part 1, we ended with the ability to detect planes. Next, we’re going to work on visually displaying those planes on screen using an SCNPlane. We’ll then apply a SCNMaterial with a grid texture.
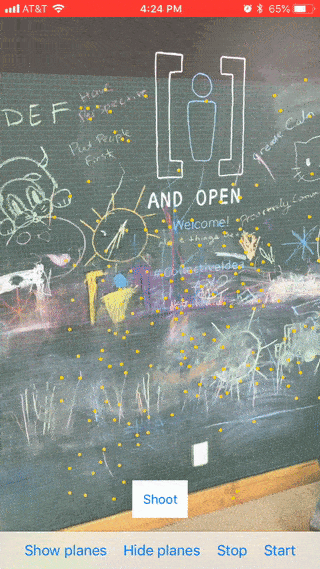
Here’s what we’re building:
If you’re starting with Part 2, download the starter project on GitHub here.
In the ARSCNViewDelegate method,
func renderer(_ renderer: SCNSceneRenderer, didAdd node: SCNNode, for anchor: ARAnchor) { ... }
we left off printing information about the ARPlaneAnchor we found.
What we want to do is add some geometry to that plane and update it as the ARPlaneAnchor changes. Let’s make a Plane class that inherits from SCNNode, so we can add it to the node: SCNNode that is provided from the above ARSCNViewDelegate method.
In the Xcode project, choose file -> new -> file. Choose Swift File, click next, and save it as Plane.swift.
Next, add this code to define your Plane class.
// 1
import ARKit

class Plane: SCNNode {

    let plane: SCNPlane

    init(anchor: ARPlaneAnchor) {
        // 2
        plane = SCNPlane(width: CGFloat(anchor.extent.x), height: CGFloat(anchor.extent.z))

        super.init()

        // 3
        plane.cornerRadius = 0.005

        // 4
        let planeNode = SCNNode(geometry: plane)
        planeNode.position = SCNVector3Make(anchor.center.x, 0, anchor.center.z)

        // 5
        planeNode.eulerAngles.x = -.pi / 2

        // 6
        planeNode.opacity = 0.15

        // 7
        addChildNode(planeNode)
    }

    // 8
    required init?(coder aDecoder: NSCoder) {
        fatalError("init(coder:) has not been implemented")
    }
1) Make sure to import ARKit.
2) We store a reference to the SCNPlane geometry and set its size to the anchor’s extent property. This way we can adjust it later.
3) Here we just round the plane’s corners to get rid of the sharp corners. Not necessary, but it looks nice.
4) A SCNNode is created, assigned our plane geometry, and positioned to the anchor’s position.
5) Planes in SceneKit are vertical by default so we need to rotate 90 degrees to match the ARPlaneAnchor.
6) Lower the opacity so we can see the camera view behind it.
7) Add it to our Plane node.
8) Since we’re creating a designated Init, init(coder:) needs to be overridden as well. We’ll just let it fail. Since we’re not coding/decoding or instantiating our Plane class from a Storyboard, it wont be called. If, down the line things change and init(coder:) is called, we’ll be notified with that fatal error.
Now let’s go back to our ARSceneManager class and update the renderer(renderer: node: for anchor:) method with a few calls to create our Plane.
func renderer(_ renderer: SCNSceneRenderer, didAdd node: SCNNode, for anchor: ARAnchor) {
        // we only care about planes
        guard let planeAnchor = anchor as? ARPlaneAnchor else { return }

        // 1
        let plane = Plane(anchor: planeAnchor)

        // 2
        planes[anchor.identifier] = plane

        // 3
        node.addChildNode(plane)
    }
1) Create a Plane and pass in the ARPlaneAnchor.
2) We will store a local array of Planes to make it easier to reference and update later. This is a Dictionary with the anchors UUID as the key.
3) Add it as a child to the node being passed in.
Now, let’s add that Dictionary to the top of the class.
private var planes = [UUID: Plane]()
If you run the app now, you’ll see our Planes being added when they are found by ARKit. However, we’re not updating the planes when changes are found. ARKit continually updates and “merges” planes as it sorts out the world.
Let’s add another ARSCNViewDelegate delegate method to handle updates to the plane anchors.
func renderer(_ renderer: SCNSceneRenderer, didUpdate node: SCNNode, for anchor: ARAnchor) {
        guard let planeAnchor = anchor as? ARPlaneAnchor else { return }

        // 1
        if let plane = planes[planeAnchor.identifier] {
            //2
            plane.updateWith(anchor: planeAnchor)
        }
    }
1) Here we find the Plane that matches the anchor’s ID.
2) Next, we call a function to update that plane based on the anchor. Let’s add that method to our Plane class.
Open Plane.swift and add this method below our inits.
func updateWith(anchor: ARPlaneAnchor) {
        // 1
        plane.width = CGFloat(anchor.extent.x)
        plane.height = CGFloat(anchor.extent.z)
        // 2
        position = SCNVector3Make(anchor.center.x, 0, anchor.center.z)
    }
1) This adjusts our plane geometry to equal the plane anchor’s size.
2) Position the plane SCNNode instance to the anchor’s position.
If you run the app now, you should see your Planes being rendered and their sizes being updated. Cool!
Sometimes you’ll notice that two planes will be “merged” together when ARKit realizes they are part of the same surface.
What’s actually happening is ARKit is removing one plane and updating the other. Currently, we are adding to our Dictionary of Planes, but are not removing them when ARKit removes its nodes. For that let’s implement another ARSCNViewDelegate method.
func renderer(_ renderer: SCNSceneRenderer, didRemove node: SCNNode, for anchor: ARAnchor) {
        planes.removeValue(forKey: anchor.identifier)
    }
Looking good!
Adding a Grid Material
One last thing we can do to make it easier to visualize the perspective and distance of the planes, is add a grid texture.
You can find the grid texture I used on GitHub here. Just place it in your xcassets folder.
Add a new Swift file, name it GridMaterial, and add this code.
class GridMaterial: SCNMaterial {

    override init() {
        super.init()
        // 1
        let image = UIImage(named: "Grid")

        // 2
        diffuse.contents = image
        diffuse.wrapS = .repeat
        diffuse.wrapT = .repeat
    }

    required init?(coder aDecoder: NSCoder) {
        fatalError("init(coder:) has not been implemented")
    }

}
Our GridMaterial inherits from SCNMaterial. When we initialize we:
1) Create a UIImage with our Grid.png file stored in our asset catalogue.
2) Set its diffuse property to the image and tell it to repeat in both directions.
Now head back to the Plane class to apply our material to its plane geometry.
init(anchor: ARPlaneAnchor) {
        // ...
        plane.cornerRadius = 0.008
        // 1
        plane.materials = [GridMaterial()]
        // ...
        // 2 delete this...
        planeNode.opacity = 0.15
        // ...
      }
1) Update to plane’s materials to be an array of just GridMaterial.
2) Delete the opacity setting since the grid texture I provided you with is semi-transparent.
If you run the project now, you’ll see the grid on top of our plane. However, you may notice it can get stretched when the plane updates. We also need to update our texture when that happens.
Update the updateWith(anchor:) method in our Plane class to update our texture as well.
func updateWith(anchor: ARPlaneAnchor) {
        // ...
        if let grid = plane.materials.first as? GridMaterial {
            grid.updateWith(anchor: anchor)
        }
    }
Head back to GridMaterial and implement that method.
func updateWith(anchor: ARPlaneAnchor) {
        // 1
        let mmPerMeter: Float = 1000
        let mmOfImage: Float = 65
        let repeatAmount: Float = mmPerMeter / mmOfImage

        // 2
        diffuse.contentsTransform = SCNMatrix4MakeScale(anchor.extent.x * repeatAmount, anchor.extent.z * repeatAmount, 1)
    }
1) Scene Kit uses meters for its measurements. In order to get the texture looking good, we need to decide the amount of times we want it to repeat per meter. If we inspect our image in an editing program we can see it’s 65mm.
2) Update the transform of the material’s diffuse property where our grid image is used.
That should do the trick. Run your app and see the grid on the growing planes!
In Part 3 we will place an object on the plane when a user taps the screen!
Download the final project of Part 2 here.
About Ben Lambert
Ben is an iOS developer and designer. He has a passion for building rich and intuitive UI /UX experiences for mobile. In his free time, he enjoys creating mobile app games.
Comments
Hi,
Please add next tutorial links in the end, it would be easier to navigate instead of searching…You have written very well, expecting more blogs on ARKit advance…how to design ARKIT app, How to make ARKIT useful in real life apps etc…and technical blogs for sure….Hats of to you!!
Let’s add that method to our Plane class. all happy wheels characters sounds