How We Develop Mobile Applications - Pt 2 - Android
Getting our environment setup for Android
In our last blog post, we covered how we get started with an iOS mobile application. Here, we’re going to walk through how we do this for an Android application. We will be starting off our donuts app and discussing what we like to do when starting a fresh Android project at Collective Idea.
Source Code Management
Just like with iOS, we keep our Android projects on Github and mimic the Github workflow. Once we have our repository created, we can clone it, and get to work.
It’s a good idea to start a new working branch from our empty repository before we begin making any changes. After each major step, we will commit our code, and review what we generated. This way, if we change our mind, or need to start over for some reason, we have a clean starting point to check out.
Creating the Project
With the latest Android Studio, we will run through the new project wizard to create our blank application. Open Android Studio and choose to start a new project.
Project Name and Location
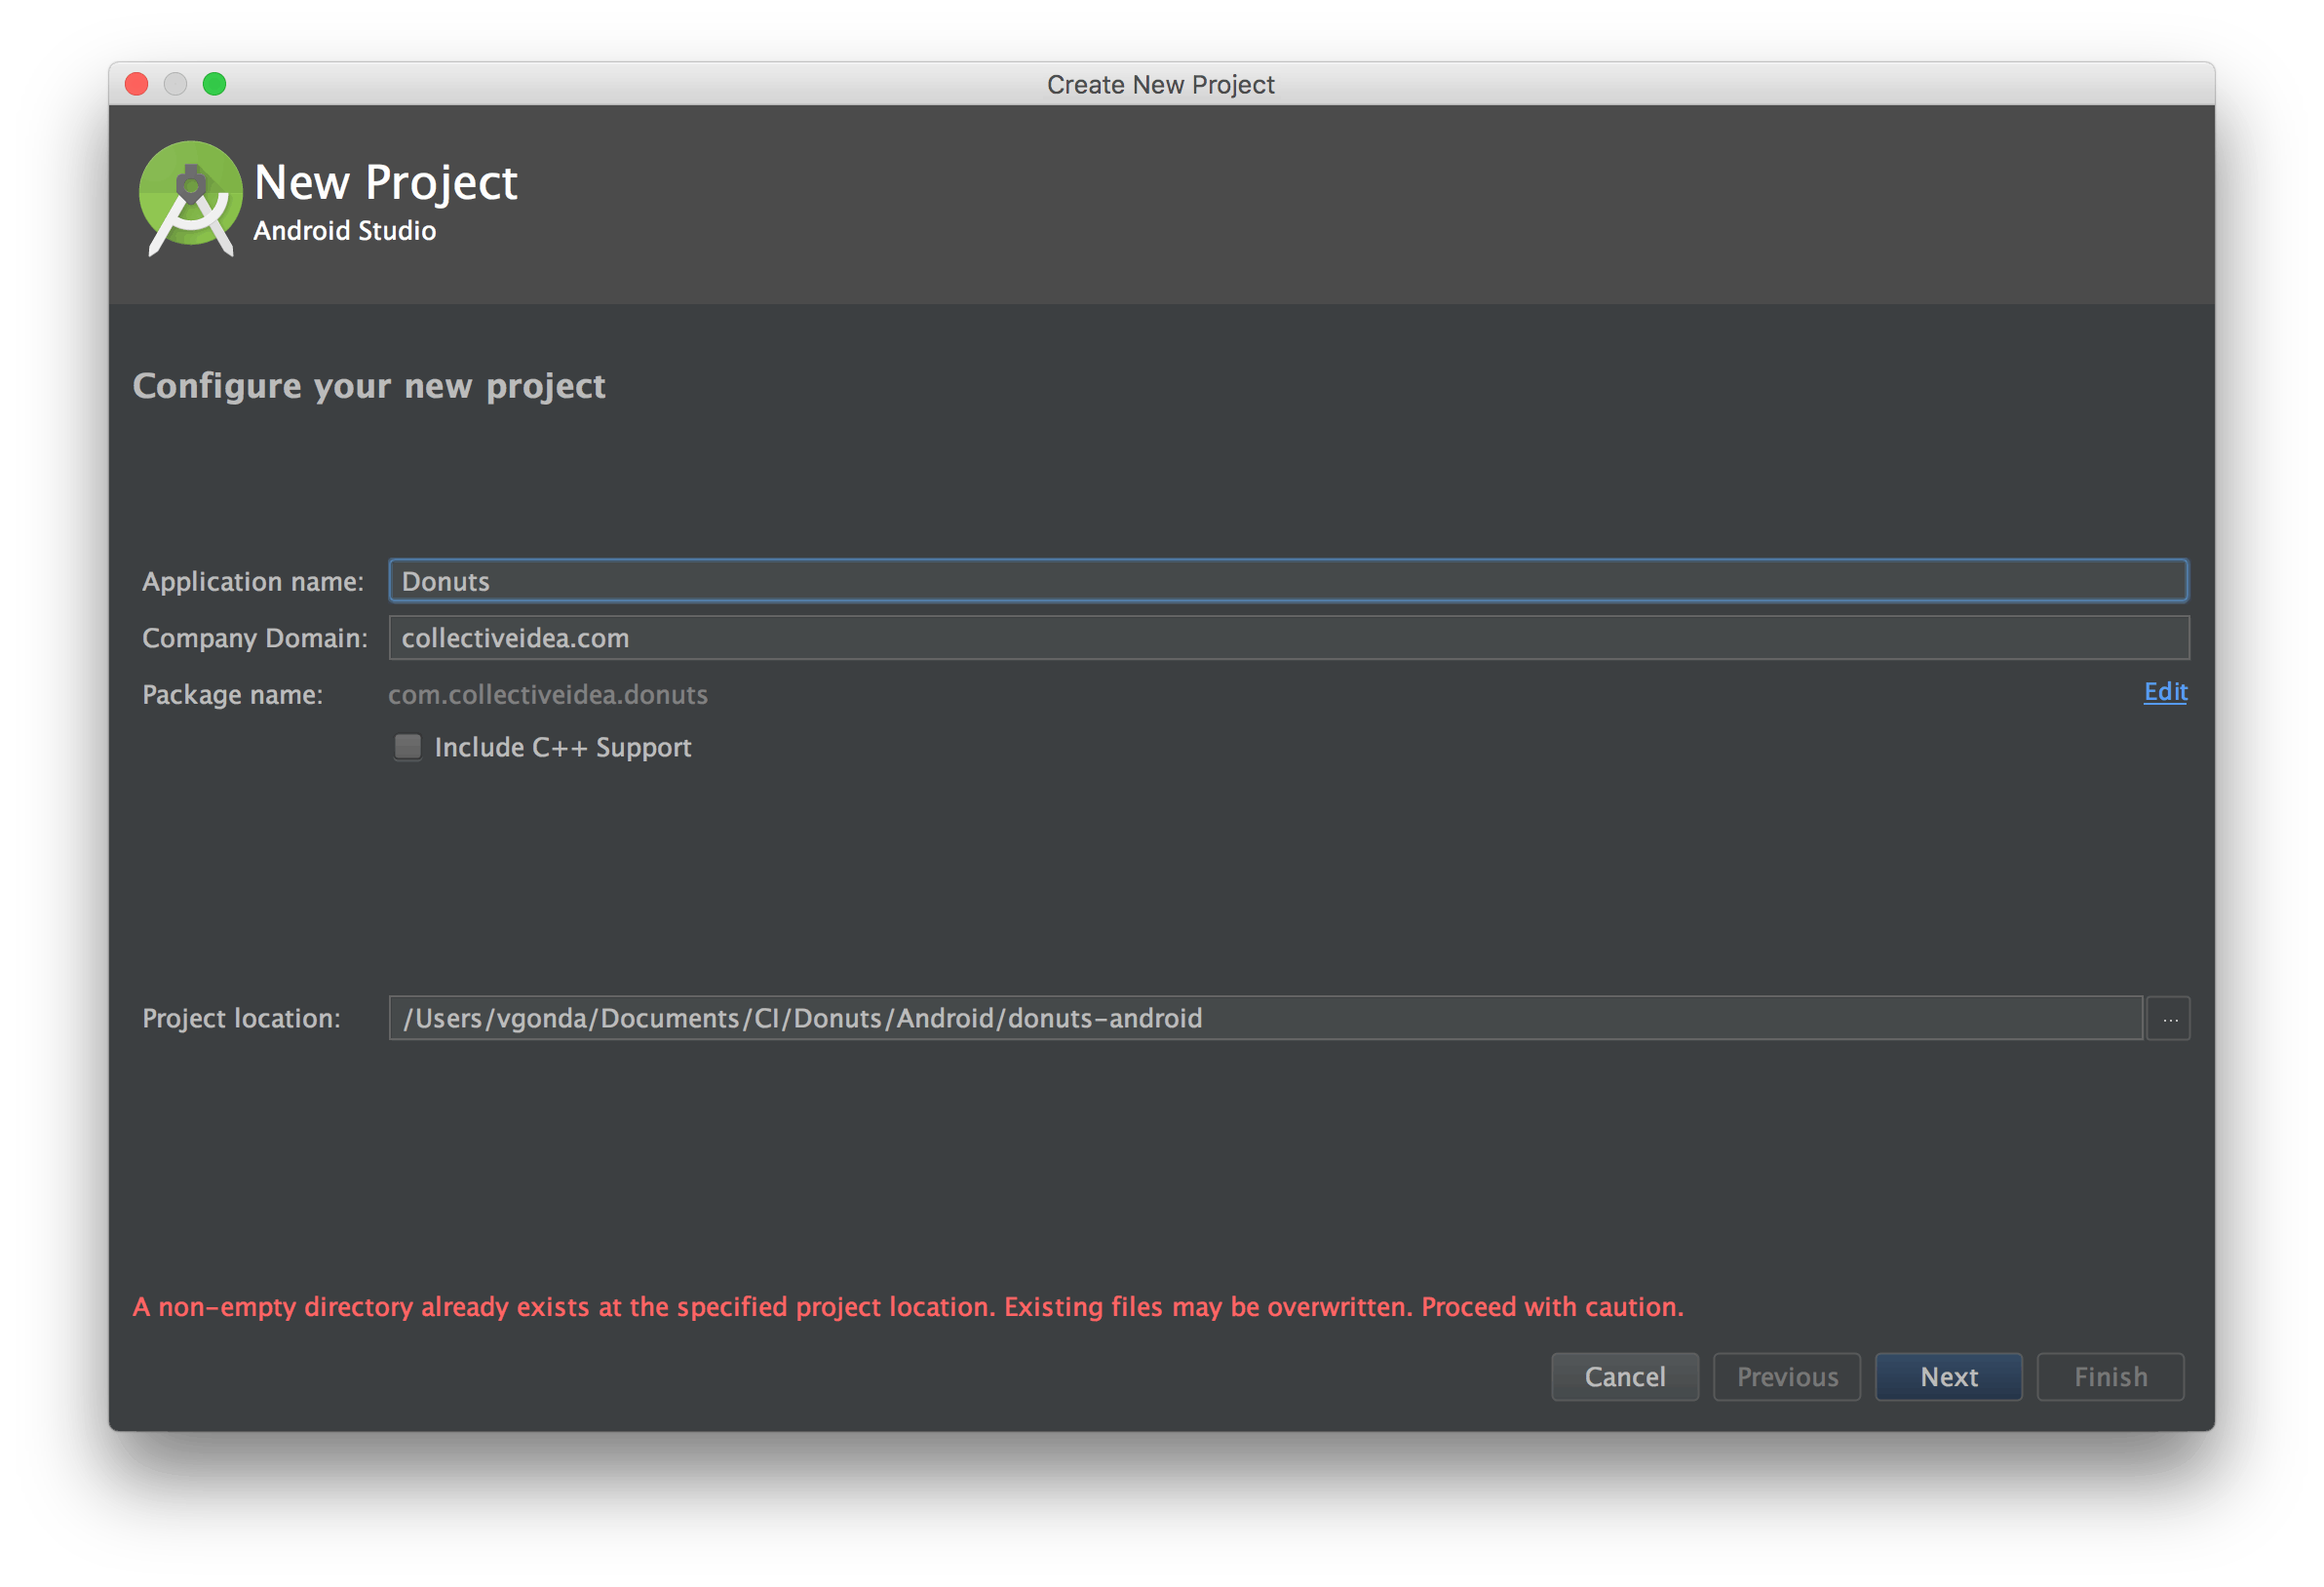
Fill in the application’s name (Donuts) and the company domain (in our case, that’s collectiveidea.com). Android Studio will automatically use these to generate the project structure and package name. Ideally, this should be unique, as it will be the default application identifier, which Android uses to uniquely reference your application instance. When you set up your company domain, make sure it’s one you own.
Finally, set the project location to be the root directory of the git repository we cloned earlier. You can ignore the warning that the directory already contains files. Since it’s already under source control, we can retrieve anything unintentionally lost.
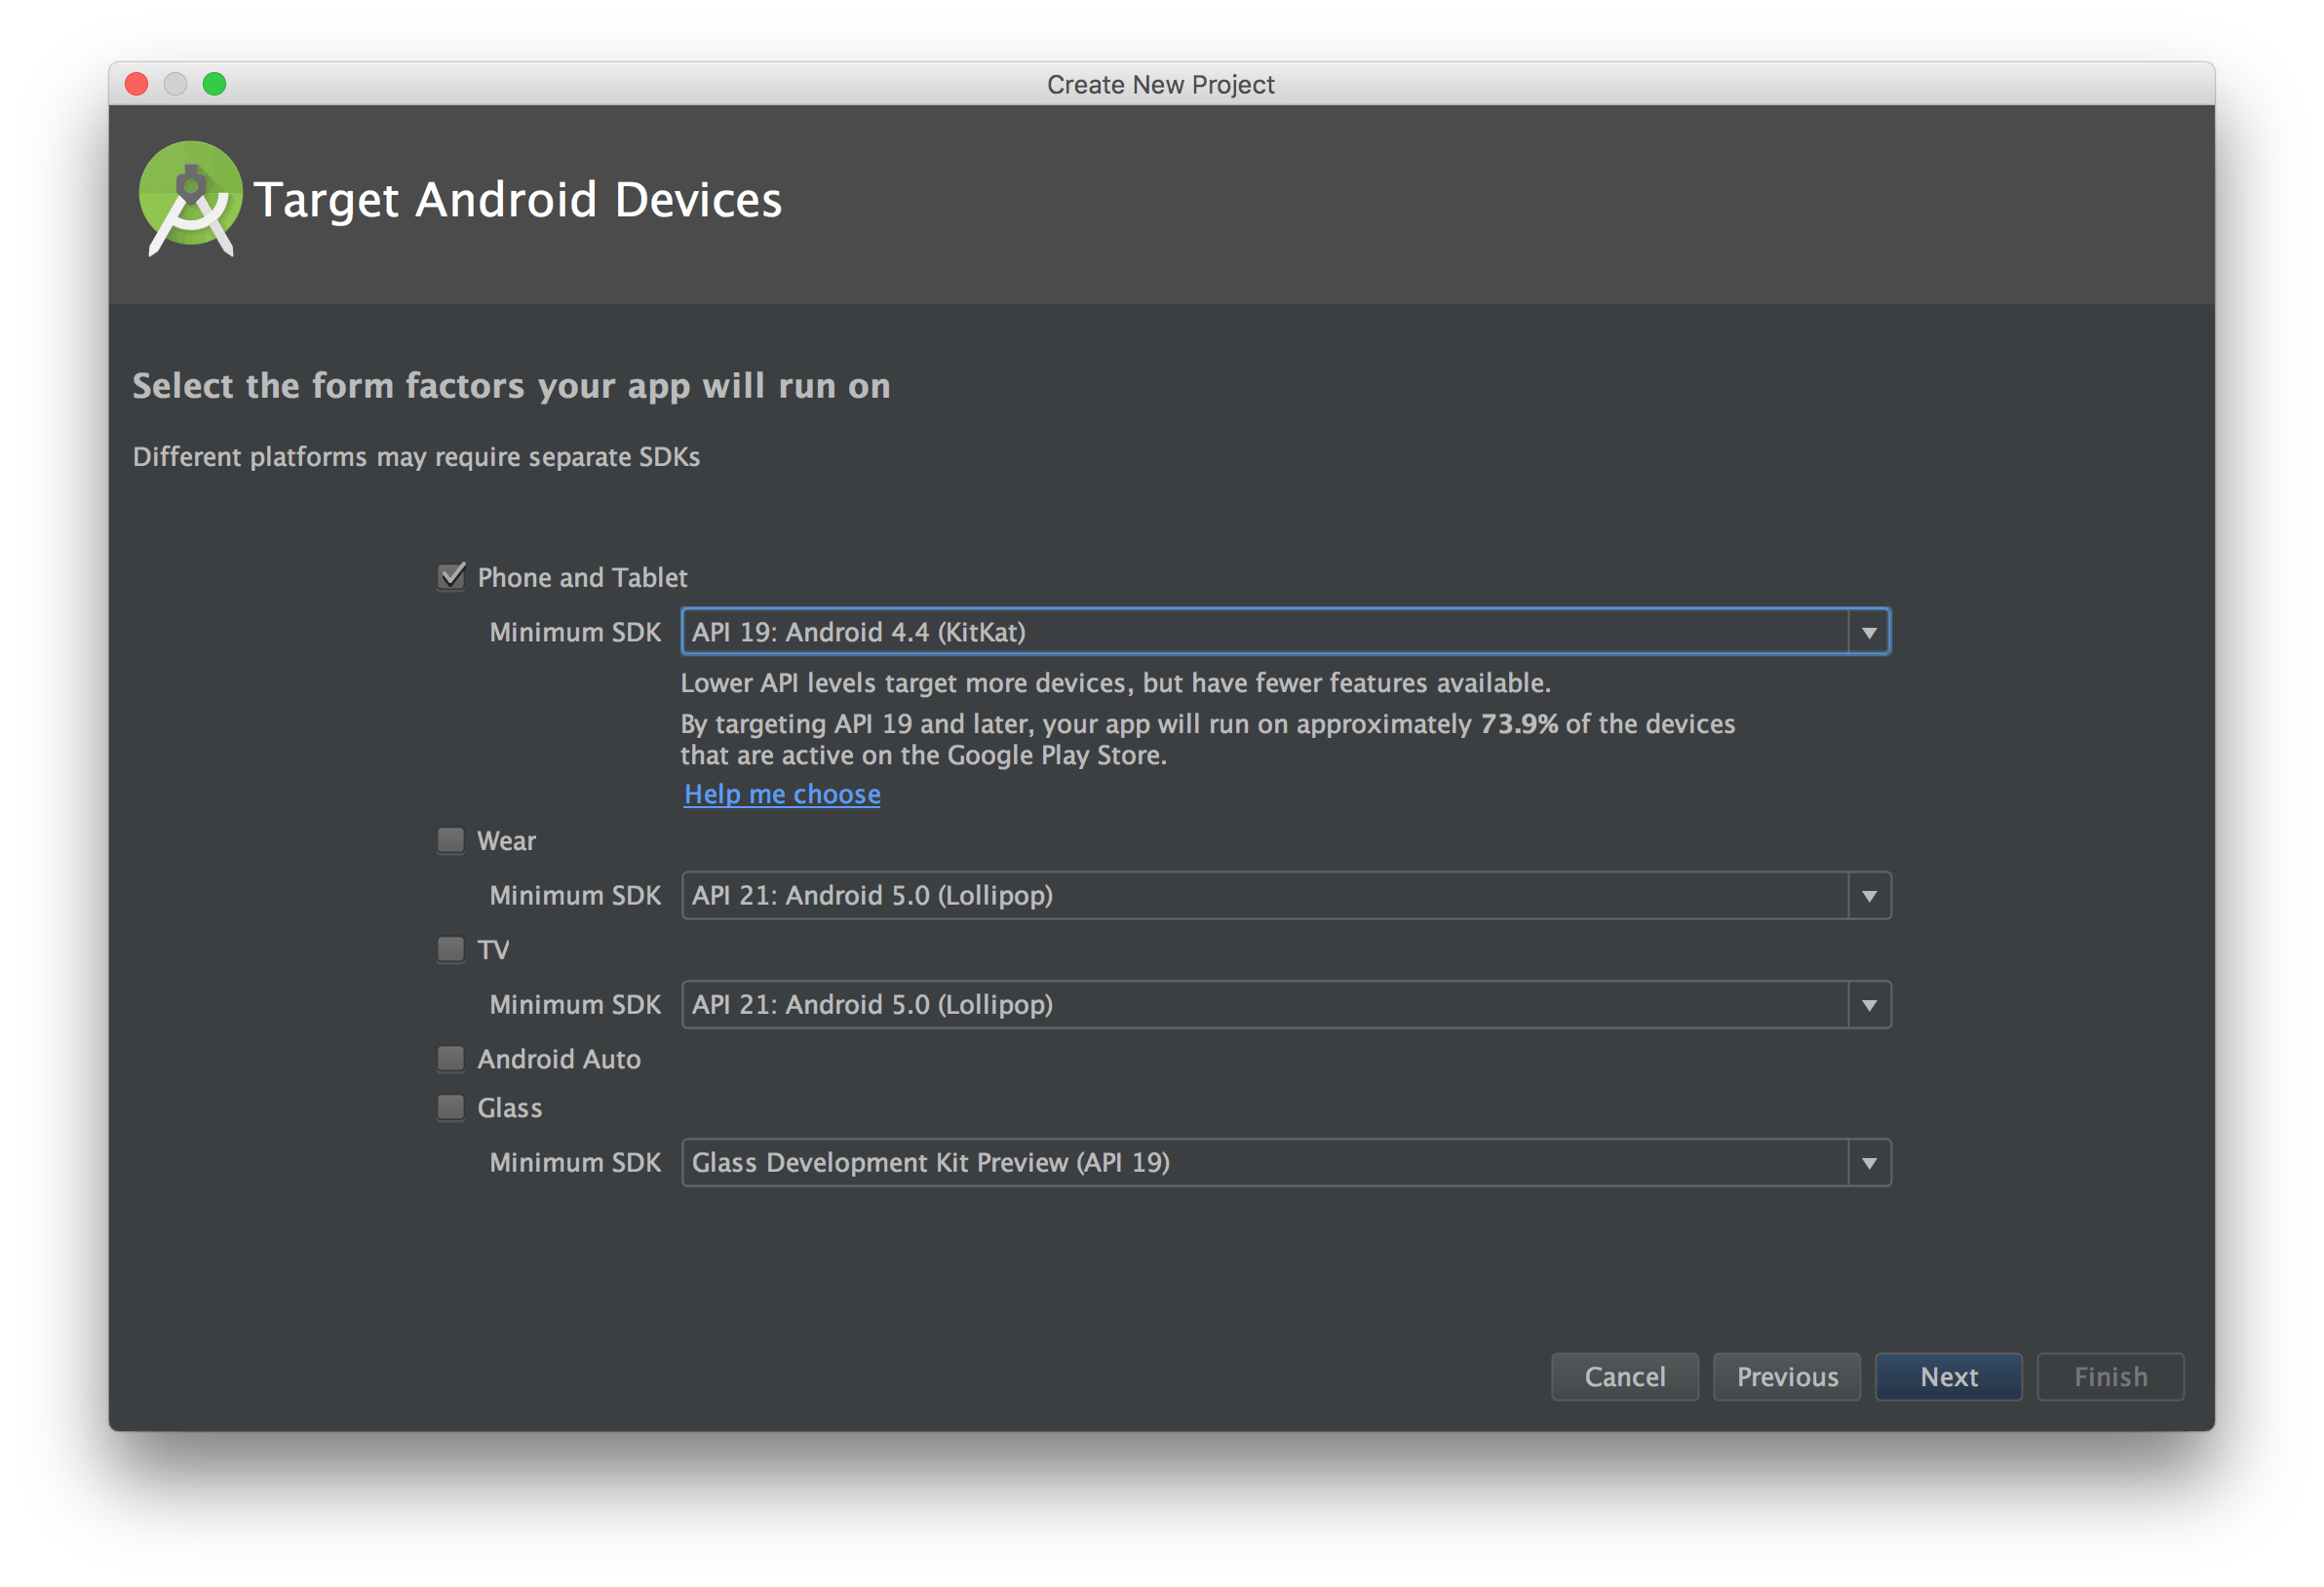
Target Devices
Next, we will choose our target devices. For new projects, you can follow the guidelines set by @minSdkVersion - “the minimum SDK version for the practical, rational developer”. Unless you have a good reason to support older SDK versions, start with this. You can always adjust it later if you need to broaden your audience. At the time of this writing, the recommended minSdkVersion is 19.
Main Activity
We will start our application with an empty activity. Other activity templates will generate a lot of code that is useful to read and explore, but in our case, we don’t need any of it. We can always generate a different one later if we need it.

Finally, we’ll name our activity and make sure we choose a backwards compatible base class by using AppCompat. Click Finish and Android Studio will generate our project.

Now, we can commit our code to our working branch. Android Studio provides us with a .gitignore when we generate the project, so we will use that to exclude any files we don’t want to commit. By committing our work here, we can always come back here to the default Android Studio setup if we ever need to reset. At this point, we can run and view our blank app.
Code Styles
It’s always a good idea to decide on a code style within your team. Early adoption of code styles will help prevent unintentional and unrelated code changes from automatic code formatting. It will also help keep arguments about style to a minimum, allowing you to focus on more important aspects of code.
One good starting point is to use the Java and Android code styles from Square. Set the code for the project in the Preferences -> Editor -> Code Style and set your schema to SquareAndroid. Make sure to commit the code style setting to source control so the rest of the team will use it.
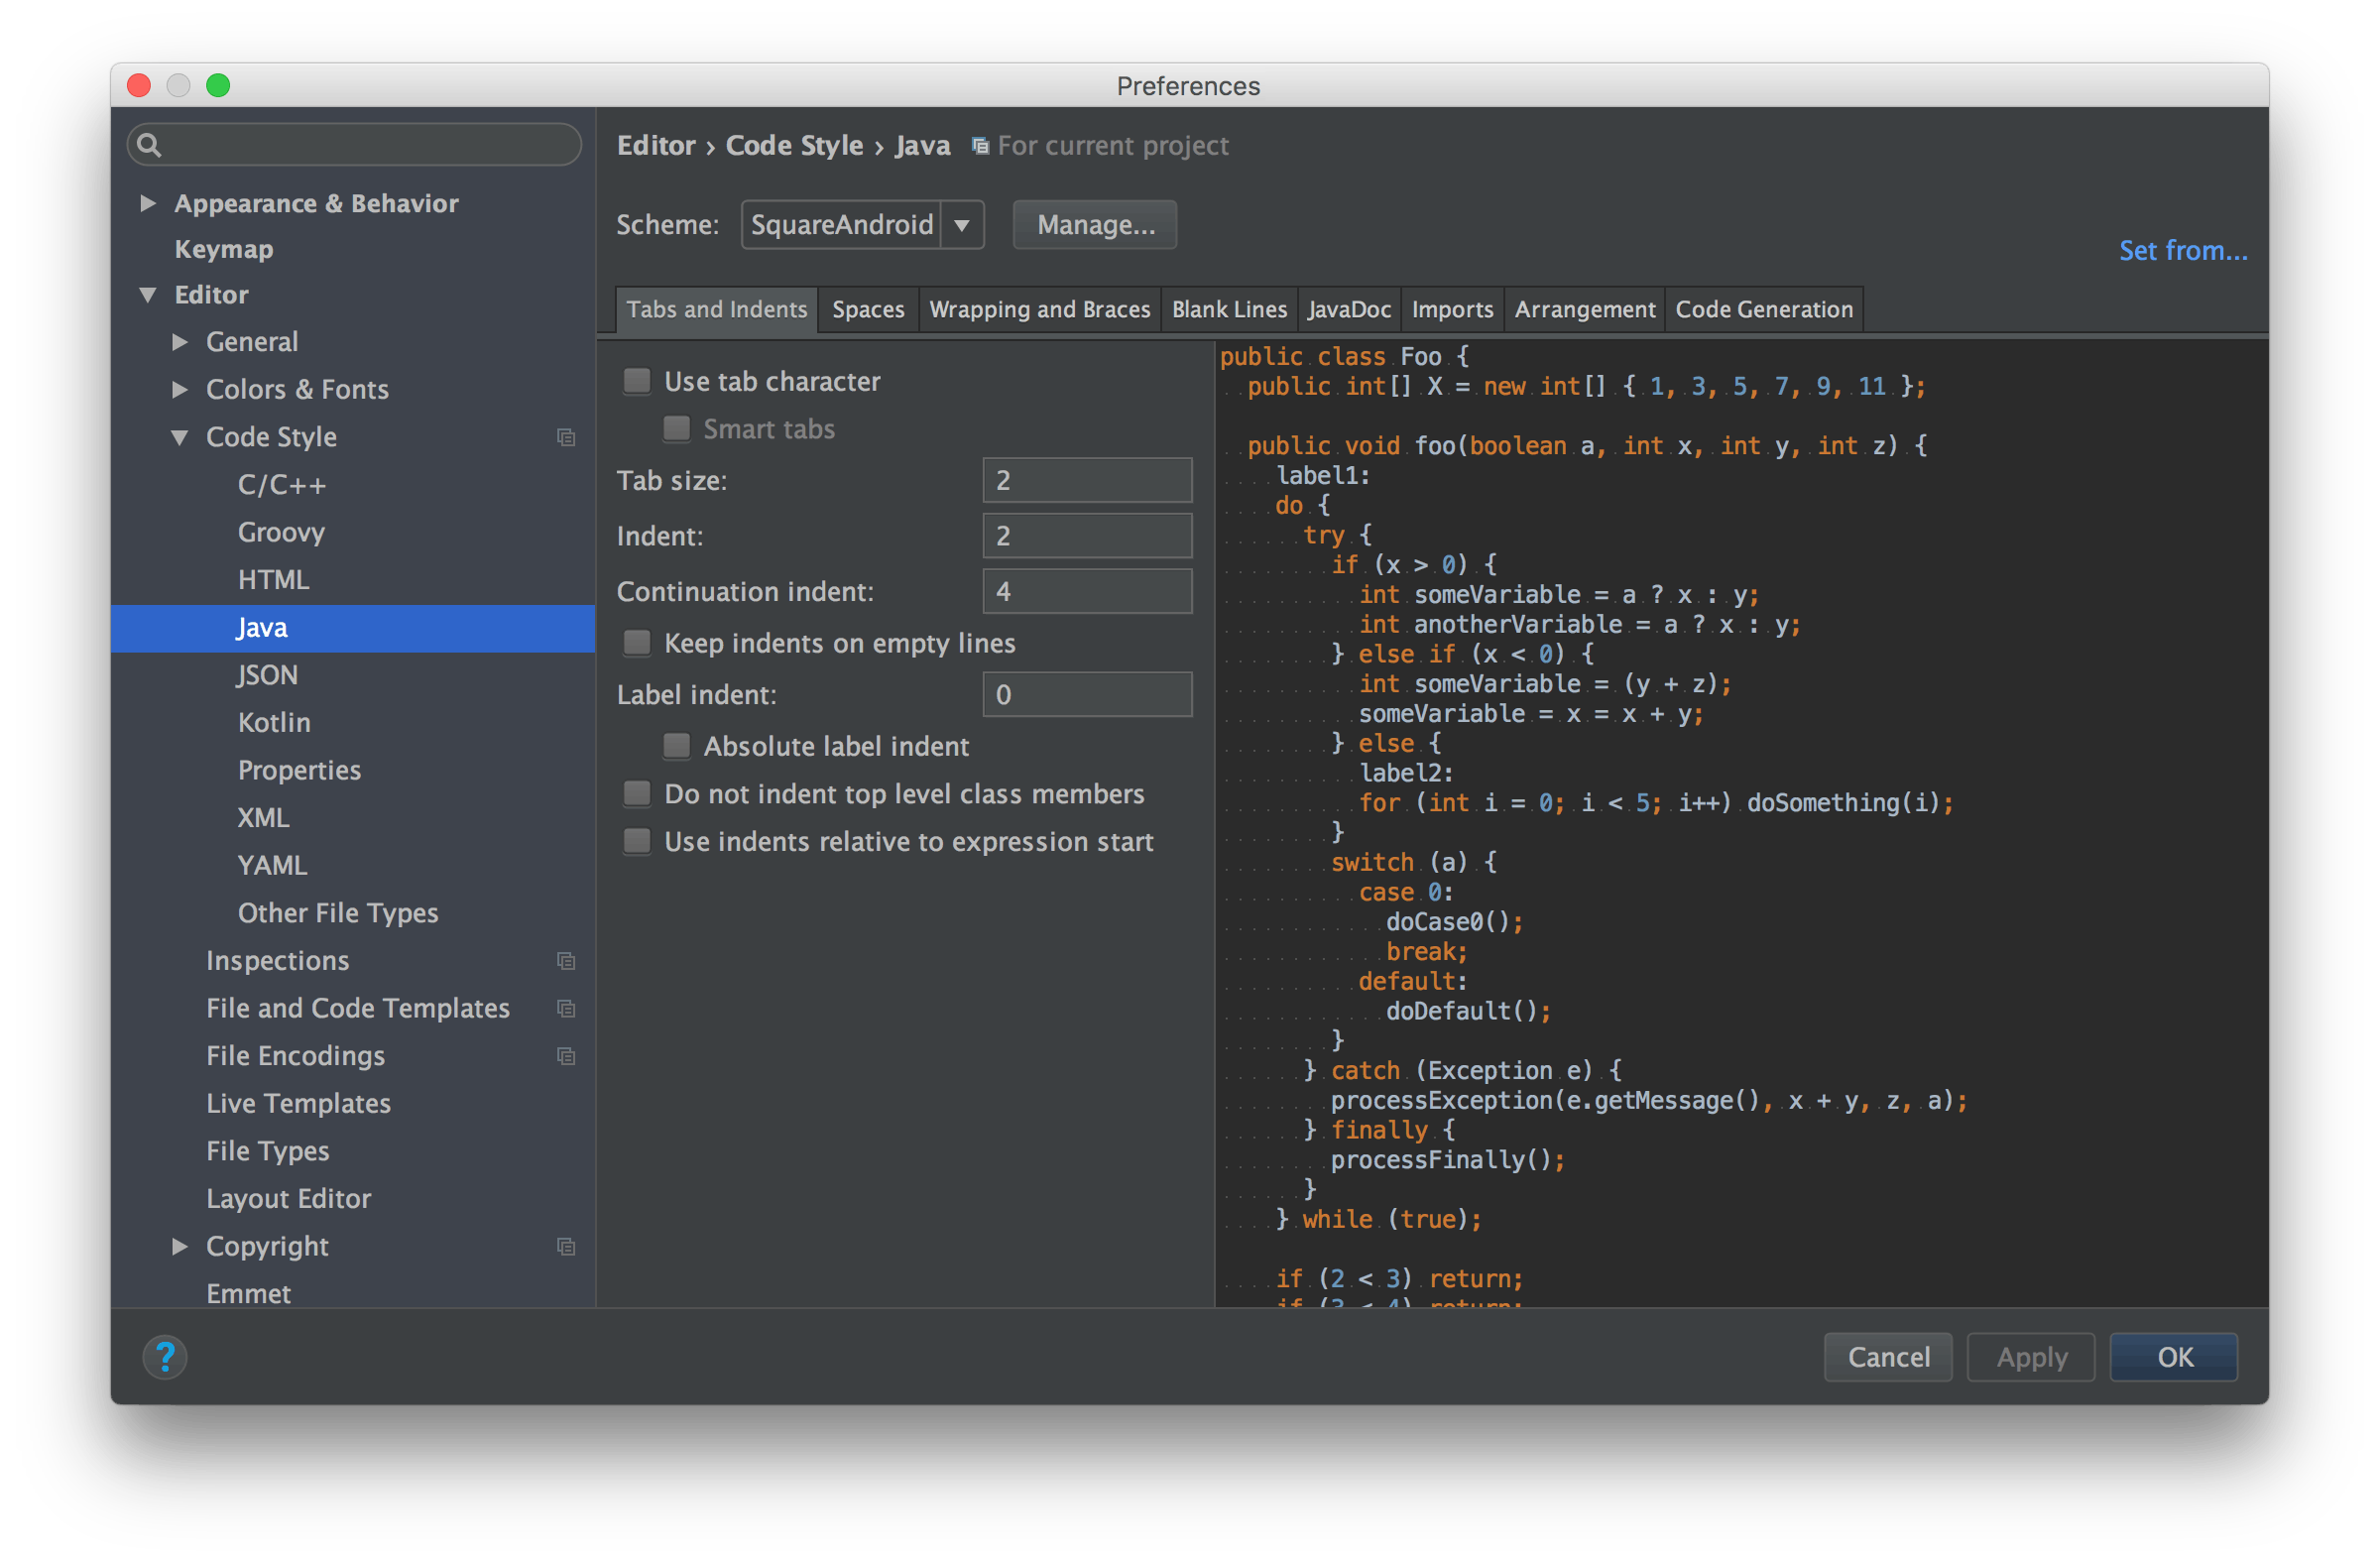
At any point, you can use ALT+CMD+L to clean up and reformat your files. We recommend doing this everywhere at this point so you can start with a clean slate. Select all your files, right click, and select “Reformat Code…” from the menu. Hit “Okay” on the dialog and give it a minute to clean everything up.
Build. Run. Commit.
Build Types
Android Studio generates a Gradle build configuration for your application. By default it only defines a release build type. The debug build type is implicitly defined. We want to allow both a debug and release version of our app on the phone at the same time with different configurations. To do that we need to add the debug build type and define a unique application ID:
android {
  // …
  buildTypes {
    debug {
      applicationIdSuffix ".debug"
    }
  }
}
Default Config
We also like to set the name of the APK that Android Studio builds for us to the name of our app. We can do this in the defaultConfig block of the app’s build.gradle:
android {
  defaultConfig {
    setProperty("archivesBaseName", "donuts")
  }
}
This will name our output files to donuts-debug.apk and donuts-release.apk.
Build. Run. Commit.
Kotlin
Kotlin is a modern JVM language that has been an enormous asset at Collective Idea. I won’t enumerate all the benefits here, but chief among them are:
- Null safety
- Data classes
- Lambdas
- Collection functions
- Class extensions
- Java interoperability
Kotlin is a great language for Android developers who want to work in a more modern language than the version of Java we are currently stuck with.
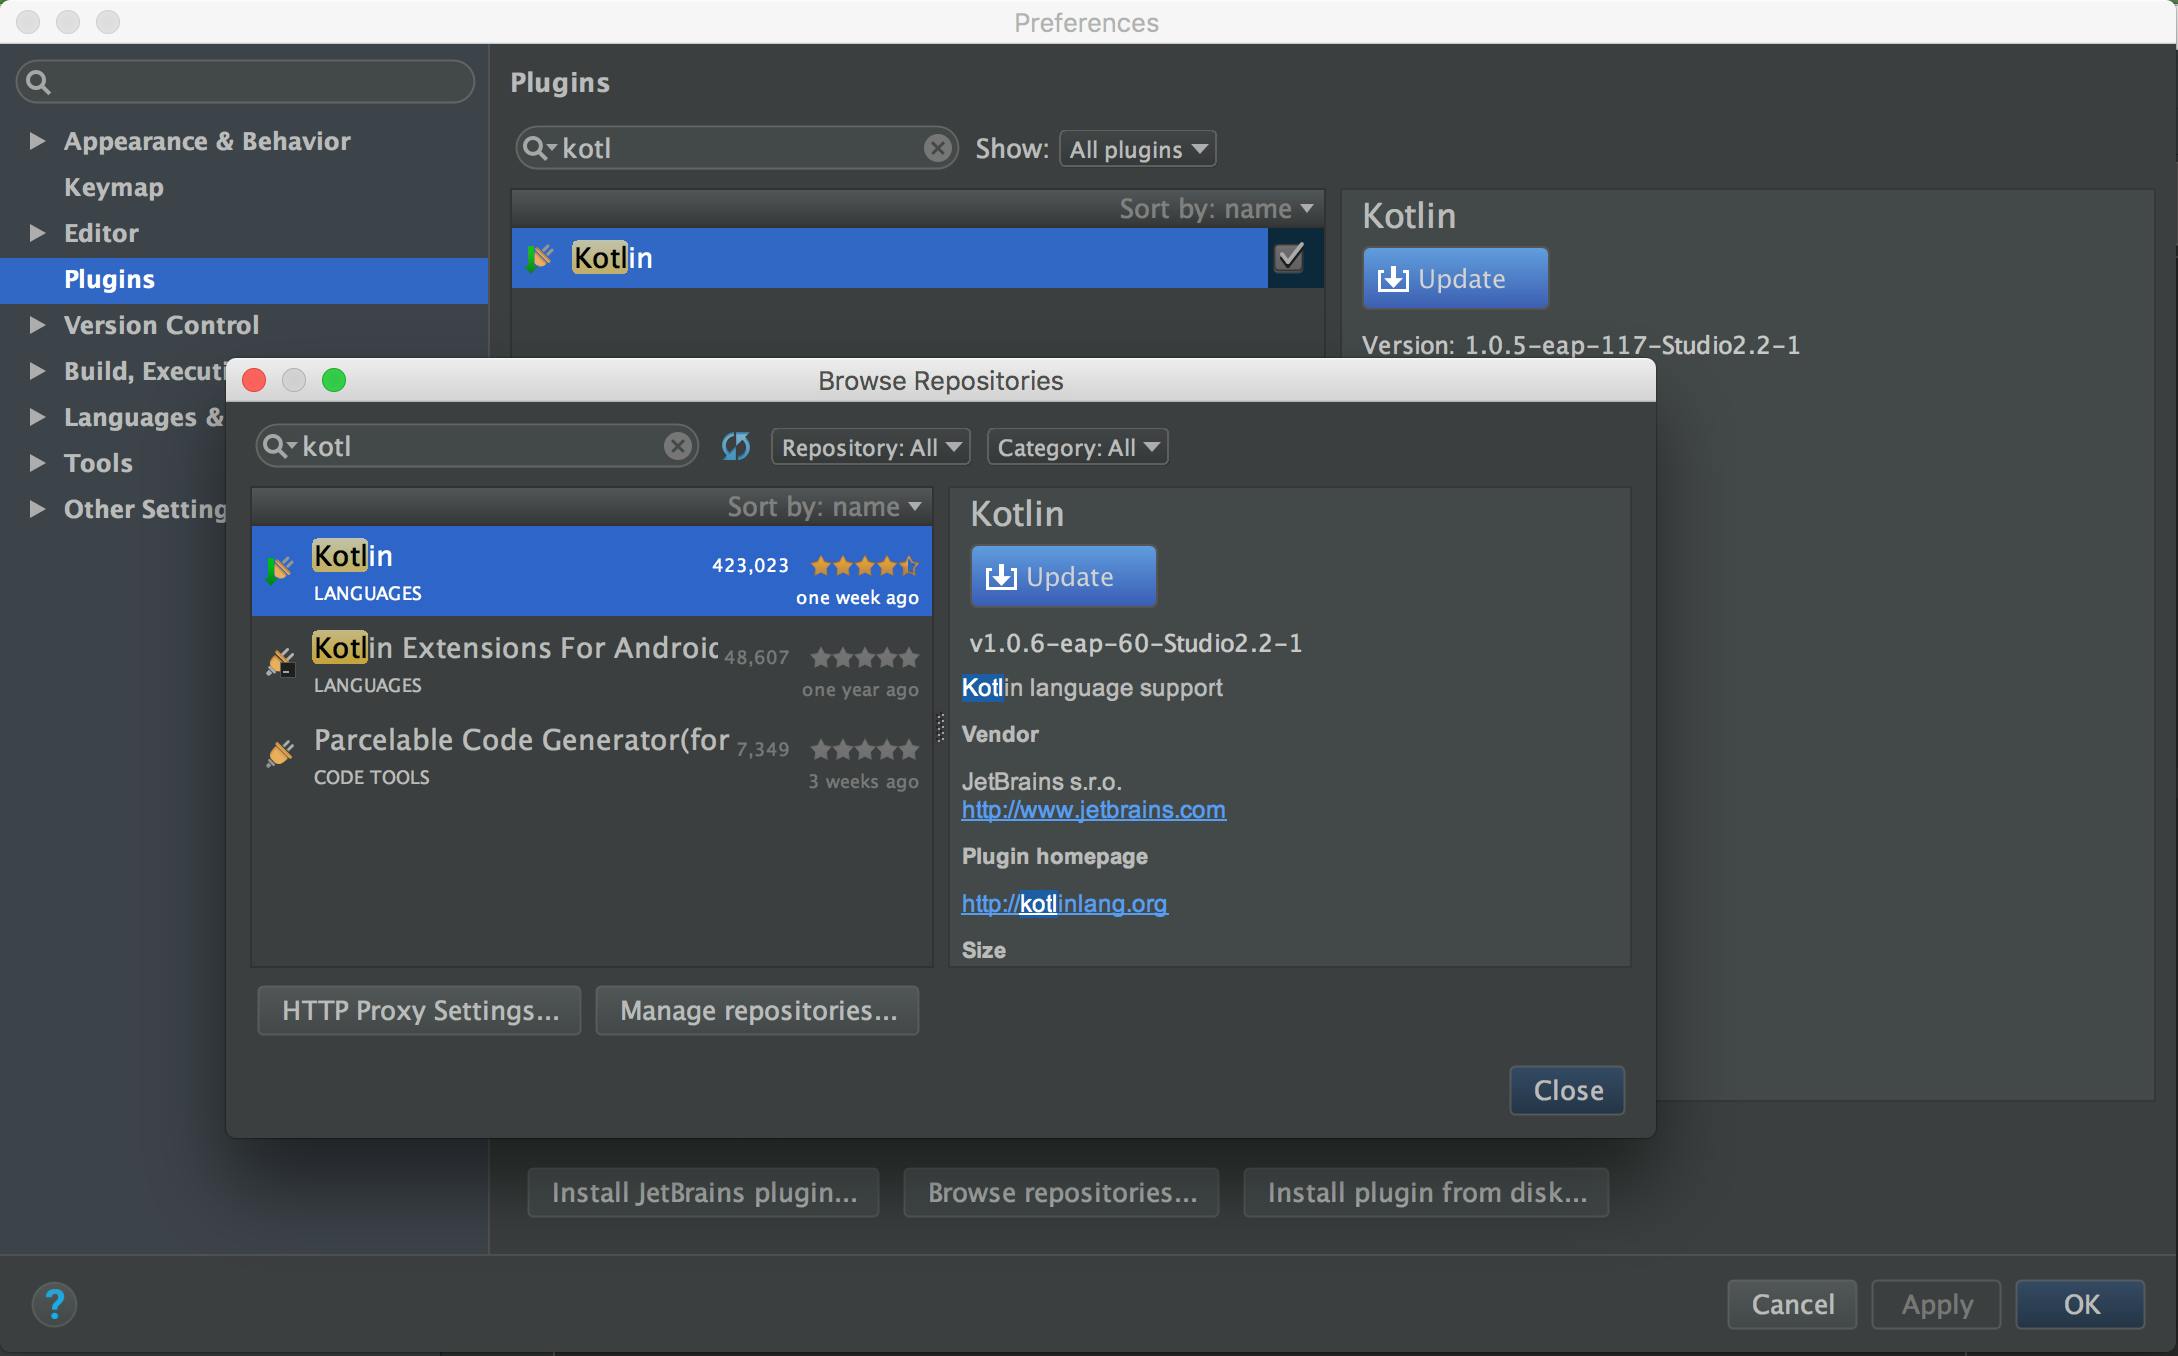
To set up Kotlin in our project, first install the Kotlin plugin for Android Studio. Go to Settings -> Plugins -> Browse Repositories… and search for Kotlin. Install the latest version there.
Next, we need to add it as a dependency to our Gradle files.
// build.gradle
buildScript {
  dependencies {
    classpath "com.android.tools.build:gradle:2.2.2"
    classpath "org.jetbrains.kotlin:kotlin-gradle-plugin:1.0.5-2"  }
}
// app/build.gradle
apply plugin: "com.android.application"
apply plugin: "kotlin-android"

kapt {
  generateStubs = true
}

dependencies {
  // …
  compile "org.jetbrains.kotlin:kotlin-stdlib:1.0.5-2"
  testCompile "org.jetbrains.kotlin:kotlin-test:1.0.5-2"
}
Worth noting is Kotlin’s Annotation Processor kapt. This replaces apt that the compiler needs for libraries with their own annotations, such as Dagger, ButterKnife, and Retrofit. If you need annotation processing in instrumentation tests, use kaptAndroidTest instead of kapt for the library in question. For example:
dependencies {
  kapt "com.google.dagger:dagger-compiler:2.8"
  kaptAndroidTest "com.google.dagger:dagger-compiler:2.8"
}
Once we’ve added Kotlin, we can convert each of our Java files to Kotlin by highlighting the app/src/java/ directory in the side bar, and using the shortcut ALT+SHIFT+CMD+K, or search for the “Convert Java File to Kotlin File” command.
Build. Run. Commit.
Base Dependencies
At Collective Idea, we have a set of core dependencies that we find indispensable for app development. We will add more in later posts when we cover related features, but these are critical enough to add at the outset:
- RxJava for working with streams across multiple threads. You can find a list of Android-specific extensions in the RxAndroid wiki
- Timber for sensible logging
- ButterKnife for loading views and binding actions to views
- LeakCanary for detecting memory leaks in debug builds
To set up LeakCanary and Timber, we’ll need to create an Application class for the app. Open the menu File -> New -> Kotlin File/Class… and name it DonutsApp. We’ll need to define the class in DonutsApp.kt:
package com.collectiveidea.donuts

import android.app.Application

class DonutsApp : Application() {
  override fun onCreate() {
    super.onCreate()
  }
}
Then we need to register the DonutsApp class in the AndroidManifest.xml by adding the android:name=".DonutsApp” attribute to the application tag.
Now you can install LeakCanary, Timber, and any other application-wide code.
Build. Run. Commit.
Independent App Launcher
When you start a fresh Android app, your MainActivity is the application launcher (the icon that shows up in the system’s App Drawer and Home Screen). This will cause a headache for users if we ever want to change anything about your MainActivity. If you decide to rename it, or use a different activity for your launcher, the icon will disappear from the user’s home screen, and they’ll have to go back to the app drawer to retrieve it. We can prevent that from happening by using an activity-alias as our launcher instead.
<!-- app/src/main/AndroidManifest.xml -->
<manifest>
  <application>
    <activity android:name=".MainActivity" />
    <activity-alias
      android:name=".Launcher"
      android:targetActivity=".MainActivity">
      <intent-filter>
        <action android:name="android.intent.action.MAIN" />
        <category android:name="android.intent.category.LAUNCHER" />
        <category android:name="android.intent.category.DEFAULT" />
      </intent-filter>
    </activity-alias>
  </application>
</manifest>
Now, if we decide to change the MainActivity to LoginActivity or DancingDonutActivity, we can change the targetActivity and the app icon won’t disappear from the home screen. Note that the activity-alias must appear after its target activity in the manifest.
Build. Run. Commit.
Conclusion
Much of what we’ve done here is implement preventative best practices. Introducing code style later can result in scorched earth commits where everything changes for trivial reasons. Choosing a language early and converting everything before you start for the same reason. Deciding on core dependencies that the team understands and agrees to work with will ensure everyone is working in a similar paradigm, and using strategies everyone can understand. Maybe you prefer AsyncTask to RxJava, but making that decision now will streamline development and code reviews in the future.
You can see the full code for this project at collectiveidea/donuts-android. We will look at setting up our testing environment in the next blog post in this series.
To view other posts in this blog series broken down by OS, see below:
Both
Part 1 - How We Develop Mobile Applications - Best Practices
Android
Part 3 - Using TDD to build our models and API client
iOS
About Joshua Kovach
Josh’s skills include web and mobile development and he enjoys developing APIs and Android Apps. He is also a mentor on HackHands, pairing with programmers working through coding issues.
About Victoria Gonda
Victoria is a software developer working on mobile and full stack web applications. She enjoys exchanging knowledge through conference talks and writing.
Comments
Hello,
Great post about Android App !! thanks for sharing..
thanks for good article 👍
Good nice article with lot of knowledge
Mobile App is very important for every business. thanks sharing such a nice blog. it will be helpful to every android developers. i will definitely share this information to my android developers.
nice
Good stuff mentioned in this post about how to develop a mobile application. I went through the whole content and I really enjoyed a lot to read this. it helps the Android developer.