Padlock by Moyan Brenn is licensed under CC BY 2.0
Let’s Encrypt with a Rails app on Heroku
I needed to renew an SSL certificate today, so I used it as an excuse to try Let’s Encrypt for a free certificate.
I’m on a Mac and I have homebrew already installed. I’m using inchworm.io as my example, so use your own domain where appropriate.
First, grab the Let’s Encrypt client, certbot:
On a mac, simply run:
brew install certbot
On other platforms install and run the certbot-auto command everywhere I use certbot.
Let’s Encrypt’s ideal workflow involves running it on your server. Since we’re not “on” the Heroku server, we have to do it locally and in a few steps.
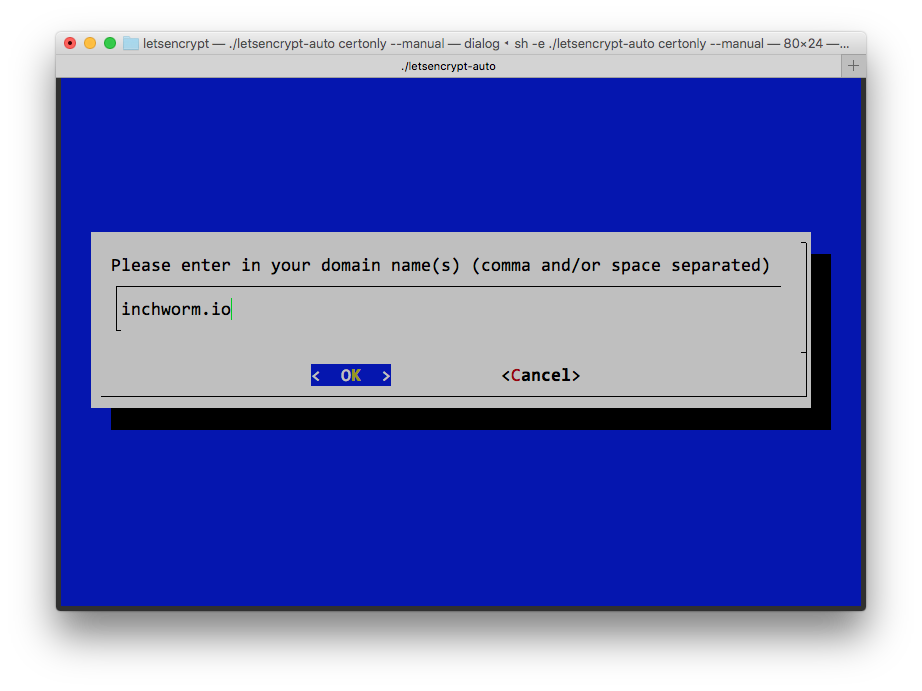
sudo certbot certonly --manual
You’ll be prompted to enter the domain you want a certificate for, and another prompt or two.
Then you’ll see a message about the next steps. Don’t continue on yet! Read the message that begins like this:
Make sure your web server displays the following content at http://inchworm.io/.well-known/acme-challenge/ya6k1ed-SOME-LONG-URL before continuing: ya6k1edW38z-your-value-here
We need the server to serve this code at that particular URL to verify that it is indeed ours.
In Rails, we first add a route to config/routes.rb:
get '/.well-known/acme-challenge/:id' => 'pages#letsencrypt'I used PagesController since I already had one for our static pages, but you can use any controller (or a new one)[1].
Then we’ll add the actual controller code. Remember to substitute your long code here[2]:
  class PagesController < ApplicationController
    def letsencrypt
      # use your code here, not mine
      render text: "ya6k1edW38z-your-value-here"
    end
  end
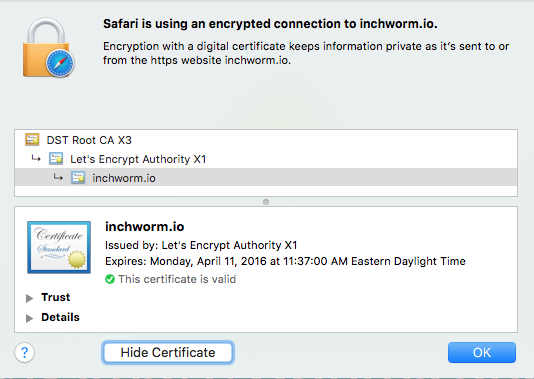
Once this is in your app, deploy it to Heroku. Then, and only then, do you continue the Let’s Encrypt process. If you did it right, you’ll see a message like this:
IMPORTANT NOTES:
- Congratulations! Your certificate and chain have been saved at /etc/letsencrypt/live/inchworm.io/fullchain.pem. Your cert will expire on 2016-04-11. To obtain a new version of the certificate in the future, simply run Let’s Encrypt again. That means it worked and you have your certificate! The final step is to upload the certificate to Heroku. If you are replacing an existing certificate[3]:
sudo heroku certs:update /etc/letsencrypt/live/inchworm.io/fullchain.pem /etc/letsencrypt/live/inchworm.io/privkey.pem
If this is your first time adding a certificate to your Heroku app, you need to enable the SSL Endpoint ($20/month) and add the cert:
heroku addons:create ssl:endpoint
sudo heroku certs:add /etc/letsencrypt/live/inchworm.io/fullchain.pem /etc/letsencrypt/live/inchworm.io/privkey.pem
Adding the SSL Endpoint changes the CNAME you need to point your custom domain to. You’ll need to edit your DNS using the new value listed in your Heroku dashboard for it to work correctly. Done!
Ready to upgrade your certificate? Run this command to renew:
sudo certbot certonly --manual -d inchworm.io
Then go back up to set the new challenge key and upload the certificate when complete. There are a few things I’d like to see improved, and I expect they will be soon.
A homebrew package forThis exists now!certbot. I expect we’ll see this after the bugs are worked out.- Don’t require
sudo. I expect this will come, but most use cases today will needsudo, so I understand why they require it. - Heroku should provide this as an automated service. I hope they do before my 90-day certificate expires, but otherwise I’ll do this process again.
A static file would work too and skip the route. ↩︎
You can also use an ENV variable for this, but I’m hoping this is automated by Heroku soon. ↩︎
Thanks to Jenny’s comment for pointing out the syntax for first-timers and Olivier Lacan for prodding me to edit the post to include it. ↩︎
Comments
Dan thanks for the great article, I’ve been trying to get this working with Heroku since the Beta opened with no luck. Just one note, this article details how to get Let’s Encrypt working if you already have SSL working on Heroku. If you don’t there are few extra steps. Instead of using Dan’s “final step” of
sudo heroku certs:update /etc/letsencrypt/live/inchworm.io/fullchain.pem /etc/letsencrypt/live/inchworm.io/privkey.pem
You need to first create the SSL endpoint on Heroku (which costs $20/month):
sudo heroku addons:create ssl:endpoint
Then you can add an SSL cert:
sudo heroku certs:add /etc/letsencrypt/live/inchworm.io/fullchain.pem /etc/letsencrypt/live/inchworm.io/privkey.pem
Once you’ve successufly added the SSL endpoint you need to update your DNS to match the end of the line starting with:
inchworm.io now served by (has new domain to point your DNS to here)
Thanks for the great article!
Thank you Dan for this article! I could easily setup my first Let’s Encrypt certificate with your help. I only encountered a single issue. Not because your article was not complete, but because my always-on “TLDR;” attitude made me skip this last-yet-critical step you mention at the end of the article: you need to update the DNS with the SSL-specific name Heroku has just gave you.
If you’re willing to update your article, I suggest to add a screenshot. This is the kind of eye catching element that triggers a “Oh, this is another step I have to consider” in lazy reader’s mind like me :)
You can find one here: http://stackoverflow.com/questions/31960487/ssl-invalid-cn-after-installing-certificate-getting-cn-herokuapp-com/36006740\#36006740
Thank you again!
A tricky edge case we stumbled upon in our project was trying accessing the validating url through https. Since I couldn’t find out how to use SSL for the validating url I had to change `config.force_ssl=false`. Luckily we manage the SSL enforce through an ENV variable, so it didn’t require a dedicated deploy.
Hi Dan,
I just had to update my cert that I generated following your original tutorial. To update cert:
cd letsencrypt ./letsencrypt-auto renew --dry-run --agree-tos --manual-public-ip-logging-ok
./letsencrypt-auto renew --agree-tos --manual-public-ip-logging-ok
One relatively important detail to remember: if you want both your root domain (example.com) and your `www` subdomain to be supported under one certificate, I highly recommend submitting: example.com, www.example.com in the Let’s Encrypt client domain prompt.
Otherwise, if you use a CNAME redirect to the Heroku endpoint for your `www` subdomain, you will see SSL errors because the certificate is only valid for the root (example.com) and not the subdomain (www.example.com).
“If this is your first time adding a certificate” instructions have a typo — the command should be “certs:add”
Let´s Encrypt is interesting and easy way to HTTPS protocol. But will the trustworthy also same in the future? Nowdays you can see some problems with phishing website with https becuse of any real validation. Maybe if I can choose, i will prefer free SSL certificate Basic DV https://magazin.sslmarket.de/inpage/lets-encrypt-vs-basic-dv-von-symantec-ein-vergleich/
BTW: You have a bug in your comment form. If I make it longer more than first comment. The form is behind this comment and I can not give it back.
LetsEncrypt is designed for automatic renewal. That’s why their certificates only last 90 days. I wrote a gem that encapsulates both provisioning & renewing a LE SSL certificate on Heroku. At the moment it only supports their new free SNI-based SSL, but I’d like to add support for their paid-for SSL endpoint too.
Comments & feedback appreciated: https://github.com/pixielabs/letsencrypt-rails-heroku
@David Somers: Cool idea, we’ll check it out!
You should really hook up Dead Man’s Snitch (Heroku Addon or deadmanssnitch.com) to that Heroku Scheduler job! ;)
Great article!
There’s a small typo on the “If this is your first time adding a certificate to your Heroku app” part. You give this command:
sudo heroku certs:update /etc/letsencrypt/live/inchworm.io/fullchain.pem /etc/letsencrypt/live/inchworm.io/privkey.pem
But, instead, it should be:
sudo heroku certs:add /etc/letsencrypt/live/inchworm.io/fullchain.pem /etc/letsencrypt/live/inchworm.io/privkey.pem
@Johann Pardanaud: Thank you for catching that! We’ll get that changed. :)
Thanks for the great article!
I wanted to secure a few subdomains + my root.
I modified your code slightly like this to handle it through a config var lets encrypt content looks like this in secrets.yml: lets_encrypt_content: and then on Heroku it looks like challenge.response,challenge2.response2,challenge3.response3, etc.
Then I modified the controller code like this:
def letsencrypt id = params[:id] values = Rails.application.secrets.lets_encrypt_content
lookup = Hash.new values.split(‘,’).each do |value| vals = value.split(‘.’) lookup[vals[0]] = vals[1] end render text: “#{id}.#{lookup[id]}” end
Now I can add multiple domains by changing the heroku config var LETS_ENCRYPT_CONTENT.
David Smith: Very nice!
Does it work with Ruby 5.0?
Visiting /.well-known/acme-challenge/y7HlW6w… renders a challenge token
Visiting /.well-known/acme-challenge/y7HlW… renders a not found message
rails 5.0.0 ruby 2.3.0
NB: if i remove the . (in front of .well-known in the browser), it seems to work.
@annie: Yes, I have this working with Rails 4 and 5. The period is required, so maybe something is up with your routes?
Hi Dan, Put the code above in the routes (at the very top).
I am wondering if maybe one of our gems is causing the problem? http://stackoverflow.com/questions/39250336/cant-create-a-route-that-has-a-segment-with-a-leading-dot-in-rails-to-verify-l
+1 for Heroku supporting this automagically in the future!
I’ve created some brief instructions on how to do this with Django apps. Pretty close to how you’ve done it with rails: https://github.com/mattharley/pdpdmeetup/wiki/SSL-Lets-Encrypt
There’s no need for a controller, you can just handle it in your routes file itself using a proc
get ‘/.well-known/acme-challenge/:id’, to: proc { |env| [200, {‘Content-Type’ => ‘text/plain’}, [‘ya6k1edW38z-your-value-here’]] }
Hey Daniel, thanks for this post, it helped us a lot. Just a quick FYI: Sometime in the last week or so the source code formatting broke—Lots of tags appearing in the source rather than syntax highlighting.
Thanks Daniel for such clear instructions! Straight-forward and worked like a charm! Also, should point out that Heroku now has free SSL, so no more $20/month for SSL EndPoint add-on. =)
Jeff: Great point. We’ve been using free SSL too, and love it!
Thank you for this tutorial!
thanks, it was helpful. twice.
Thanks a lot! Worked like a charm.
[3] Heroku now does this automatically for new apps. For existing apps, follow https://devcenter.heroku.com/articles/automated-certificate-management
You can now simply run
heroku certs:auto:enableon a Hobby plan or above.Hi Dan – thanks for this post. You may want to make one more quick edit. Heroku recently introduced managed certificates – the command above handles generation via letsencrypt, along with 90 day renewals, automatically. Very slick!
Thanks for the website. It really helped me. I posted a question here about the fact that I might be certified without Heroku knowing or caring. Tell me what anyone thinks. https://stackoverflow.com/questions/47209066/why-do-i-need-to-register-my-lets-encrypt-certification-with-my-heroku-server
Thanks! In rails 5 I had to do “render plain:” instead of “render text:” but other than that things went smoothly