Part 3: ARKit Wall and Plane Detection for iOS 11.3
Place objects in the scene and orient them to an ARPlaneAnchor
In Part 1 of this series on ARKit wall and plane detection we ended with the ability to detect planes. (Final Part 1 Project File). And in Part 2 we added a grid to visualize the planes. (Final Part 2 Project File)
Now, in Part 3 we’re going to place an object at the plane’s position. When I pulled the master, I had some fun and added the ability to shoot a “blunt object” from your screen and have it bounce off the 3D objects ;)
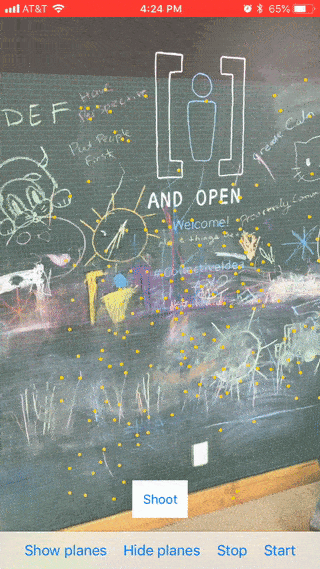
Here’s what we’re building today.
As a note, if you’re starting with Part 3, download the starter project here.
The first thing we need to do is add a tap gesture to the view. In viewDidLoad() add this to the bottom.
let tapGesture = UITapGestureRecognizer(target: self, action: #selector(didTapScene(_:)))
        view.addGestureRecognizer(tapGesture)
Creating the action
Now let’s create our didTapScene(_:) action. Add this below viewDidLoad().
@objc func didTapScene(_ gesture: UITapGestureRecognizer) {
        switch gesture.state {
        case .ended:
            //1
            let location = gesture.location(ofTouch: 0,
                                            in: sceneView)

            //2
            let hit = sceneView.hitTest(location,
                                        types: .existingPlaneUsingGeometry)
            //3
            if let hit = hit.first {
                placeBlockOnPlaneAt(hit)
            }
        default:
            break
        }
    }
1) First, convert the tap location to ARSCNView.
2) ARSCNView has a hitTest method that checks if a point in a scene intersects another object, defined by the types parameter. In this step we use .existingPlaneUsingGeometry because we are using planes that have already been found. Check out the other options of ARHitTestResult.ResultType as there are some neat things in there. For instance, estimatedVerticalPlane speeds up the placement of objects by not waiting for an ARPlaneAnchor to be found first. As planes are located, you can update the position of your objects to align more precisely.
3) Find the first plane that was tapped, and call placeBlockOnPlaneAt(_ hit: ARHitTestResult) passing in our ARHitTestResult.
Defining the method
Now we’re going to define that method. Add this below didTapScene.
func placeBlockOnPlaneAt(_ hit: ARHitTestResult) {
       //1
        let box = createBox()
        position(node: box, atHit: hit)
        //2
        sceneView?.scene.rootNode.addChildNode(box)
    }
1) Here we need to call a helper method to create and position a 3D box node. We will define that later.
2) Add the box to the scene’s rootNode.
Defining the helper methods
This is where we define the helper methods.
private func createBox() -> SCNNode {
        let box = SCNBox(width: 0.15, height: 0.20, length: 0.02, chamferRadius: 0.02)
        let boxNode = SCNNode(geometry: box)

        return boxNode
    }
Creating the box
Here we create a box and round its edges.
private func position(node: SCNNode, atHit hit: ARHitTestResult) {
        //1
        node.transform = SCNMatrix4(hit.anchor!.transform)
        //2
        node.eulerAngles = SCNVector3Make(node.eulerAngles.x + (Float.pi / 2), node.eulerAngles.y, node.eulerAngles.z)
        //3
        let position = SCNVector3Make(hit.worldTransform.columns.3.x + node.geometry!.boundingBox.min.z, hit.worldTransform.columns.3.y, hit.worldTransform.columns.3.z)
        node.position = position
    }
1) Transform the box to match the ARPlaneAnchor’s transform.
2) Next we want to rotate our box so it lies long ways on top of our plane. Adjust its eulerAngles by rotating it 90 degrees along its x axis.
3) Now we need to figure out the position by using the ARHitTestResult’s columns property’. (Figuring out how to place something in a 3D world can be quite confusing!) And we just take into account the height of the node so it looks like it’s resting on top/in front of the surface.
Testing your app
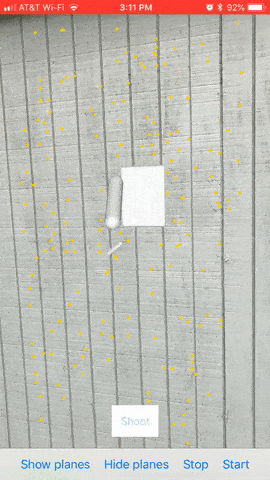
Finally, run your app to see if you can tap on a plane and see a box plopped at that position.
If all is working correctly, you’ll notice that once you place an object, the plane itself will continue to adjust as it learns more about its surface, which may make your box object no longer look as its sitting directly on the plane.
The boxes are completely white, so let’s quickly add a light to the scene to give them some dimension. After that, we can call it good!
Open up ARSceneManager.swift and add self.sceneView?.autoenablesDefaultLighting = true inside attach(to sceneView: ARSCNView). Run again and you should see some definition to your boxes!
A look at the current version.
About Ben Lambert
Ben is an iOS developer and designer. He has a passion for building rich and intuitive UI /UX experiences for mobile. In his free time, he enjoys creating mobile app games.
Comments
A game of Go begins with a vacant board. Every player has a viably boundless supply of pieces, one taking the dark stones, the other taking white happy wheels
Wow! I actually love what you did there. How did you even do it? Do you have like a video tutorial?
Dan | stamped concrete fayetteville ar
Who would have thought that a help would be here? Thanks for saving me and supporting the thing we are working on our research. You are awesome!
travel merchant account
What a great idea!
This is one great strat.
post office near me
What an interesting and amazing project! shapspa.com/
This is an amazing idea.
Jim,
Moling contactors
Great post! I really appreciate your ARKit Wall and Plane Detection for iOS 11.3. nice update. xilinx parts
I am definitely enjoying your website. You definitely have some great insight and great stories.
AU Casino Games
This is such a great strategy for my businesses. Thank you for sharing
street view for you walk, bike, or drive.
street view for you walk, bike, or drive.
The information is very special, I will have to follow you, the information you bring is very real, reflecting correctly and objectively, it is very useful for society to grow together.
Your content is nothing short of brilliant in many ways. I think this is engaging and eye-opening material. Thank you so much for caring about your content and your readers. https://www.dailyhealthstudy.com
Your content is nothing short of brilliant in many ways. I think this is engaging and eye-opening material. Thank you so much for caring about your content and your readers. www.dailyhealthstudy.com